BoredomBusted — Find Your Next Favorite Thing To Do
Discover hobbies, activities, places, and ideas that spark joy. Whether you're looking for something creative, active, social, or relaxing, BoredomBusted helps you find your next favorite thing to do.
Browse our hobby guides, things-to-do collections, and place ideas to never be bored again.
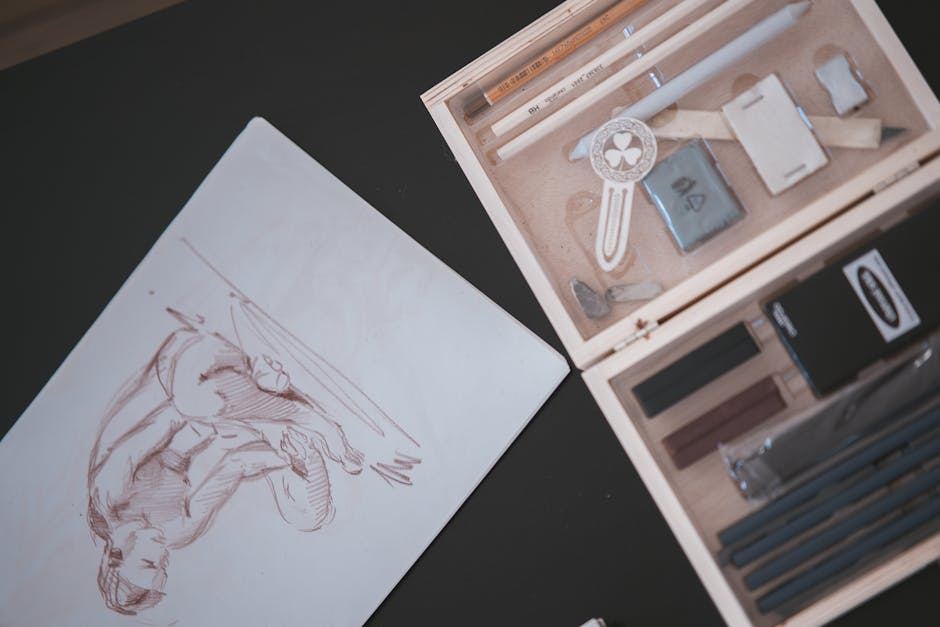
Unlock your creativity with our comprehensive guide to charcoal drawing for beginners. Learn essential techniques, select the right materials, and master blending and layering to create stunning art. Start your charcoal journey today and explore this expressive medium!
Most people think charcoal drawing is just a messier, less precise version of pencil sketching. It's not. Charcoal is a completely different animal — one that rewards thinking in masses of tone rather than lines, and punishes anyone who tries to draw with it like a pencil.
Once you understand what charcoal is actually asking you to do, it becomes one of the fastest mediums for developing a real eye for light and shadow. Here's what you actually need to know before you start.
Charcoal looks forgiving because you can smear it around. But that smearability is exactly what makes it tricky. Three things will define your results from the start.
First, paper tooth. Charcoal doesn't soak in like ink or bond like paint — it sits in the microscopic peaks and valleys of the paper surface. Smooth paper fills up fast and won't hold additional layers. Too much tooth and you can't blend cleanly. The paper is doing more work than beginners realize.
Second, charcoal type. Vine charcoal is soft, light, and erases easily — ideal for blocking in shapes you'll refine later. Compressed charcoal is denser and darker and nearly impossible to fully remove once it's down. Using the wrong type at the wrong stage is one of the most common beginner mistakes.
Third, your eraser is a drawing tool, not a correction device. A kneaded eraser lifts charcoal to create highlights and lighter tones. If you're only using it to fix mistakes, you're leaving half the medium on the table.
Your first session will probably start with a light sketch using vine charcoal — loose lines to establish where things are. Then you'll cover larger areas with the side of the stick to block in your darkest shadows. This is where most beginners freeze up, because it looks like a muddy mess at this stage.
What surprises almost everyone is how physical it is. You're blending with your fingers, your palm, a paper stump — you're in direct contact with the drawing constantly. It feels more like sculpting than sketching.
The most common first-session mistake is working too small and too tight. Charcoal at small scale turns into a grey smudge. Work bigger than feels comfortable — at least A3 — and use your whole arm, not just your wrist.
You'll also get charcoal on everything. Your hands, your paper's edges, your desk. Keep a spare sheet under your drawing hand and accept that the first few sessions are going to look like a crime scene. That's fine.
Here's what working charcoal artists understand that beginners don't: you don't draw objects, you draw the light that hits them. The technique that makes this concrete is called the "toned ground" approach — you cover the entire paper in a mid-tone grey first by spreading vine charcoal and blending it flat, then you work in two directions simultaneously: darkening with more charcoal, and lightening with a kneaded eraser.
This is radically different from working on white paper and adding dark. On white paper, you're only thinking about shadow. On a toned ground, you're thinking about both shadow and light at the same time — which is how light actually works.
The practical difference is dramatic. Drawings done this way have a natural sense of atmosphere that's almost impossible to fake working from white. It's also why charcoal is the medium most life drawing and academic drawing programs start with — it forces tonal thinking from session one.
A pack of vine charcoal sticks, a kneaded eraser, and a pad of newsprint or cartridge paper will get you through your first several sessions. Newsprint is cheap and has enough tooth for vine charcoal. Don't buy a starter kit — they usually include charcoal pencils you won't need yet and skip the vine charcoal you will.
Once you know you're staying, upgrade to proper drawing paper with tooth — Strathmore 400 Series Charcoal Paper is a solid entry point. Add a set of compressed charcoal sticks for darker values, a tortillon or two for blending in tight areas, and a fixative spray to preserve finished work.
At this stage you're buying better paper in larger sheets (Canson Mi-Teintes or similar), a full range of compressed charcoal grades, white charcoal or chalk for highlights, and a drawing board with clips. A good adjustable easel is worth it if you're working at A2 or larger — drawing flat on a table distorts your perception of proportions.
Vine charcoal sticks (soft grade) — the workhorse. Kneaded eraser — non-negotiable. Newsprint or cartridge paper pad (A3 minimum). A clean rag or paper towels for blending large areas and wiping your hands.
Charcoal pencils — useful for fine detail work but you need to understand the medium first. Compressed charcoal — powerful but less forgiving; save it for when you understand value structure. Fixative spray — essential for finished work, not needed while you're still learning. White charcoal — great for highlights on toned paper, but a kneaded eraser covers most of that at the start.
Beginners almost always reach for smooth copy paper or a standard sketchbook. Both are wrong for charcoal. Smooth paper fills its tooth within one or two passes and won't accept more charcoal on top — you end up with a greasy smear instead of a deep black.
For starting out, newsprint has enough tooth and is cheap enough to work large without anxiety. Once you're ready to keep pieces, move to charcoal-specific paper or pastel paper. The tooth holds more material, lets you build layers, and makes blending actually work.
Paper colour is also a real choice, not just an aesthetic one. Grey or warm-toned paper means you start at a mid-value and only need to add darks and lights — which is exactly the toned ground workflow described above. White paper makes you build every tone from scratch. Both are valid; just know which game you're playing.
Most charcoal instruction happens inside broader drawing or life drawing courses, so you need to filter carefully. Five things that signal a class is worth attending:
The instructor demonstrates live. Watching someone work through a charcoal problem in real time teaches more than any lecture. Ask before you book.
It includes a model or still life setup. Drawing from life is where charcoal earns its reputation. Working from photos in a beginner class is a weak substitute.
The class size is small enough for individual feedback. More than 12–15 students and instructors can't meaningfully watch each person work.
It covers tonal structure, not just technique. A class that only teaches blending tricks without explaining value relationships will leave you stuck at an intermediate ceiling.
The instructor can show you their own work. A working artist who draws in charcoal regularly will teach differently — and better — than someone who just runs the curriculum.
If you haven't already, browse the full creative hobbies list to see how charcoal fits alongside other drawing and painting mediums you might want to try.
Online, r/drawing and r/learnart on Reddit are the most active communities for charcoal artists at all levels — post work, get critique, or just lurk to calibrate where you are. The r/ArtFundamentals subreddit skews technical and is especially good if you want to understand the "why" behind what you're doing.
On YouTube, Proko's channel is the gold standard for figure drawing and charcoal technique — his videos on light and shadow are as good as most paid courses. New Masters Academy has free content on atelier-style charcoal drawing if you want the classical approach.
In person, life drawing open sessions are the best community entry point for charcoal artists. They're low-commitment (usually drop-in, no booking required), cheap, and full of people at every level. Search "open life drawing" plus your city. Most major cities have at least one weekly session.
Give it 30 sessions before you decide anything. Here's what those sessions should look like.
Sessions 1–10: You're learning the physical language of the medium. How hard to press, how to blend without over-blending, how to use your eraser as a drawing tool. Everything looks muddy and nothing goes where you want it. That's correct.
Sessions 11–20: You start seeing tonal relationships before you draw them. You begin to understand why your darks aren't dark enough — you've been afraid to commit. Your drawings start to have a sense of form rather than just outline.
Sessions 21–30: You have a process. You know how to start a drawing, what order to work in, and when to stop. You're making intentional marks instead of fixing mistakes. This is when charcoal starts to feel like a real medium rather than a wrestling match.
Stop if the mess genuinely frustrates rather than satisfies you, or if you find yourself wishing you could just erase cleanly and work precisely — that's pencil or ink calling.
Keep going if you find yourself noticing shadow shapes on faces and objects when you're nowhere near a drawing — squinting at how light falls across a wall, mentally mapping the dark side of a bowl, seeing the world as patches of tone rather than outlines. That's charcoal thinking, and once it starts, it doesn't stop.
Pencil Sketching for Beginners — if charcoal feels too loose and you want more control, pencil is the natural sibling medium to try.
Ink Drawing for Beginners — the opposite of charcoal in almost every way: high contrast, no blending, permanent marks. Great to try once you understand tonal thinking.
Pastel Drawing for Beginners — uses similar paper and blending mechanics to charcoal but adds colour. Many charcoal artists move here naturally.
Oil Painting for Beginners — the tonal thinking you develop in charcoal transfers directly to oil painting. Many serious oil painters use charcoal for underdrawings.
Creative Hobbies List — the full BB roundup of visual art and creative hobbies if you're still figuring out where charcoal fits in your practice.
To begin, you'll need charcoal pencils or sticks, drawing paper (medium-weight or thicker), a blending stump or tortillon, and a kneaded eraser. Many beginners also find it helpful to have a fixative spray to preserve finished drawings and prevent smudging.
A basic beginner kit typically costs $15–$40, including charcoal pencils, paper, and blending tools. You can start even cheaper with just a few charcoal sticks and printer paper, then invest in quality materials as you progress.
Charcoal drawing is beginner-friendly because it's forgiving—you can easily erase and adjust with a kneaded eraser—and produces visible results quickly. Most beginners grasp basic techniques within a few practice sessions, though mastering advanced blending takes more time.
You can learn fundamental techniques like shading, blending, and layering within 2–4 weeks of regular practice. Creating polished, expressive pieces typically takes a few months of consistent effort, depending on your starting skill level.
Charcoal pencils offer precision and control for detailed work and fine lines, while sticks cover larger areas quickly and are ideal for shading and blending. Most beginners benefit from having both—sticks for background work and pencils for details.
Yes, charcoal is highly forgiving. You can use a kneaded eraser to lift charcoal gently without damaging paper, or erase and rework entire sections. This flexibility makes charcoal ideal for beginners experimenting with composition and shading.