BoredomBusted — Find Your Next Favorite Thing To Do
Discover hobbies, activities, places, and ideas that spark joy. Whether you're looking for something creative, active, social, or relaxing, BoredomBusted helps you find your next favorite thing to do.
Browse our hobby guides, things-to-do collections, and place ideas to never be bored again.
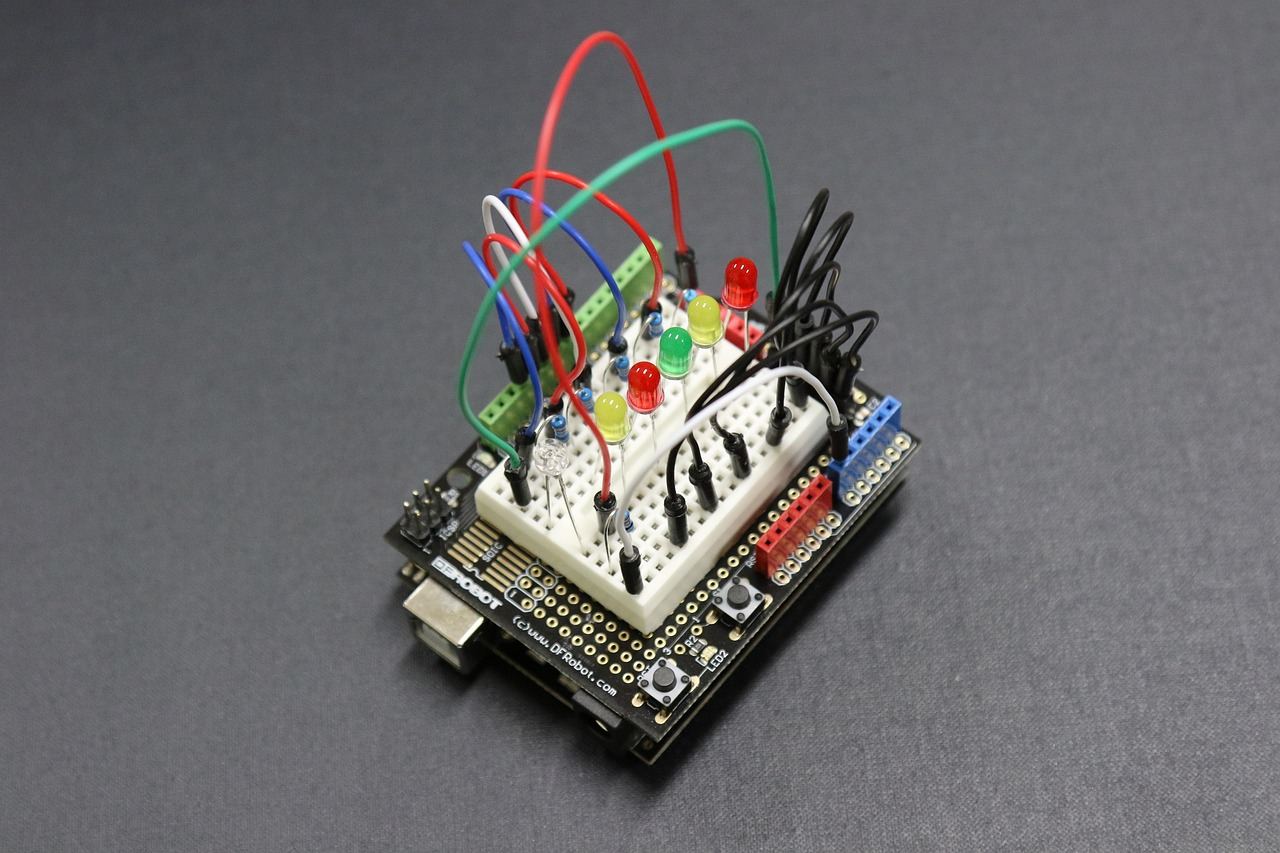
Arduino isn't just for techies — Mia's soil sensor shows anyone can jump in and create functional projects with just an afternoon's work and a tutorial.
Getting started with Arduino projects as a beginner opens up a world of creativity, allowing you to write simple code to control physical components like LEDs, sensors, and motors.
The code tells the hardware what to do, in real time.
You're building both the logic and the circuit from scratch. This sets it apart from pure coding or basic robotics kits.
In Arduino Projects, hobbyists wire Arduino microcontrollers to sensors and displays on breadboards, write and debug C++ code using the Arduino IDE, and physically solder components to create functional electronic devices like digital thermometers or gesture-controlled robots.
This hobby induces a flow state through balanced challenges in coding and electronics, providing immediate feedback and a clear sense of accomplishment as you progress from simple circuits to complex deployments, fostering both creative expression and social belonging in the Arduino community.
You think Arduino is for engineers. Maybe for CS students who wear the same hoodie every day and dream in hexadecimal. That assumption is costing you one of the most immediately satisfying hobbies you can start this weekend.
It's not about coding from scratch – most of the work is copying, tweaking, and understanding why something blinks.
The real barrier is just an afternoon – after that, you're just building things that do stuff, which is genuinely fun regardless of your background.
It's systems thinking, not programming – knowing what connects to what and why, which anyone who's ever assembled furniture or followed a recipe already does instinctively.
A 12-year-old named Mia built a soil moisture sensor that texts her mom when her succulents need water. She had zero coding experience. She followed one tutorial, broke it twice, fixed it, and now she's modifying it to track two plants at once.
That's the actual entry point – not a computer science degree, not years of tinkering. The next question is what those first few hours actually look like.
Watching a YouTube tutorial on building a sensor-triggered LED matrix looks straightforward. Two wires, one concise idea, ten tidy minutes. Then you open the Arduino IDE and have seventeen browser tabs open before the first line compiles.
The first session is mostly chaos management. A dubious USB cable, code that compiles but doesn't run, and zero clarity on which problem to solve first. Beginners who push through that first wall are the ones who actually finish week one — not the ones who feel ready.
After three hours, one LED blinks. That single result is the milestone. Week two introduces floating pins and the confusion that comes with them — inputs that read random noise because nothing is pulling them to a defined voltage. Most beginners spend days troubleshooting phantom errors before they learn that floating pins are the cause, not their code.
Before any tutorial, run File → Examples → Basics → Blink inside the Arduino IDE. This confirms your board is talking to your computer — and that your cable actually carries data, not just power. Skipping this step means every future error could be a setup problem disguised as a code problem.
By week four, you're opening other people's sketches and changing values to see what breaks. That's the real shift — you're not following steps anymore, you're running experiments. The gap between reading code and directing it is exactly where beginners get stuck the longest — and the next section covers the specific mistakes that keep people there.
When to start: Early morning
Duration: 1 hour
Cost to try: $25
Success criteria: if you finished without any major errors in uploading the code, do session 2.
Bigger boards promise more pins, but beginners find more hardware doesn't mean fewer problems.
Start simple with the Arduino Uno, which is suitable for 90% of beginner projects and comes with extensive tutorials.
Connecting directly to the Arduino's 5V pin seems easy. But components needing over ~40mA, like motors or LED strips, will overload it.
Use a separate power source for high-draw components, with a shared ground to avoid frying your board.
Running code you don't understand means success by chance, and failure leaves you lost.
Read every line and research anything unclear before uploading to truly grasp the project's mechanics.
Focusing only on the physical setup causes beginners to miss deeper logical errors.
Implement Serial.begin(9600) and Serial.println() to track and resolve issues by observing your code's execution.
delay() seems useful for timing, but it holds up the entire board. Your project becomes unresponsive while waiting.
Switch to the millis() pattern, especially if your project multitasks. Check out Arduino's "BlinkWithoutDelay" example for guidance.
Your desk is a great start, but for serious learning, head to a makerspace or hackerspace
You'll find tools and advice from others who know the ropes. And a lot of support when your code compiles but nothing works.
No single authority runs the Arduino scene, so local groups matter most. The Arduino Education initiative (arduino.cc/education) connects through schools or workshops if that's your route.
Walk in, say you're new and curious. You'll get project ideas and probably save money with part recommendations.
The Uno is the archetype for newcomers. It offers a forgiving experience and countless tutorials are available. Nothing advanced, but that's precisely the appeal.
Perfect for absolute beginners who want to avoid hardware headaches while learning. Cost: Around $25 for the official board, $10–12 for a nearly identical clone.
The Arduino Nano and Mini match the Uno's capabilities in a fraction of the footprint. Built for embedding permanently into a finished project.
Ideal for makers wanting to refine their projects after mastering the Uno. Clones run $3–5 each, making them easy to stockpile.
ESP8266 and ESP32 aren't traditional Arduino boards but run Arduino code with built-in Wi-Fi and Bluetooth on top.
Great for home automation or any project needing wireless communication. Prices from $4–15 make fearless experimentation easy.
The Arduino Mega brings more pins, more memory, and extra serial ports to the table.
Designed for intricate projects with a multitude of sensors and components.
Raspberry Pi is a Linux-based PC — a fundamentally different beast from Arduino's microcontroller focus.
Perfect for projects requiring video, substantial processing, or an operating system. Expect costs from $35–80 depending on the model and accessories.
Some of the same instincts show up in Web Development — worth a look if this clicked.
Drone Building lives in the same world — different mechanics, similar appeal.
Beginners collect components and copy sketches, then wonder why nothing works.
More parts won't fix this. Neither will a better tutorial. The skill that separates improving hobbyists from stuck ones is serial debugging fluency — reading your board's internal state in real time, before anything breaks.
Most beginners reach for Serial.print() only when something goes wrong. That's already too late. Print your sensor outputs, your loop counters, and your conditional values constantly — even in projects that seem fine.
Not broken yet.
Not acting weird.
Just running.
That's when you learn what normal looks like — so when something does go wrong, you know exactly which value drifted and where to look.
Every wiring question gets answerable fast. Every logic error, every trigger that won't fire — add a Serial.print() before each if statement and you stop guessing what value is actually being tested.
Without this habit, you blame the wiring, the library, the tutorial. With it, you know. Once you build this into every project by default, the harder project types — sensors, triggers, multi-component builds — stop feeling like guesswork.
Eight sessions over 30 days — roughly two per week. That spacing gives you enough time to hit real snags, sit with them, and come back with fresh eyes rather than just pushing through in one frustrated stretch.
If you're already planning your next build before the current one is finished, that's not beginner enthusiasm — that's the hobby. Start tracking what you want to build in a simple list and move toward sensors, motors, or wireless modules next.
If you completed the sessions with a shrug, try four more with a project that solves a real problem you have — an automatic plant waterer, a garage door alert, something with a use case you actually care about. Low-stakes tinkering can feel empty; applied tinkering often doesn't.
If you felt relief when something gave you a reason to skip a session, that's a clean answer. Arduino rewards people who find the debugging loop satisfying rather than draining — and not everyone does.
The sign worth paying attention to: you're getting pulled toward the hobby before you've officially started it — bookmarking IC chip breakdowns at midnight, watching build videos you have no immediate use for. That pull isn't hype. It's the signal.
For ideas that take five minutes instead of five weeks, see things to do when you're bored.
A basic Arduino starter kit typically costs $25–$50 and includes a microcontroller board, breadboard, sensors, and cables. Additional components like LEDs, resistors, and modules range from $1–$10 each, so your total initial investment depends on project complexity. Most beginners can start learning fundamentals with just the starter kit before expanding.
No prior coding experience is necessary—Arduino uses a simplified version of C++ that's beginner-friendly with plenty of online tutorials. You'll learn basic programming concepts like loops and conditionals as you build, making it a natural introduction to both electronics and coding.
Arduino projects range from simple LED blinkers and temperature sensors to more complex creations like weather stations, home automation systems, robotic arms, and music synthesizers. The possibilities expand as you combine different sensors, motors, and components to solve real-world problems or create interactive art.
A basic first project like an LED blink or button-controlled light takes 30 minutes to 1–2 hours, including assembly and code upload. More complex projects can take several hours to multiple weeks depending on component count, coding requirements, and your familiarity with the platform.
Yes—Arduino is specifically designed to be accessible to non-technical people through visual programming options and extensive community tutorials. You'll develop technical skills naturally through hands-on experimentation without needing a background in engineering or programming.
You'll need an Arduino board (like Arduino Uno), a USB cable to connect it to your computer, and the free Arduino IDE (software) available for Windows, Mac, and Linux. Many starter kits bundle everything needed, and the Arduino community offers free resources, libraries, and project guides online.