BoredomBusted — Find Your Next Favorite Thing To Do
Discover hobbies, activities, places, and ideas that spark joy. Whether you're looking for something creative, active, social, or relaxing, BoredomBusted helps you find your next favorite thing to do.
Browse our hobby guides, things-to-do collections, and place ideas to never be bored again.
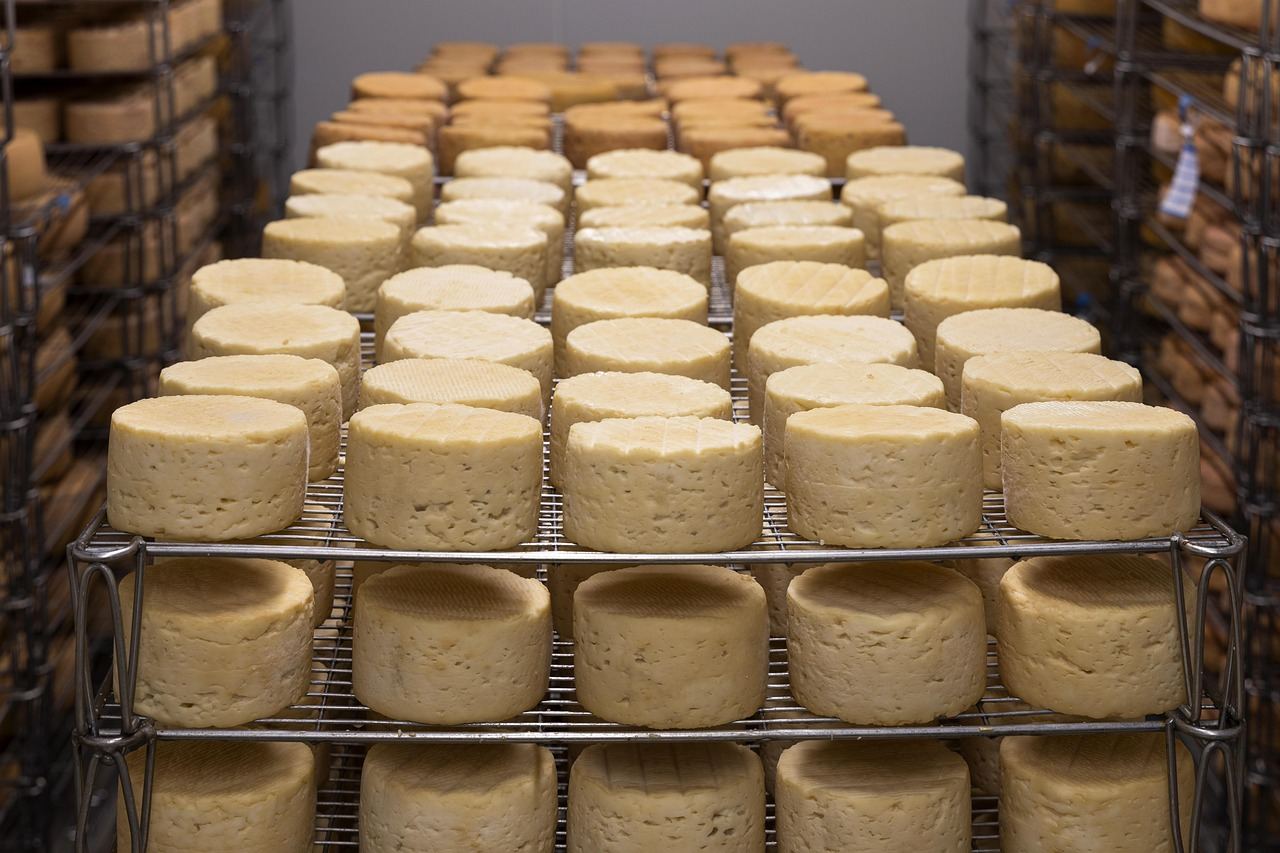
Cheese making isn’t just for goat owners; it’s a thrilling blend of microbiology and creativity that can yield delicious results in just 30 minutes.
Getting started with cheese making as a beginner involves understanding the basic process of using acid or rennet to separate curds from whey.
Then salt, pressure, and time do the rest.
Unlike cooking or baking, the results keep evolving for weeks after you're done – a cave-aged wheel you made in March is still changing in June.
It's preservation as a craft.
In cheese making, you transform milk into cheese through a meticulous process that includes heating, culturing, cutting, draining, pressing, and aging. You'll monitor temperatures, add cultures, stir curds, drain whey, and shape cheeses, all while maintaining cleanliness and documenting your process to refine future batches.
Cheese making induces a flow state through its rhythmic nature, combining brief bursts of action with waiting periods, fostering deep engagement as you assess textures and flavors. This hobby provides immediate sensory feedback, allowing for rapid learning and mastery, while also offering a creative outlet and a tangible sense of accomplishment from transforming simple ingredients into complex pr…
You think cheese making is a farmers' market hobby. Something for people with a goat and too much time.
The reality is that cheese making is more accessible than you think.
Cheese is controlled microbiology. You're not just following a recipe; you're managing a living process. Every batch teaches you something the last one didn't.
The equipment barrier is almost zero at entry level. A pot, milk, and an acid source are all you need to start.
The skill ceiling is genuinely high. Flavor, texture, aging, rind development – cheesemakers spend decades still experimenting.
A fresh ricotta takes about 30 minutes from start to finish. Heat milk, add acid, watch the curds form, strain it.
The first time it works, it feels disproportionately satisfying. You've made food from chemistry, not from a box.
You're already wondering what the first actual make looks like. That's next.
Starting with cheesemaking feels deceptively simple. Pour the milk, check with a thermometer, wait for magic. But soon, you'll find more questions than answers bubbling up.
The first session might feel like a high-stakes science experiment. Milk is still just milk, the lab smells funny, and you wonder what went wrong. Every new cheesemaker faces this confusion.
The first week, a quick cheese like ricotta or paneer makes you think you're a natural. By the second week, you meet mozzarella, and spend ages wrestling with the curd and Google. Week three, the mozz melts in your mouth: victory at last. By week four, you're curious about cheddar, already plotting where to stash it.
Mistakes aren't failures; they're the best tutorials. Cheesemaking isn't about perfect steps. It's about learning to understand milk, and that lesson comes from messy batches.
Temperature is everything. Relying on a cheap instant-read thermometer will sabotage your first few attempts. Use a probe thermometer that stays in contact with the milk as you stir. Curds don't lie about whether the milk was at 88°F or 96°F.
When to start: Morning
Duration: 1.5 hours
Cost to try: $15
Success criteria: if you finished without burning the milk, do session 2.
Cold milk takes forever to culture, and beginners often ignore the temperature's impact until the curd never sets right.
Take your milk out an hour before starting. Culturing at room temperature helps the bacteria do their job.
The float test seems like a myth, so beginners cut too early, before the curd gains structure.
Test your curd with a knife. If it breaks like jelly, it's ready; if it smears, give it ten more minutes.
Home burners cycle on and off, causing temperature swings that can ruin your batch during coagulation.
Use a double boiler setup. This adds a buffer and keeps the temperature steady.
Salt isn't just seasoning—it controls moisture and rind formation. Beginners often guess, leading to inconsistent results.
Weigh your salt to 2% of the curd weight. You'll get consistent curds every time.
You pressed for an hour, the wheel looks good, so you unwrap it—but it falls apart because the curds didn't fully knit.
Double your press time to ensure the cheese holds together. Under-pressing ruins the wheel.
Most cheese making starts at home. Your kitchen is a fine place to begin.
Local cooking schools are gold mines for workshops. Many farms or creameries offer beginner classes too.
In a class, say you've tried making fresh cheese and want to dive deeper. It often skips the basic milk-curdling lecture, letting you jump into culture and aging know-how.
Add acid or heat to milk, drain the curds, and you're done in under an hour. Perfect for beginners, this is your entry into cheese making with no waiting or complex gear.
A pot, cheesecloth, and thermometer are all you need.
Heat and pull curds to make mozzarella or provolone. This hands-on method gives that satisfying elastic texture. Ideal if you've mastered fresh cheese and want to up your game with minimal waiting.
You'll need starter cultures and a cheese press. An aging space, strictly controlled, is crucial. Ideal for those seeking a months-long project after trying fresh cheese.
Set aside $50–$150 for equipment before tasting your first wheel.
Enjoy brie or camembert's delicate white rind by applying mold cultures. Environment precision is key. Great for those comfortable with cultures wanting a cheese that dazzles friends and family alike.
Introduce *Penicillium* mold and skewer to create blue veins. Only for experienced cheesemakers, it's challenging but rewarding if you can navigate the variables.
For something adjacent, see Fermenting.
If this resonates, Home Cooking explores a similar direction.
A close neighbor worth considering: Dessert Making.
Most beginners obsess over recipes – the exact culture, the exact mold, the exact aging time.
The recipe isn't failing you. Your hands are.
Reading curd texture by feel is the key skill. Not with a timer, not with a thermometer. By pressing the curd with your fingertips, you sense readiness from how it pushes back or holds.
Moisture content, texture, and rind formation – all locked in during the curd stage.
Time can't fix this later. The aging cave can't compensate. But if you master this skill, you'll see why those 'failed' batches went wrong.
You'll no longer just follow instructions. You'll understand their meaning.
Next, let's explore how you can build this intuitive touch over time.
Commit to 4 sessions over 30 days – roughly one per week.
Spacing is crucial. Cheese demands patience. Waiting lets you evaluate, reflect, and decide if you enjoy the slow pace.
You're tinkering with temperatures midweek. You're bothered when the cheddar isn't right. This is your signal – caring means you're in. Dive into aging equipment and explore raw milk.
If the sessions were just tasks, no big deal. Maybe you wanted more action, less waiting. Test one fresh cheese like ricotta or chèvre, and one aged. If neither sparks interest, it's not your match.
If the process felt tedious, that's telling. Cheese making involves waiting and attention. For some, the wait is the reward. Without that, it's not likely to click.
You're intrigued by cheese labels at the store or searching cheesy mysteries at midnight. That curiosity lives in your mind, hinting that this is more than just passing interest.
Sometimes you just need something for the next ten minutes — that's what things to do when bored is for.
Basic cheese making requires a large stainless steel pot, thermometer, cheesecloth, colander, and curd knife. You can start with a simple cheese making kit (around $30–50) that includes most essentials, then invest in more specialized equipment like molds or a press as you progress.
Fresh cheeses like ricotta or mozzarella can be ready in 1–2 hours. Aged varieties like cheddar or gouda take weeks to months, with some requiring 6–12 months of aging. Most beginners start with quick cheeses to see results immediately.
No—fresh cheeses like mozzarella and ricotta are forgiving and great entry points, requiring only basic technique and attention to temperature. Aged cheeses demand more precision and patience, but most home cheesemakers successfully move from simple to complex varieties within months of practice.
Use whole, pasteurized milk (not ultra-pasteurized, which won't set properly). Cow, goat, and sheep milk all work well depending on the cheese style you want—cow's milk is most forgiving for beginners. Avoid homogenized milk, as it produces a softer curd.
You can begin for $50–100 with a basic kit and kitchen items you likely already own. Milk typically costs $3–6 per gallon, yielding 1–1.5 pounds of cheese, making homemade cheese roughly comparable to store-bought specialty cheese in cost.
Yes, when proper sanitation and temperature control are followed. Using pasteurized milk and maintaining clean equipment eliminates most food safety risks, though aged cheeses made from unpasteurized milk carry a small risk that many cheesemakers accept as part of the craft.