BoredomBusted — Find Your Next Favorite Thing To Do
Discover hobbies, activities, places, and ideas that spark joy. Whether you're looking for something creative, active, social, or relaxing, BoredomBusted helps you find your next favorite thing to do.
Browse our hobby guides, things-to-do collections, and place ideas to never be bored again.
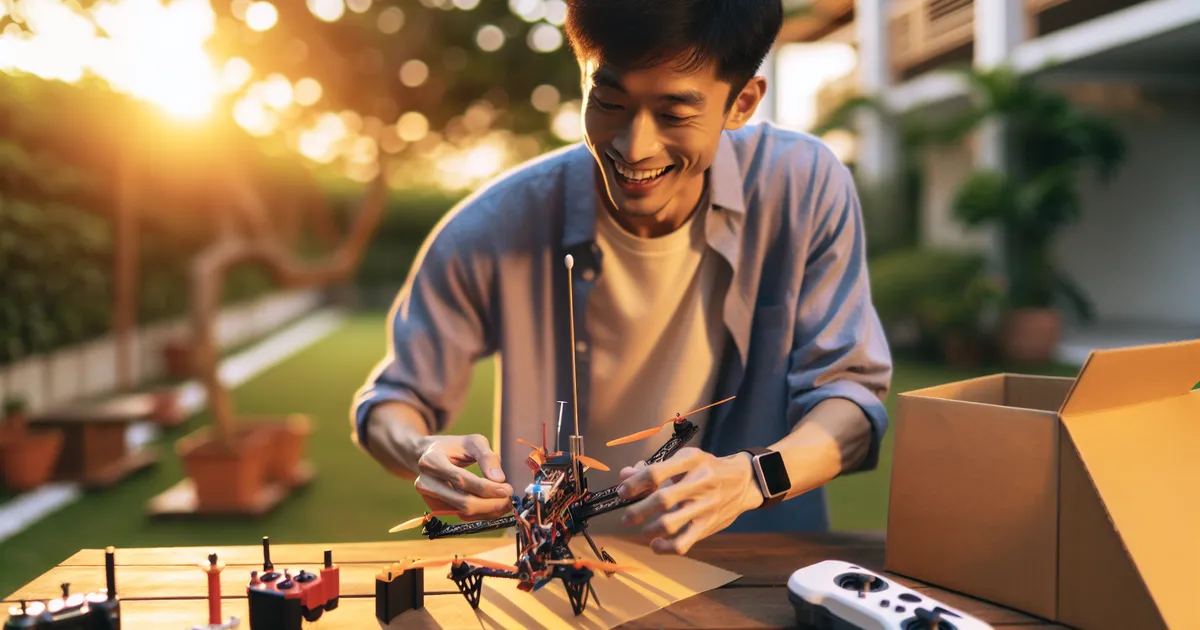
Drone building is less about gadgets and more about systems thinking; each crash teaches faster than any tutorial ever could.
Getting started with drone building as a beginner is an exciting journey that involves assembling a flying aircraft from individual components like frames, motors, and flight controllers.
You tweak the software until it actually flies. It's an intimate understanding of every part.
This DIY approach distinguishes it from RC planes or simple drone racing.
In drone building, participants engage in hands-on assembly of custom drones, which involves sourcing individual components, soldering connections, securely mounting motors, and calibrating sensors, along with iterative testing to optimize performance.
Drone building induces a flow state through its intricate tasks that require sustained focus, while skill feedback loops from immediate crash tests allow for rapid iterations, fostering a sense of accomplishment that transforms frustration into satisfaction upon achieving a successful flight.
You think drone building is an expensive hobby for tech bros who memorize spec sheets. You picture a basement full of soldering irons and a YouTube channel nobody watches. That assumption blinds you to what the hobby actually offers.
Overall, drone building offers more than assembling gadgets. It's about how motors, weight, airflow, and software work together in real time.
Your first collision teaches you more than hours of tutorials. Each failure becomes a real-time analysis of what your choices yield.
The Edinburgh pilot started with just £180. A cheap £12 soldering iron was enough to launch his first drone—badly. Through multiple tweaks and fixes, he reached tuning levels typical beginners avoid for months. His journey was driven by relentless problem-solving efforts, not expensive gear.
Your initial question shouldn't be about building capability. It should focus on the kind of builder you want to become—a concept the next section delves into.
Building your first drone often feels chaotic. Wires tangle, nothing fits as expected, and a solder bridge sneaks by unnoticed. The flight controller refuses to initialize, and your screen is a mess of tabs.
That's normal for session one.
Expect YouTube tutorials to play constantly. Progress will feel slow but rewarding.
The smell of flux becomes familiar as weeks pass. Your harnesses look cleaner, and your stacks fall into place without effort. Finally, a quad that arms—the payoff feels surreal.
Beware—the wrong solder will trip you up early on. Invest in 63/37 leaded rosin core, 0.6mm solder. Cold joints and malfunctioning firmware are a rite of passage, not a failure.
Don't mistake struggle for inadequacy. Every builder goes through this stage before the craft clicks into place. The breakthrough is closer than it seems.
Next, we'll look at the common mistakes everyone makes and how to avoid them.
When to start: Early morning
Duration: 2 hours
Cost to try: $0
Success criteria: if you finished without actually building anything, do session 2.
Beginners get lost in flight controller features. They have no idea what size or type of build they're committing to.
Pick your frame first – it determines motor size, prop size, and compatible FC form factor.
Confidence from watching videos doesn't protect your drone. First crashes at low altitudes and slow speeds can destroy bare props instantly.
Use prop guards until your throttle control is smooth.
Motor spin direction affects your drone's stability during takeoff. Beginners often skip this step and end up with misaligned rotation.
Use unsoldered bullet connectors initially, confirm the spin direction with your FC software, then solder permanently.
A simple firmware update can erase all your settings. PID tunes, rate profiles, and motor mappings disappear without a saved configuration.
Run `diff all`, save the output in a safe place, not just on your desktop.
Extreme rates don't mean you're progressing faster. They just introduce instability that you can't control yet.
Stick with Betaflight's default rate profile, and only tweak settings once you can hover steadily for 30 seconds.
Drone building often happens at home workbenches. But there's a lot to gain by visiting a makerspace or community workshop. These venues offer tools, soldering stations, and experienced builders who can offer guidance at every step.
An easy way to get help is to walk in and say: "I'm just starting to build – I haven't flown anything yet."
Race at breakneck speeds using goggles that let you see what your drone sees. These drones are stripped to the essentials. Nothing extra — just raw speed.
Ideal for thrill-seekers who love mastering challenging skills.
These drones are all about executing tricks and capturing stunning movements. You'll crash as you learn, so the frames are tough enough to handle it.
Perfect for those who enjoy BMX or skateboarding vibes over competition.
Build your own rig to accommodate a camera, bypassing expensive store-bought drones. Costs add up, but learning how to customize each component is a major plus.
Great for anyone wanting complete control over their filming gear.
These drones fly like tiny airplanes, offering efficiency and long flight times. Builds are similar to RC planes, not typical quadcopters.
Best for mapping, surveying, or those who love covering vast distances.
Tiny indoor drones that are budget-friendly and durable. Practice inside your home with little risk or cost.
A smart choice if you're curious but cautious about drone building.
If you want a related angle, Web Development is the natural next stop.
IoT Projects is a sibling pursuit and often surfaces the same kind of curiosity.
For something adjacent, see Arduino Projects.
Upgrading gear isn't what lifts your flying. Motor output interpretation is the game changer. It's about understanding how your drone's flight behavior connects to what's under the hood.
Imagine knowing, "It oscillated on roll but not pitch." That's not just a wobble. It's pinpointing that your PID I-term is too high, not a prop balance issue.
Mastering this skill means landing with a hypothesis, not a shrug. Without it, you're stuck guessing with every session. Throwing adjustments at the wall, hoping something sticks. This guesswork trap is where many drone pilots stall for months.
This systematic approach transforms your understanding and effectiveness.
Commit to 6 sessions over 30 days. One session every five days keeps you progressing without burning out.
If you're already planning the next build before finishing this one, this is more than curiosity. Dive deeper into it by keeping build notes and experimenting with customizations.
If you completed the sessions but felt indifferent, that's telling. Try working on a quick repair project instead—building from scratch might not be your thing, but tweaking and improving might be.
If you found yourself dreading the sessions and constantly putting them off, this hobby might not align with your interests. Not everyone enjoys the patient nature of drone building. Consider exploring a different interest instead.
The one sign you shouldn't ignore is if you're watching FPV racing footage into the night and analyzing techniques. That pull towards understanding the nuances signals genuine interest.
Sometimes you just need something for the next ten minutes — that's what things to do when bored is for.
Beginner drone builds typically range from $200–$500 for entry-level quadcopters with basic parts, while more advanced racing or photography drones can cost $800–$2,000+. Your budget depends on the drone's purpose, component quality, and whether you already own tools like soldering irons and battery chargers. Starting with a budget-friendly build lets you learn fundamentals before investing in premium components.
No prior experience is necessary—most beginners start with pre-programmed flight controllers and follow assembly guides step-by-step. You'll pick up soldering, wiring, and basic coding skills naturally as you build and troubleshoot your first drone. Online communities and tutorials make it accessible to anyone willing to learn.
A beginner's first build typically takes 8–20 hours spread over several days or weeks, depending on complexity and whether you're learning soldering and electronics for the first time. Simple kits with pre-soldered components can be assembled in a weekend, while fully custom builds take longer. Most builders plan for plenty of trial, error, and troubleshooting time.
Essential tools include a soldering iron, solder, wire strippers, a screwdriver set, and a battery charger compatible with LiPo batteries. You'll also want a multimeter for testing connections and safety gear like helping hands for soldering. Many hobbyists gradually build their tool collection as they take on more complex builds.
Drone building ranges from moderately easy (assembly kits) to challenging (fully custom builds with custom coding), so it scales with your ambition. The initial assembly is straightforward, but tuning flight performance and debugging electrical issues requires patience and problem-solving. Most builders find it manageable if they take time to understand each component and follow guides carefully.
Your custom drone can be tailored for photography and videography, competitive racing, mapping and exploration, or casual flying. Building your own lets you optimize for your specific use case—lighter frames for racing, stabilizers for cinematic footage, or extended flight time for surveying. Many builders enjoy the continuous cycle of flying, crashing, learning, and upgrading.