BoredomBusted — Find Your Next Favorite Thing To Do
Discover hobbies, activities, places, and ideas that spark joy. Whether you're looking for something creative, active, social, or relaxing, BoredomBusted helps you find your next favorite thing to do.
Browse our hobby guides, things-to-do collections, and place ideas to never be bored again.
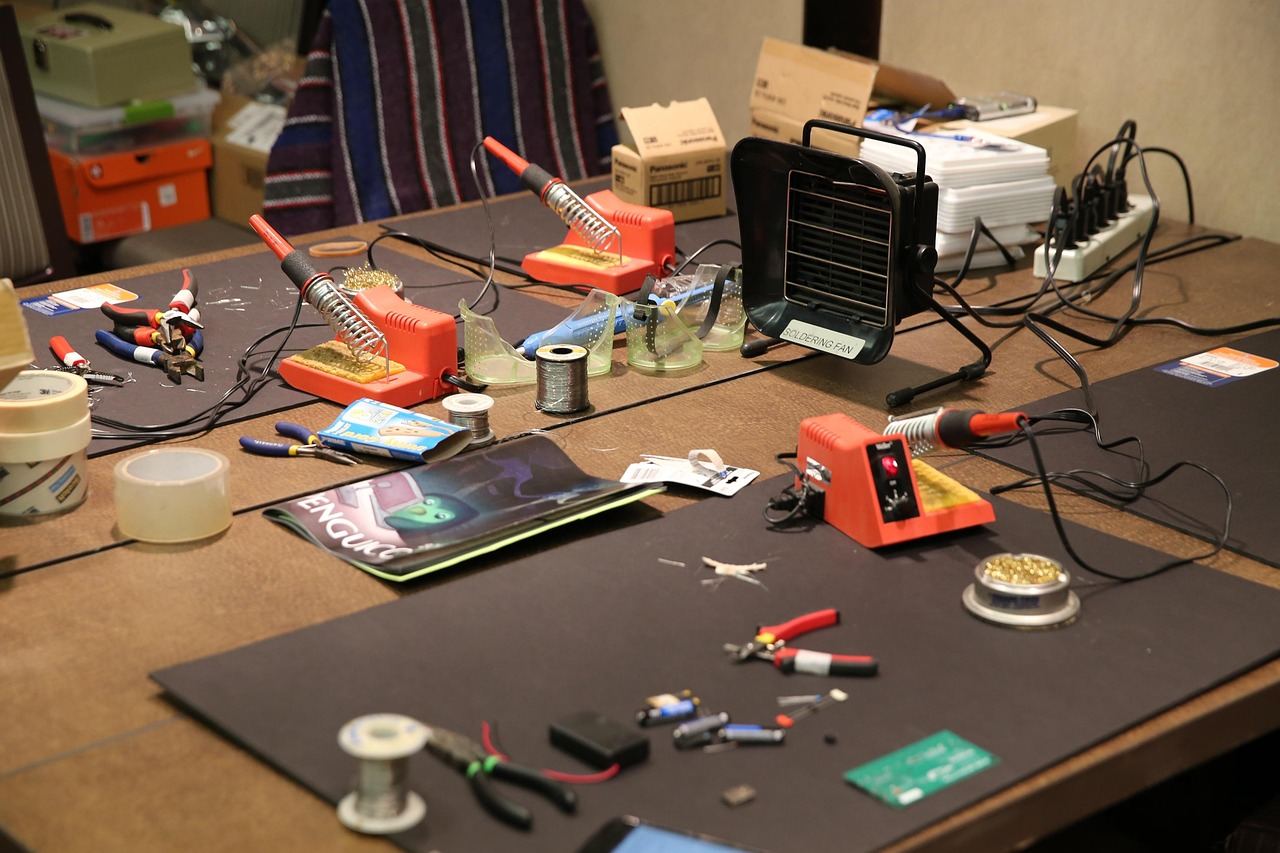
Electronics tinkering is often seen as an engineer-only domain — but in reality, anyone with curiosity can thrive and learn through hands-on experiences.
Getting started with electronics tinkering as a beginner opens up a world of creativity where you can create, modify, and repair electronic devices. You can dive deep into technology by building simple displays or complex circuits.
Working with tools like soldering irons and multimeters lets you handle components directly.
Components include resistors, capacitors, and microcontrollers, each playing a role in your project.
Electronics tinkering involves hands-on assembly and experimentation with electronic components, such as inserting resistors and capacitors into breadboards, following circuit diagrams to create functional prototypes, and troubleshooting failures by inspecting connections or modifying layouts to achieve desired effects.
This hobby creates immediate skill feedback loops through tangible results like glowing LEDs or sounding buzzers, fostering a flow state as hobbyists engage in problem-solving and iterative building, which sustains interest and provides a sense of accomplishment with each completed project.
You might think electronics tinkering is reserved for professional engineers.
Imagine John. He started without any engineering background, driven by sheer curiosity to fix his broken toaster. In just a few months, he was modifying his own gadgets with confidence, using online tutorials and forums.The journey is less about technical skill and more about a willingness to learn.
It's curiosity. It's experimentation. It's the thrill of creating something new from spare parts. With each project, your understanding grows, and you build skills that bring your ideas to life.
Next up, we'll explore how to start your own electronics projects without feeling overwhelmed.
Your first session will probably smell like warm plastic and slightly burnt fingertips. You'll be hunched over a breadboard, squinting at a circuit diagram, poking a resistor into a row of tiny holes. The LED you're trying to light up will stay dark. You'll check the diagram again. Still dark. The gap between "I followed the steps" and "it actually works" is where electronics tinkering really begins — and that gap is wider than most beginners expect.
The thing that catches most people off guard isn't the complexity — it's the silence. A software bug throws an error message at you. A dead circuit gives you nothing. No feedback, no clue, just a component sitting there doing exactly zero. Learning to treat a non-working circuit as information, not failure, is the actual skill you're building in the first few sessions. You'll start turning components around, reseating wires, swapping out parts — and slowly, you'll develop a feel for where things go wrong.
When something does click — when that LED finally lights up, or the buzzer sounds for the first time — it hits differently than you'd expect. It's disproportionately satisfying for how small the result is. That first working circuit rewires how you see every electronic device around you. Suddenly your phone charger, your TV remote, your kitchen timer all have an internal logic you feel like you could touch.
The early sessions are mostly about building tolerance for ambiguity — sitting with a problem until you find the loose connection or the backwards component. That patience is learnable. But there are also a handful of specific mistakes that derail beginners before they ever get that first win. Those are worth knowing upfront.
When to start: Early morning
Duration: 1 hour
Cost to try: $20
Success criteria: if you finished without burning yourself or making the circuit unusable, do session 2.
It feels productive to stock up on parts. Resistors, capacitors, Arduino boards — you grab a handful of everything and wait for inspiration. Without a specific project in mind, most of those parts sit in a drawer for months.
Pick one beginner project first — a blinking LED, a simple buzzer circuit, a basic voltage divider. Then buy only what that project needs. You'll learn faster because every component you handle has an immediate purpose.
Soldering looks like the "real" version of electronics. So beginners rush to it before they've tested anything. The problem: a soldered mistake is much harder to fix than a breadboard mistake.
Build every circuit on a breadboard first. Get it working. Confirm the connections. Only then commit it to solder. This single habit will save you hours of frustration and wasted components.
Circuit diagrams look simple until you're holding a component and have no idea where it goes. Most beginners skim the schematic, start building, and then improvise the parts they missed. Improvised connections are the number one cause of circuits that don't work and components that get fried.
Before touching any component, trace the full diagram with your finger. Identify every part and where it connects. Then lay out your components on the table in roughly the same arrangement as the schematic. Building becomes much more obvious from there.
When a circuit doesn't work, the instinct is to start swapping components and hoping something changes. This wastes parts and teaches you nothing. Systematic inspection — checking one connection at a time — finds the problem faster every single time.
Work through this order when something fails:
A multimeter makes this whole process faster. Learning to use one early is one of the best decisions you can make as a beginner.
A blinking LED feels too basic. You want to build something with a microcontroller, sensors, and wireless output. The issue is that complex projects compound your mistakes — one misunderstood concept early on creates ten confusing problems later.
The feedback loop in simple circuits — LED lights up, buzzer sounds, motor spins — is what builds real intuition. Stack three or four simple wins before you scale up. The confidence and pattern recognition you gain makes harder projects genuinely easier.
Start with r/electronics and r/arduino on Reddit — both have hundreds of thousands of members posting builds, asking questions, and sharing circuit diagrams daily. r/AskElectronics is specifically built for troubleshooting, so if a component is misbehaving, post a photo and you'll get real answers fast.
For in-person connection, look for a local makerspace or hackerspace near you. Sites like Hackerspaces.org and Meetup.com list community workshops where you can bench-share, borrow equipment, and work alongside people mid-project. These aren't classes — they're open build nights where everyone's just tinkering.
The Instructables community and the EEVblog forums are worth bookmarking too. Instructables lets you follow builders whose project style matches yours. EEVblog skews toward more serious hobbyists and is particularly good for analog and test-equipment questions.
If you want structured community with a competitive edge, look into local IEEE student chapters or Maker Faire events — Maker Faire has regional events across the US and internationally where hobbyists demo projects and trade ideas face to face.
Breadboard prototyping is where most people start. You push components into a reusable board, follow a diagram, and watch something happen — a blinking LED, a beeping buzzer.
No soldering, no permanent mistakes. This is the version for people who want fast feedback and low stakes while they figure out if electronics clicks for them.
Microcontroller projects — think Arduino or Raspberry Pi — let you write simple code that controls physical hardware. A button triggers a motor. A sensor reads temperature and displays it on a screen.
This is the sweet spot for people who want their projects to feel alive. You're not just building a circuit — you're programming behavior into it.
Soldering moves you from prototype to finished product. You bond components onto a board with molten metal, creating connections that won't wiggle loose.
**The tactile satisfaction here is different from anything else in this hobby.** It takes a steady hand and patience, but the result is something you can actually keep, gift, or install.
Electronics repair and reverse engineering means cracking open dead gadgets and figuring out what went wrong. A faulty connection, a burned-out component, a bad capacitor — these are puzzles with real answers.
This path suits people who are driven by diagnosis. You need a multimeter, some patience, and a tolerance for not knowing the answer until you find it.
PCB design is the advanced end of the hobby. You lay out your own printed circuit board in software, then send it off to be manufactured. What comes back is a custom board built exactly to your spec.
This is for tinkerers who've outgrown off-the-shelf components and want full control over what they're building. The learning curve is steeper, but the payoff is a genuinely original creation.
Readers who enjoy this often gravitate toward Logic Grid Puzzles next.
If you want a related angle, Quiz Bowl is the natural next stop.
For something adjacent, see IoT Projects.
The skill that separates people who keep improving from people who stall is learning to read a failure instead of just fixing it.
When a circuit doesn't work, most beginners wiggle a wire or swap a component until something changes. That approach gets you unstuck once. It teaches you nothing you can use next time. The hobbyists who actually improve treat every dead LED or silent buzzer as a data point — they ask what the failure is telling them about current flow, component placement, or a misread diagram.
This is where a multimeter stops being an optional tool and becomes your primary one. Poking test points and comparing readings to what the circuit should show builds a mental model of how electricity actually behaves. Once you can picture voltage dropping across a resistor or current stalling at a bad solder joint, you stop guessing and start diagnosing. That shift — from random fixing to deliberate reading — is the whole game.
The next section covers exactly what your first projects should look like — and why starting small isn't playing it safe, it's playing it smart.
Run four sessions over two weeks — roughly every three to four days — each around 45 minutes to an hour. Build something small each time: a basic LED circuit, a buzzer, anything with a visible result.
That LED lighting up hit differently than you expected. The compulsion to fix just one more connection before stopping is the real signal. From here, move to a beginner microcontroller kit — an Arduino starter set is the natural next step — and pick a project with a slightly harder goal than what you just built.
The circuits worked, but the satisfaction felt flat. Before walking away, try shifting the goal — indifference at this stage often means the project wasn't connected to anything you actually care about. Pick something with a personal use case: a motion sensor for your desk, a custom light for your room. A concrete purpose changes the experience significantly.
The physical fiddling with tiny components, the circuit diagrams, the debugging — none of it sparked anything. That's not a patience problem; it's a genuine mismatch between how your brain likes to work and what this hobby demands. If you still want to build things, woodworking or 3D printing scratches a similar making-something-physical itch without the circuit-level troubleshooting.
If you find yourself opening component datasheets or browsing breadboard kits at an odd hour — not because you planned to, but because your brain drifted there — this hobby has already found you. That involuntary pull is more reliable than any test you could run.
For ideas that take five minutes instead of five weeks, see things to do when you're bored.
You'll need basic tools like a soldering iron, multimeter, wire strippers, and a breadboard to begin. A starter kit (typically $30–$50) usually includes resistors, LEDs, capacitors, and Arduino or similar microcontroller boards. As you progress, you can add specialized tools, but most beginners start small and expand gradually.
You can grasp fundamental concepts like circuits and basic soldering in 2–4 weeks with consistent practice. Building your first working project usually takes a few hours once you understand the basics, and more complex projects may take days or weeks depending on difficulty.
No, electronics tinkering is beginner-friendly if you start with simple projects like LED circuits or basic Arduino sketches. Modern starter kits come with clear tutorials and online communities provide extensive support, making it accessible even without prior technical experience.
Electronics tinkering is hands-on experimentation with small circuits and devices for learning and fun, while electrical engineering is a formal discipline dealing with power systems and industrial applications. Tinkering requires no formal training and focuses on creativity and problem-solving over theory.
You can start for $30–$100 with a basic starter kit that includes essential components and tools. High-quality tools and additional components add more, but most hobbyists find the initial investment modest compared to other hobbies, with the ability to reuse components across multiple projects.
Yes, this hobby builds practical skills in circuit design, programming, and troubleshooting that are valuable in tech, robotics, and engineering careers. Many employers value hands-on project experience gained through tinkering, and it's an excellent way to develop a portfolio of work.