BoredomBusted — Find Your Next Favorite Thing To Do
Discover hobbies, activities, places, and ideas that spark joy. Whether you're looking for something creative, active, social, or relaxing, BoredomBusted helps you find your next favorite thing to do.
Browse our hobby guides, things-to-do collections, and place ideas to never be bored again.
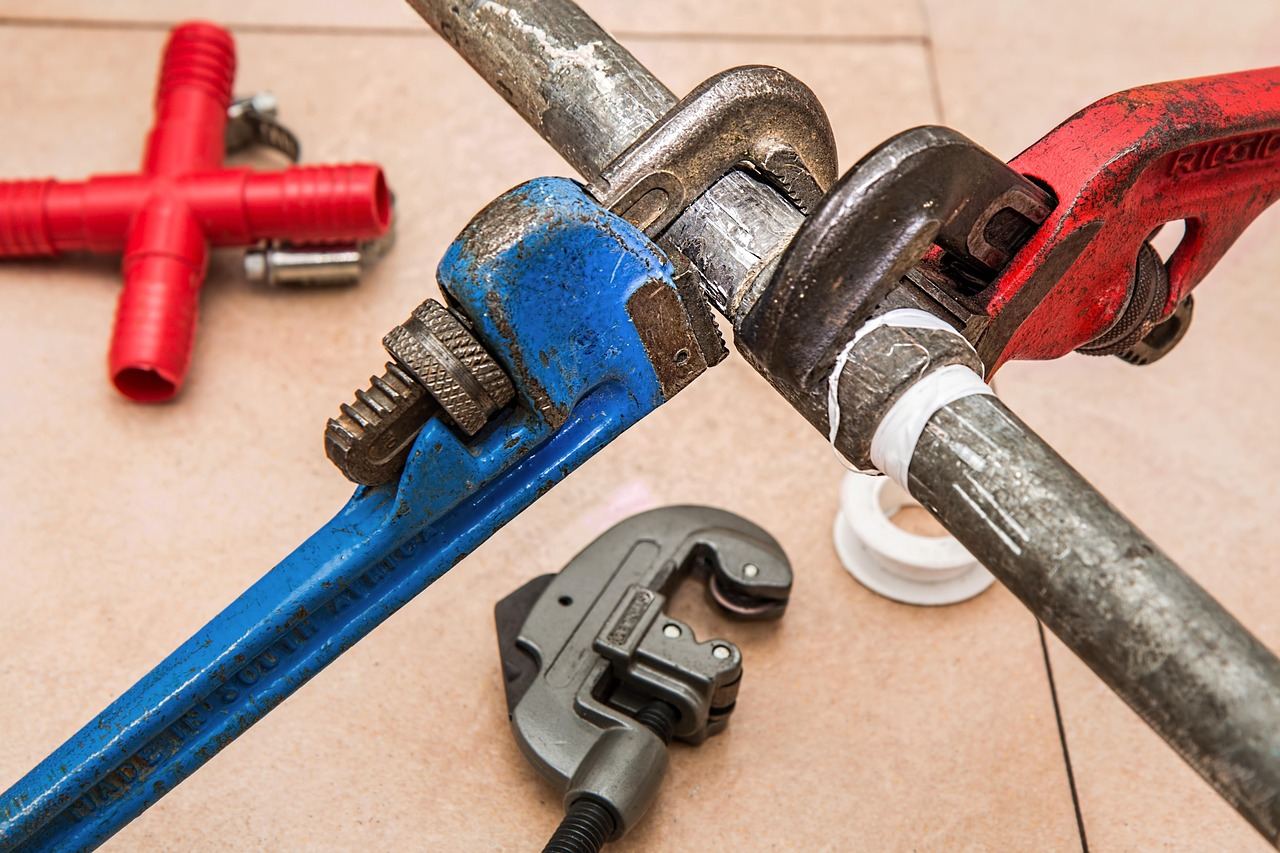
Home DIY isn't just for seasoned pros — you can start small and build your skills with accessible online resources at any experience level.
Getting started with home DIY as a beginner allows you to transform your living space using your own two hands. That's the essence of crafting and creating home improvements.
Your home becomes a reflection of you, tailored to suit your needs and style.
In Home DIY, participants mix cement and water to create a pourable consistency, then shape the mixture into various molds using household objects. They manipulate textures by embedding items, allow creations to cure for 24-48 hours, and finish pieces through techniques like painting or cutting away molds. The process involves experimentation and troubleshooting, resulting in functional decor lik…
Home DIY fosters a flow state through the immersive task of shaping cement, balancing skill challenges with immediate tactile feedback, and providing a sense of accomplishment as practitioners create unique decor. This creative expression combats boredom by allowing for novel projects that transform everyday items, while the iterative process ensures continuous skill development and rewarding out…
You're convinced home DIY is only for the trained and experienced.
You've thought that without a professional background, you're bound to fail or get frustrated.
That's not the case for Sarah, who started with a $10 toolset and a YouTube video to fix her leaky faucet. No experience, just the desire to learn. Today, she confidently frames her own photos and manages small household repairs, all learned from free online resources.
Flexibility. Accessibility. Limitless tutorials at your fingertips. Home DIY is as easy or ambitious as you want it to be. Every small project builds your skills and makes the next one easier.
Now, let's explore some fundamental projects to kick-start your DIY journey.
Your first session with cement DIY is wetter, heavier, and messier than you picture. The mix clings to your hands, the consistency shifts fast, and the smell is sharp and mineral. You're working against a clock — cement doesn't wait while you figure things out. The physical reality of the material is the first thing beginners underestimate.
The part nobody warns you about is the waiting. You pour your first piece, smooth the surface, feel pretty good about it — then you have to leave it alone for 24 to 48 hours. That gap is where most beginners go wrong. They check it too early, nudge the mold, or try to rush the cure. Patience isn't a personality trait here — it's a technical requirement. Touch it too soon and you'll crack what you made.
Your first finished piece probably won't look like the photos online. Edges chip when you pull the mold. Bubbles leave pits in the surface. Colors come out duller than expected. None of that means you did it wrong — those flaws are just cement telling you what to adjust next time. The learning happens in that feedback loop, not in getting it perfect on attempt one.
By your third or fourth project, your hands know the right texture before your eyes do. You stop second-guessing the mix and start making real decisions about form and finish. That shift feels earned — because it is. Before you get there, though, there are a handful of mistakes almost every beginner makes that slow things down unnecessarily. Knowing them ahead of time changes everything.
When to start: Early morning
Duration: 1 hour
Cost to try: $15
Success criteria: If you finish one small project with a straight, secure result and all cut or painted edges neat, do session 2.
The hardware store is overwhelming. You grab a cart and start loading up, convinced you need everything. Then half of it sits in a drawer unused.
Pick one project first. Then buy only what that project requires. One focused project teaches you more about what you actually need than a fully stocked toolbox ever will.
Most DIY disappointments happen before a single tool touches the surface. Uneven walls, dusty cement, loose fittings — they all show up later when it's too late to fix easily.
Budget as much time for prep as you do for the project itself. Clean surfaces. Measure twice. Tape off edges. The actual work goes faster when the groundwork is solid.
Ambition is good. Starting with a full bathroom retile when you've never grouted anything is not. Big projects have too many variables, and early frustration is the fastest way to quit.
Start with something you can finish in an afternoon. A completed small project builds more confidence than an abandoned big one. Concrete planters, picture frames, a patched wall — these are real wins that stack up.
Cement that looks set isn't always set. Paint that looks dry can still be tacky underneath. Touching, moving, or loading a project too early undoes hours of work.
Follow the cure time on the packaging, not your gut feeling. For most cement projects that's 24–48 hours minimum. Start a second project while you wait. Patience is the skill that separates clean results from cracked ones.
A cracked mold. A lopsided finish. A tile that doesn't sit flush. These aren't failures — they're exactly how the learning works. Every experienced DIYer has a pile of botched first attempts somewhere.
When something goes wrong, ask one question: what would I do differently next time? The troubleshooting is the skill development. There's no shortcut around it, and there doesn't need to be.
Start with r/DIY and r/HomeImprovement on Reddit. Both communities have millions of members posting project photos, asking questions, and giving brutally honest feedback. Real people, real mistakes, real fixes.
For video-first learning, YouTube channels like This Old House and Home RenoVision DIY cover everything from drywall patching to full bathroom remodels. Search the specific project you want to tackle — not "DIY tips" — and you'll find step-by-step walkthroughs filmed in real homes.
Both Home Depot and Lowe's run free in-store workshops on tiling, painting, and basic carpentry. Check their websites under "Events" or "Workshops" to find sessions at your nearest location. These are worth attending just to handle tools before buying them.
Local makerspaces and tool libraries are another underused resource. Search Meetup.com for DIY or home improvement groups in your city. You'll find everything from neighborhood fix-it clinics to weekend project swaps where people share tools, skills, and materials.
Functional concrete projects are the most practical entry point. Think planters, coasters, bookends, and candle holders — things you'll actually use every day.
This is the version for people who want a finished product, not just the process. You mix, mold, cure, and you've got something sitting on your shelf within 48 hours.
Repair and maintenance DIY covers the stuff most homeowners quietly dread. Patching walls, sealing gaps, fixing squeaky doors, unclogging drains.
This suits people who want to stop paying for small jobs they could handle themselves. The learning curve is low, and the savings add up fast.
Decorative DIY leans into aesthetics — painting walls, creating textured finishes, building custom frames, or making concrete decor with embedded objects and painted surfaces.
The appeal here is full creative control over how your home feels. No waiting for a specific product to come in stock. You make exactly what fits your space.
Construction-style DIY means shelving units, raised garden beds, workbenches, or simple furniture builds. These projects take more time and a few more tools.
This is for the person who wants to point at something and say they built it. The projects are bigger, but so is the payoff.
Mixed-material and sculptural projects combine concrete, wood, fabric, or found objects into one-of-a-kind pieces. The process involves testing, failing, and adjusting.
The reward isn't the object — it's figuring out what works. If you get bored following a step-by-step guide, this is your lane.
A close neighbor worth considering: Wire Sculpture.
Tape Art lives in the same world — different mechanics, similar appeal.
If you want a related angle, Hands On Skills is the natural next stop.
The skill that separates people who keep improving from people who stall is reading the project before starting it.
Most beginners jump straight to doing. They pick up the tool, skip the dry run, and figure it out as they go. That works for simple tasks. But the moment a project has two or three connected steps — mix ratio, cure time, mold removal — improvising mid-way costs you time and materials. The people who improve fastest are the ones who pause before touching anything and trace the whole sequence in their head first.
With something like concrete casting, this matters immediately. The cement mixture has a working window. Once you pour, you can't pause to Google whether you need to seal the mold first. Pre-reading the project means you already know the answer. You've already placed your tools. You're not reacting — you're executing a sequence you already ran through once in your head.
This habit compounds. Each project you pre-read teaches you to spot the pressure points — the step where things typically go wrong. Over time, you stop needing to read as carefully because the patterns become familiar. That's the difference between someone who's done twenty projects and someone who's done the same project twenty times. The next section covers exactly what those early projects should look like.
Do four sessions over two weeks — mix a batch of cement, pour it, and finish one small piece each time. That's enough real data to know where you stand.
You finished a piece and immediately started eyeing other household objects as potential molds. That restlessness is the signal — you're hooked. Move into slightly more ambitious projects: planters, candle holders, wall tiles. Start building a small toolkit and keep a scrap box of mold materials.
The projects got done, but the process didn't pull you in. Indifference here usually means the medium is wrong, not the hobby category. Try shifting toward wood, tile, or paint-based projects before writing off DIY entirely — the tactile satisfaction is very different across materials.
The mess, the waiting, the troubleshooting — none of it felt worth the output. That's useful information: you probably want faster, cleaner creative payoffs. Look toward digital design, drawing, or photography — creative hobbies where the feedback loop is immediate and the cleanup is minimal.
You caught yourself photographing the finished piece before it was even fully cured — or mentally redesigning it mid-pour. That involuntary investment is the real tell.
Startup costs vary widely depending on your first project, but you can begin with basic tools for $50–$150 and use materials from existing household items. As you progress, you'll gradually invest in quality tools and supplies based on the types of projects you choose. Many DIYers find that savings from completed projects quickly offset initial tool investments.
Essential beginner tools include a hammer, screwdrivers, measuring tape, level, utility knife, and a basic drill. You don't need every tool upfront—start with these fundamentals and add specialized tools as you tackle different projects. Many projects can be completed with just 5–10 basic tools.
Project duration ranges from a few hours for simple tasks like painting or shelving, to several weekends for larger renovations. Most beginner-friendly projects take a weekend or less to complete, allowing you to see quick results and build confidence. As your skills develop, you can tackle more complex projects that span multiple weeks.
Home DIY is very beginner-friendly—start with simple projects like painting, caulking, or basic furniture assembly to build foundational skills. Clear instructions, online tutorials, and community forums make it easy to learn as you go without prior experience. Most beginners gain confidence quickly and progress to more challenging projects within weeks.
Popular beginner projects include painting walls, installing shelves, caulking gaps, assembling furniture, replacing cabinet hardware, and basic tile work. These projects require minimal tools, have low stakes if mistakes happen, and deliver visible home improvements. They're ideal for building skills and motivation before tackling larger renovations.
Yes, DIY projects typically cost 40–60% less than hiring professionals, with savings increasing on larger projects. Labor costs make up a significant portion of contractor quotes, so handling the work yourself captures substantial savings. Even accounting for tool investments and learning mistakes, most DIYers break even within 2–3 projects.