BoredomBusted — Find Your Next Favorite Thing To Do
Discover hobbies, activities, places, and ideas that spark joy. Whether you're looking for something creative, active, social, or relaxing, BoredomBusted helps you find your next favorite thing to do.
Browse our hobby guides, things-to-do collections, and place ideas to never be bored again.
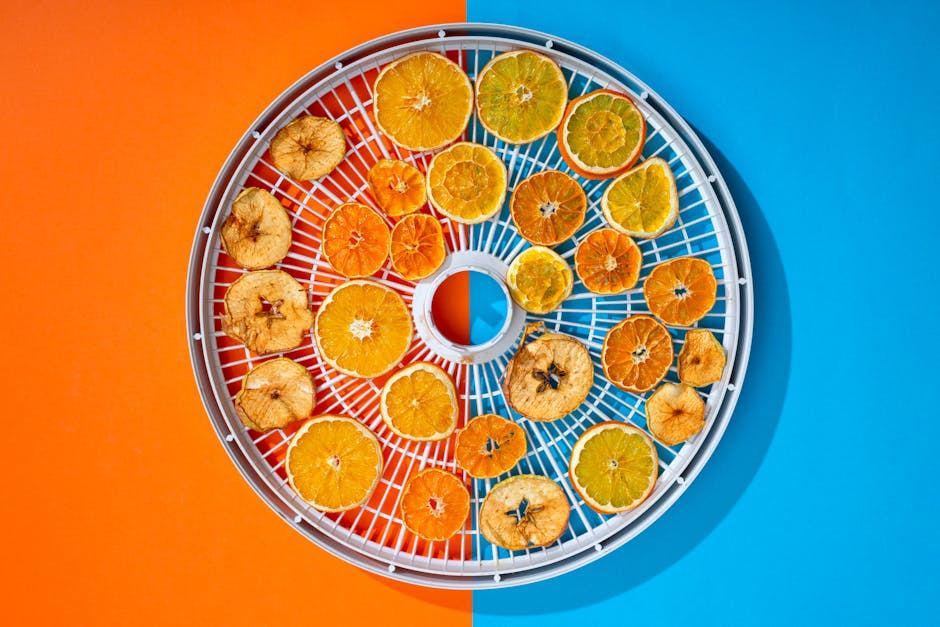
Dehydrating isn't just for snacks; it's a mastery of flavor concentration that elevates your cooking and turns groceries into gourmet enhancements.
Learning dehydrating as a beginner opens up a world of preservation techniques that can be done using a countertop dehydrator, an oven, or the sun.
Unlike canning or fermenting, nothing is added: no heat-killed bacteria, no brine, no cultures.
You're just pulling water out until microbes can't survive.
In dehydrating, you select fruits, vegetables, or meats, slice them appropriately, and use a dehydrator or oven to remove moisture, transforming them into shelf-stable snacks. The process involves monitoring temperature and time, ensuring even drying while experimenting with flavors and combinations. You can also package and store the finished products for later use, integrating creativity in sna…
Dehydrating activates a flow state by engaging your focus on the precise techniques of slicing, timing, and flavor pairing, offering tangible results that build your culinary skills and provide immediate gratification. This hobby also yields a sense of accomplishment with each successfully preserved batch, as you create something both functional and tasty.
Dehydrating seems like it's about jerky and trail mix. Maybe it feels like a bulky machine you rarely use, languishing next to the bread maker in the garage.
That view hides the true value of dehydration.
Dehydrating teaches how food really works. Understanding moisture, enzymes, and oxidation elevates your skills in cooking and shopping. Many see it as just preservation, but removing water concentrates flavor. That's why dehydrated tomatoes bring more punch in sauces than fresh ones.
Consider dehydrated mushrooms ground into powder. Prep takes twenty minutes. What you get is an umami powerhouse that outperforms any store-bought seasoning. Buy mushrooms on sale, and it costs next to nothing.
It's not just about making snacks. It's really about creating a sustainable system. The following section will guide you in setting up that system efficiently.
The first encounter is deceivingly simple. You imagine a quick slice, drop it into the dehydrator, and walk away. Easy.
In reality, you'll hover over the machine, second-guessing every slice. You'll wonder if the color is right and if you set the temperature correctly.
That eight-hour wait is misleading. It's nothing by the end of week one, and slice thickness soon becomes your obsession. The aroma from the machine trumps any timer.
Early on, you'll overfill trays and struggle with uneven drying times. By the second week, convinced something is done, you'll learn it's still damp inside. Then, a victory — one batch comes out right, shifting your confidence. Suddenly, you're eyeing thickness with precision and reducing guesswork.
Temptation to quit peaks during the second week. Bad texture, wasted fruit, and a running appliance yield disappointing results.
But that's not failure. That's where others stop, and if you push past it, you're likely onto something rewarding. One tip before you start? Pre-treat light fruits with lemon juice and water.
Skipping this step won't ruin the flavor, but it will make your peaches and apples look unappetizing. No one likes grey-brown fruit that seems prematurely aged.
When to start: Early morning
Duration: 1.5 hours
Cost to try: $20
Success criteria: if you finished without burning or over-drying the fruits, do session 2.
Many think eyeballing slice size works until the center of each apple ring remains wet after hours in the dehydrator.
Cut everything to 1/4 inch or less using a mandoline to ensure even drying.
Most skip reading about fruit pre-treatment until they see grey mango and assume it's a machine issue.
Toss fruit in one tablespoon lemon juice per cup of water before loading the dehydrator.
This makes food look appealing, not mistaken.
Thick pieces often trick you by feeling dry on the surface while remaining wet inside.
Let food cool for five minutes before testing, then check the middle:
Warm food causes condensation in jars, leading to mold you won't see until it's too late.
Cool everything on the tray for at least 30 minutes before storing it in containers.
High-fat foods don't dehydrate well and end up going rancid over time.
Stick to lean meats and low-fat produce for anything you want to keep longer than two weeks.
Dehydration is mostly a home affair. Transform your kitchen counter, spare room, or garage shelf into a simple setup. Shared dehydrators at community kitchens or makerspaces offer a chance to experiment before committing to a purchase.
Your first step is Facebook Groups. Search for "food dehydrating + [your city/state]" to find active members.
Meetup.com hosts "food preservation" or "homesteading" groups. Regulars at these gatherings often practice dehydrating.
Check your local Cooperative Extension Service. They frequently run food preservation workshops, including dehydrating demos, through land-grant universities in the U.S.
The National Center for Home Food Preservation (nchfp.uga.edu) isn't a formal governing body but offers resources and connects to local events.
Online forums welcome beginners with open arms. Say 'I'm starting out and interested in learning safe drying temps and times' at your first meetup. You'll leave with handouts, a mentor, and maybe an invite to see their setup.
Start with fruits and vegetables. This approach is forgiving and accessible. Perfect for beginners seeking quick, manageable outcomes. A basic $40 dehydrator is all you need.
Making jerky means handling meat at higher temperatures. Ideal for those confident in kitchen safety. Invest in a better dehydrator, with features like a top-mounted fan, for around $70–90 total.
Preserve herbs and spices effortlessly with lower temperatures for shorter durations. Great for gardeners with surplus basil. Easily integrate your results into everyday cooking.
Raw food dehydration keeps temps under 115°F to maintain enzymes. Targets established plant-based eaters. Precise timing is crucial, so don't start here if you're new.
Dehydrate full meals like stews for trail rehydration. Aimed at hikers avoiding pricey store options. It's the most complex method but delivers excellent trail snacks with practice.
Cheese Making lives in the same world — different mechanics, similar appeal.
If the texture of this appeals to you, Dessert Making is built on similar bones.
Some of the same instincts show up in Home Cooking — worth a look if this clicked.
Beginners often fixate on finding the perfect temperature for their dehydrators.
But that's not the most important factor. It's all about the moisture load.
Reading moisture load before drying is the critical skill. Different cuts, ripeness, and prep methods alter how much water needs removing. A thick slice of fresh peach and a thin slice from a grocery store peach are vastly different. Overlooking this leads to uneven dehydration.
Estimating moisture load allows you to control drying time effectively. No more guesswork.
Without understanding moisture load, you'll often find your jerky dry and tough on the outside but still moist inside. By gauging moisture correctly, you'll see why a recipe might need different times on different weeks.
Try 6 dehydrating sessions over 30 days. Aim for roughly one every five days, giving each batch time to finish and evaluate before the last fades from memory.
The number matters because dehydrating has a built-in lag. You load the trays, walk away for hours, and see results the next day. Six runs mean complete cycles of prep, wait, result, and taste.
If you're thinking of the next batch before this one finishes, you're hooked. It becomes natural to categorize groceries into 'dry this' and 'don't bother'. Dive in deeper with marinades, build a snack rotation, or consider a vacuum sealer. There's more here than it first appears.
Finishing all six sessions without a spark means it's functional for you, but not exciting. Before moving on, realize some want only the outcome, not the craft. Explore options like meal prep services if output is all you need.
Skipping prep days and feeling relief is telling. If the 10-minute setup feels like a chore, it's likely not your fit. Accept it and explore other hobbies without self-criticism.
The sign you shouldn't ignore? You're irked by unnecessary preservatives in store-bought snacks or find yourself calculating moisture content in groceries. That low-level interest in food processing indicates a true attraction to dehydrating.
If nothing here clicks, our guide to what to do when bored covers shorter, lower-commitment options.
You can begin with a basic electric food dehydrator, which costs $40–$200 depending on size and features. Alternatively, you can use your oven at low temperature, though a dehydrator provides better results and energy efficiency. Beyond that, you'll only need cutting boards, knives, and food-safe storage containers.
Most fruits and vegetables take 4–24 hours depending on thickness, moisture content, and your dehydrator's temperature. Jerky and meats typically require 4–8 hours, while thinner slices like apple chips finish in 4–6 hours. Thicker items like whole mushrooms or fruit halves may take a full day or more.
No—dehydrating is one of the easiest food preservation methods to learn. Simply slice your food, arrange it on trays, set the temperature, and let the dehydrator run. Most mistakes are forgivable, and you'll develop intuition quickly through practice.
Fruits like apples, berries, and mangoes, vegetables such as tomatoes, kale, and peppers, and meats including chicken and beef jerky are all excellent choices. Herbs, nuts, and even yogurt can be dehydrated for creative snacks and pantry staples.
Properly dehydrated and stored foods last 6 months to 2 years depending on the item and storage conditions. Keep them in airtight containers in a cool, dark place away from moisture and heat to maximize shelf life.
Initial investment ranges from $50–$300 for a decent electric dehydrator, plus minimal ongoing costs for produce and storage containers. Once set up, the cost per batch is low since you're likely using kitchen scraps or bulk produce.