BoredomBusted — Find Your Next Favorite Thing To Do
Discover hobbies, activities, places, and ideas that spark joy. Whether you're looking for something creative, active, social, or relaxing, BoredomBusted helps you find your next favorite thing to do.
Browse our hobby guides, things-to-do collections, and place ideas to never be bored again.
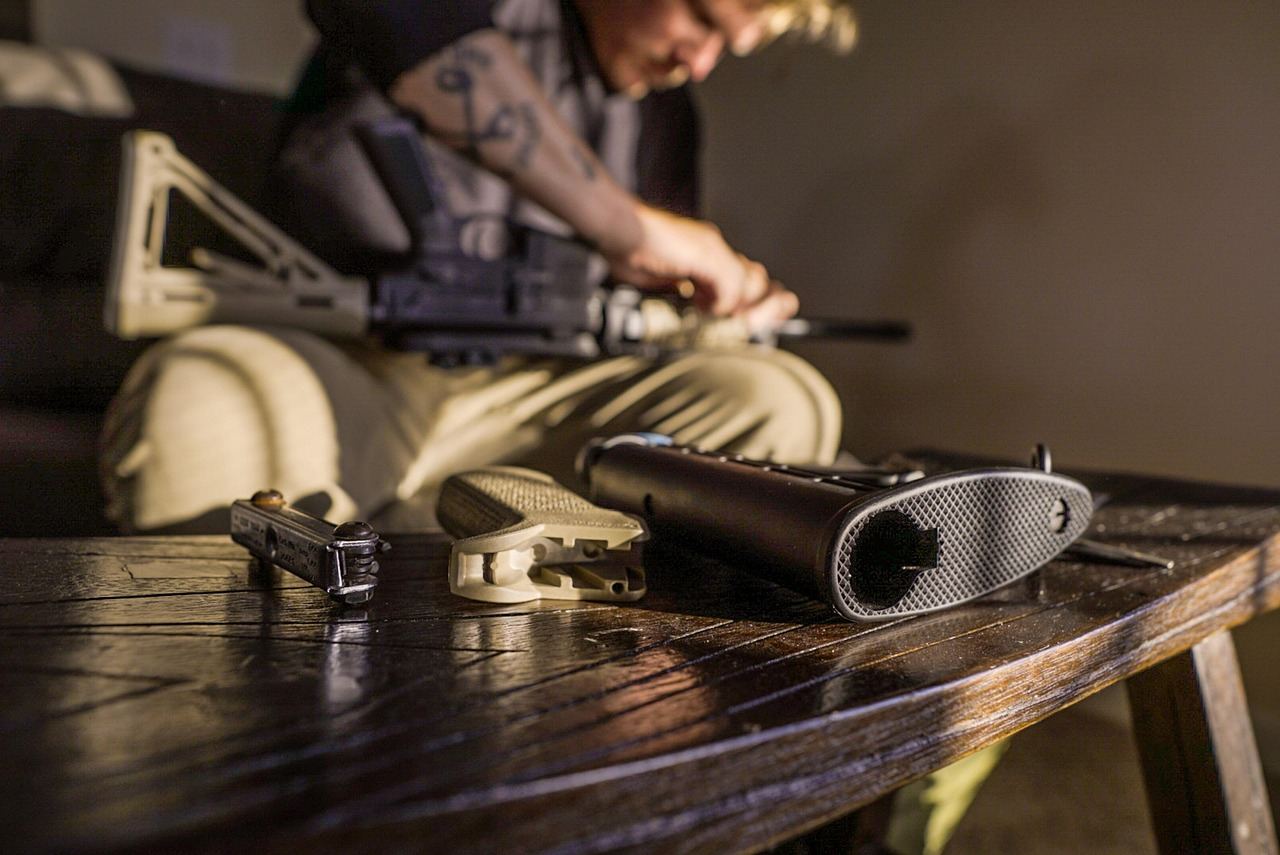
Gunsmithing isn't just for hunters; it's more about precise mechanical problem-solving—think watchmaking, not heavy welding.
Learning gunsmithing as a beginner involves understanding the fundamental skills needed for repairing and customizing firearms – covering everything from trigger adjustments to full custom builds.
You diagnose mechanical problems, fit parts, and refinish metal or wood to restore or improve function.
Unlike general DIY or even blacksmithing, every decision is governed by federal law and ballistic consequence, which raises the stakes and the skill ceiling considerably.
In gunsmithing, you engage in hands-on maintenance, repair, and customization of firearms, performing tasks like disassembling components, cleaning parts, fitting new pieces, and refinishing stocks, all with basic tools in a home workshop setup.
Gunsmithing creates a flow state through sequential tasks that match your skill level, offering immediate feedback from successful repairs and installations, while also fostering a sense of accomplishment and community through shared experiences with fellow hobbyists.
You think gunsmithing is for someone with a dozen rifles and a specialized workshop. You picture a grizzled veteran, masterfully shaping metal in a tucked-away shop. That image hides the truth—this hobby is one of the most technically satisfying experiences you can have.
It's not about owning a lot of guns. It's about problem-solving. Think of a simple trigger job on a bolt-action rifle. Instead of blindly grinding, you're measuring pull weight, pinpointing friction spots, and adjusting precisely until it breaks clean.
It's not brute force. It's finesse. It's precision. More like tuning an instrument than fixing a truck, each adjustment is deliberate and thorough.
Next, let's talk tools and space. The starter list is more approachable than most think.
Handling a 1911 in your first session is nothing like watching an expert breeze through it. Stripping it down feels slow and uncertain as you second-guess every move. It looks so simple in videos, yet taking four times longer is typical for beginners.
Surprises everywhere. Springs scatter across the table. New terminology pops up that leaves you puzzled. Instructions assume you know things you don't.
Frustration is part of it. Expect it to be slow, and brace for moments of feeling out of your depth. Those who persist aren't the ones who breeze through challenges – they're the ones who realize that
the real learning is in the struggle.
Learn the exact part names for your specific model before starting. A Ruger 10/22 and an AR-15 don't share vocabulary.
Not knowing this could mean losing precious time figuring things out at the bench.
When to start: Early morning
Duration: 1.5 hours
Cost to try: $30
Success criteria: If you finished without damaging any parts, do session 2.
Holding parts by hand seems quick. But when punches slip, you'll leave unsightly scratches.
Always use a dedicated gunsmithing vice or action block for secure staking and drifting.
Steel punches seem right. Yet, using them on hardened roll pins deforms pin walls. They become a nightmare to remove.
Select the right punch for the job: brass or nylon for soft metals, roll-pin punches for roll pins.
The rush to reassemble can trip you up. Finish piecing it together and miss a trigger reset issue lurking in an upper.
Check each component separately – trigger group, extractor, safety – before full reassembly.
Your fingers can't gauge torque. Too loose, the scope shifts; too tight and you crack the rail.
Invest in an inch-pound torque wrench and rely on manufacturer specs for accuracy.
'Glock compatible' doesn't mean universal. Variations by generation and caliber result in wrong fits and failures.
Cross-check your pistol's details – generation, model, caliber – with the part's specifications first.
Most intense gunsmithing takes place in dedicated spaces. These include home workshops, specialized setups, or licensed gunsmith shops. Some mentors in these shops might take on apprentices.
If you lack a home setup, some gun ranges offer an alternative. On-site gunsmiths may allow you to observe or get hands-on experience during slow periods.
Search for your state's gunsmithing guild or city gun club armorer. These local groups often have networks that aren't publicly advertised.
Explore the American Gunsmithing Institute and the Gunsmith Guild directories for region-filtered member lists.
Find "gunsmithing [your state]" on Facebook Groups. They're active spaces where you can ask direct questions and get answers.
Reach out to the nearest NRA-affiliated club using the NRA club finder at nra.org. Many clubs offer armorer nights or host sessions with certified instructors.
Introducing yourself as a beginner can open doors. Saying, "I'm learning from scratch and willing to help in any way," is a practical approach that gets you real exposure.
This is the baseline – cleaning, diagnosing malfunctions, replacing worn parts. No fabrication or customization. You're just keeping guns functional and safe.
Perfect for those absolutely new to gunsmithing who want real skills without a five-figure toolset.
A basic armorer's kit runs $50–$150, the lowest entry cost of any variant here.
You're assembling a firearm from components, commonly AR-platform rifles and 1911 pistols.
Most hobbyists discover their passion here, as you see every system interact during assembly.
Best for those wanting to understand firearm mechanics, not just fix them.
Parts kits and a lower vise block setup can run $300–$800 before you have a finished firearm.
Focuses on shaping, fitting, and finishing wooden stocks – more like fine woodworking than mechanical work.
It's slower, meditative, and produces something beautiful.
Best for those who enjoy hand-tool woodworking or seek a craft with a tangible aesthetic payoff.
Cutting threads or modifying muzzle devices requires precision machining, usually with a lathe.
The margin for error is nearly zero, not ideal for beginners but satisfying for advanced users.
Best for machinists or engineers venturing into gunsmithing with existing metal-working skills.
A decent gunsmithing lathe starts around $1,500 used.
Focusing on trigger components, you'll fit, polish, and tune to reduce pull weight and improve consistency.
Popular among competitive shooters seeking a legal edge without buying new firearms.
Best for shooters already competing who know precisely what results they want.
Start with factory triggers before making changes – you need to know what "better" feels like first.
Programming lives in the same world — different mechanics, similar appeal.
If you want a related angle, AI Model Tinkering is the natural next stop.
If you want a related angle, Home Improvement is the natural next stop.
The real breakthrough in gunsmithing isn't about having the perfect tools.
Many beginners fixate on acquiring better files, punches, and fit kits. The tools aren't the bottleneck. It's learning to read metal.
Tactile diagnostic reading is the skill to master. This means figuring out fit problems by feel, witness marks, and how parts move before touching any tools.
Run a slide and notice where resistance spikes. Distinguish whether a trigger's gritty pull comes from sear geometry or spring tension – without a guess.
When you understand the language of metal, mistakes are minimized. Beginners often ruin parts by removing material in the wrong place.
Without this skill, each adjustment is just a risky guess with tools.
Next, we'll explore practical ways to build this crucial diagnostic skill.
Thirty days. Four focused sessions. That's the test. You'll get a real feel for the learning curve, handling tasks like disassembly, basic fitting, and maybe even a trigger job or stock inlet.
Constantly thinking about your next session shows more than enthusiasm—it's your mind viewing it as a skill puzzle worth solving. The next step is to get a parts kit and start intentional teardowns on a dedicated project gun.
If you finished all four and feel indifferent, the appeal might be in the idea of gunsmithing, not the bench work itself. Try two more sessions with a specific task, like fitting a new trigger. Test whether there's genuine interest or just initial allure.
For those who had to force themselves to show up by session three, that's a solid indication. Gunsmithing exposes you to technical and physical discomfort—precise fitting, eye strain. If it's not engaging yet, it likely never will be.
When you spot a gun and instinctively examine its action just to understand its mechanism, that's telling. It's this curiosity about how things work that separates lifelong tinkerers from those who stop at one class.
For ideas that take five minutes instead of five weeks, see things to do when you're bored.
Licensing requirements vary by location and depend on whether you're gunsmithing for personal use or commercial purposes. In the US, hobbyist gunsmithing on your own firearms typically doesn't require a federal license, but you should check your state and local laws, as some jurisdictions have stricter regulations. If you plan to work on others' firearms or sell modifications, you'll likely need a Federal Firearms License (FFL).
Initial costs can range from $500 to $2,000+ depending on your setup, as you'll need quality hand tools, specialized gunsmithing tools, a workbench, and safety equipment. Basic projects might use tools you already own, but precision work requires investment in items like files, punches, gauges, and possibly a small milling machine. Many beginners start small and gradually build their tool collection as they take on more complex projects.
You should have basic mechanical aptitude and comfort reading technical specifications and schematics. Prior experience with hand tools, metalworking, or mechanical assembly is helpful but not required—many gunsmithing skills are learned through practice and dedicated study. Understanding firearm safety fundamentals is essential before handling any weapons or parts.
Basic repairs and simple customizations can be learned in a few months with self-study and online resources, but becoming proficient typically takes 1–2 years of regular practice. Advanced work like barrel replacement or action refinishing may take years to master. Many people pursue formal gunsmithing courses (4 weeks to 2 years) to accelerate learning and gain professional credentials.
Gunsmithing carries inherent risks since you're working with weapons, but dangers are manageable with proper safety protocols, including unloading firearms, wearing protective equipment, and maintaining a clean workspace. The main hazards are hand injuries from tools and accidental discharge if firearms aren't handled correctly. Following established safety procedures and getting proper training significantly reduces these risks.
Beginners typically start with simple projects like cleaning, basic maintenance, adjusting sights, replacing stocks, or installing aftermarket grips and rails. Moving to intermediate work involves polishing, customizing triggers, and minor modifications that don't require specialized machining. As you gain skills and tools, you can progress to barrel replacements, action refinishing, and custom builds.