BoredomBusted — Find Your Next Favorite Thing To Do
Discover hobbies, activities, places, and ideas that spark joy. Whether you're looking for something creative, active, social, or relaxing, BoredomBusted helps you find your next favorite thing to do.
Browse our hobby guides, things-to-do collections, and place ideas to never be bored again.
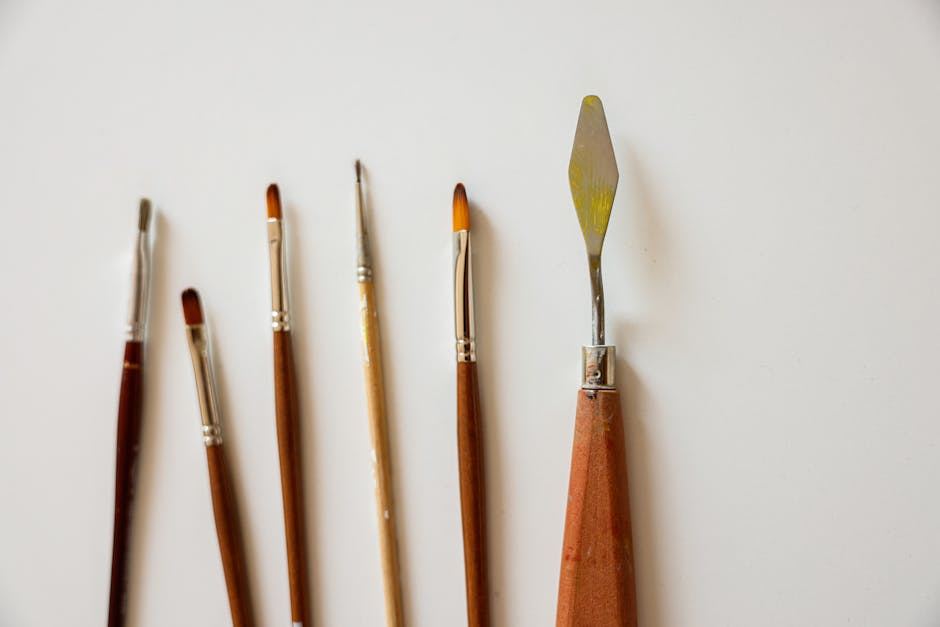
Discover the joys of oil painting with our beginner's guide! Learn essential techniques, materials, and tips to unleash your creativity. From color mixing to surface preparation, this comprehensive resource will help you master oil painting and elevate your artistic journey.
Most people think oil painting is the slow, forgiving medium where you can fix anything. That's half true. Oils do dry slowly — but that slowness is a double-edged thing that trips up almost every beginner in the same way.
Oil painting is one of the most technically layered mediums you can pick up. It's also one of the most rewarding — once you understand what it's actually asking of you.
Three things define oil painting technically — and none of them are about brushwork. They're about chemistry, time, and surface.
Fat over lean is a structural rule, not a suggestion. Each layer you apply must contain more oil than the one beneath it. Break that rule and your painting will crack as it cures — not in days, but in years.
Solvents and mediums change how paint behaves on contact. Thin your paint with too much solvent and you weaken the binder. Use too much oil and lower layers won't cure before upper ones trap them. Getting this balance takes real experience.
The canvas needs to be primed or your paint won't stick properly. Raw canvas wicks oil out of the paint and causes premature aging. Most pre-primed canvases are fine for beginners, but it's worth knowing why it matters.
Your first session will probably go like this: you squeeze out too much paint, the colors go muddy fast, and you spend 40 minutes trying to fix a section that would have been better left alone.
The thing that surprises most beginners is how physically resistant oil paint is. It doesn't flow like watercolor or bite like acrylics. It sits on the brush with real body, and moving it around the canvas takes more deliberate pressure than most people expect.
What beginners get wrong first: overworking wet paint. Because oils stay workable for hours, you keep going back in — blending, adjusting, smoothing — until the color turns to grey-brown mud. The fix is to mix more paint on the palette instead of on the canvas, and to lay strokes down with conviction.
Expect your first session to produce something rough. That's accurate, not discouraging. Oil painting has a real learning curve and the first few sessions are about getting the feel of the medium, not making a painting you'd hang.
Beginners think oil painting is about color. Working painters know it's about value — the relative lightness and darkness of every area in the painting.
A painting with correct values but wrong colors looks believable. A painting with correct colors but wrong values looks flat and broken. This is why squinting at your reference — which collapses color information and forces you to see only light and dark — is one of the most used tools by professional oil painters.
Practically, this means starting every painting by blocking in your darkest darks and lightest lights before touching mid-tones. It gives you the scaffolding everything else hangs on. Beginners who skip this step chase colors that don't relate to each other and wonder why the painting never looks right.
Try a full monochrome underpainting in raw umber before adding any color. It forces you to solve the value problem first — and it's the single exercise that accelerates beginners faster than anything else.
A student-grade paint set (Winton or Gamblin 1980), three or four hog hair brushes, a pad of canvas panels, a small bottle of odorless mineral spirits, and a stay-wet palette or a wooden palette. This gets you through the first months.
Artist-grade paints in a limited palette (titanium white, yellow ochre, burnt sienna, ultramarine blue, cadmium red or alizarin), a range of brush shapes, stretched canvases instead of panels, and a proper medium like Liquin or refined linseed oil. The jump to artist-grade paint makes a visible difference in color depth.
A full artist-grade palette with specialty colors, a tabletop easel or floor easel, larger canvases, a dedicated workspace with good ventilation, and possibly a lightbox or reference system. Ongoing costs are mostly paint and canvas — budget $30 to $60 a month if you're painting regularly.
Student-grade oil paints (6-color set): Winton or Gamblin 1980. Enough pigment quality to learn on without spending on colors you'll waste.
Hog hair brushes (flat and filbert, sizes 4, 6, 10): Stiff bristles move oil paint properly. Don't start with soft synthetic brushes — they won't give you the feedback you need.
Canvas panels (5-pack, 8x10 or 9x12): Cheaper and less precious than stretched canvas. You'll work more freely when you're not worried about wasting an expensive surface.
Odorless mineral spirits (small bottle): For thinning paint and cleaning brushes. Odorless versions are much safer for home studios.
A palette knife: For mixing colors on the palette. Mixing with your brush wears it out and muddies colors faster.
A floor easel: Useful, but canvas panels on a table work fine for learning. Buy this when you're working on larger pieces consistently.
Artist-grade individual tube colors: The quality jump is real, but you won't be ready to make use of it in the first few months. Get comfortable with mixing first.
Specialty mediums (Liquin, stand oil, alkyd): These matter once you're layering intentionally. For now, odorless mineral spirits is all you need.
Soft hair brushes (sable or synthetic): Great for detail and glazing work. Not useful until you have the fundamentals solid.
What you add to your paint matters as much as the paint itself. Beginners usually just thin with whatever solvent came with their kit, without understanding what it's actually doing to the paint film.
Solvent alone (mineral spirits or turpentine) thins paint but adds nothing — and used in excess, it strips the binder and creates a weak, matte layer that won't adhere properly. It's fine for early lean layers, but don't rely on it for everything.
Oil mediums (linseed, safflower, walnut) slow drying further and increase gloss. They're correct for later, fatter layers. Alkyd mediums like Liquin speed drying dramatically — useful when you want to layer without waiting days.
For beginners: start with odorless mineral spirits only, used sparingly. Once you're doing deliberate multi-session layering, add Liquin to your kit. That covers 90% of what you'll need for the first year.
A bad oil painting class wastes your time and your supplies. Here's what a good one looks like:
The instructor actually demonstrates technique in real time. Watching someone mix paint, load a brush, and lay a stroke tells you more than any verbal explanation.
The class covers fat over lean and layering explicitly. If these aren't part of the early curriculum, the instructor is skipping the structural foundation of the medium.
Class sizes are small enough for individual feedback. More than 10 to 12 students and you won't get the instructor's eye on your specific mistakes.
It includes at least one value-only exercise. A monochrome or limited-palette session early on shows you where a good instructor's priorities are.
The instructor paints themselves, regularly. Avoid instructors whose only credential is teaching. You want someone with an active practice.
If in-person classes aren't available, look for structured online courses with critique components. Browse the full creative hobbies list to see what other mediums have robust learning communities too.
Oil painting has a genuinely active online community, and finding other people working through the same problems accelerates your learning in ways solo practice can't.
Online: r/oilpainting on Reddit is active and welcoming to beginners — post your work and you'll get real, specific feedback. YouTube channels like Marco Bucci and Sinix Design cover fundamentals that apply directly to oils. The Virtual Art Academy community is worth joining if you want structured learning with peers.
In person: Local art centers and community colleges often run open studio sessions where you paint alongside other people without structured instruction. Life drawing groups — even though they're not oil-specific — build observational skills that carry directly into oil painting. Plein air groups are another option; painting outdoors with other oil painters is one of the fastest ways to improve.
Local art supply shops sometimes post notices for painting meetups and workshops. Worth checking the bulletin board next time you're picking up supplies.
Give it 30 sessions before you decide. Not 30 days — 30 actual painting sessions. Here's what you're looking for along the way.
By session 10: You can mix a color on the palette that roughly matches what you see in your reference. Your brushwork still feels clumsy but you've stopped fighting the paint's weight. You know what mud looks like before it fully happens.
By session 20: You've got a sense of when to put a stroke down and leave it. You've started a painting with a value block-in at least once. You're thinking about what layer comes next before you start the one you're on.
By session 30: You've completed at least one painting you'd show someone. Not because it's perfect — because it holds together as a whole. You understand why it works or why it doesn't.
Stop if: The slowness of the medium frustrates rather than relaxes you. If you need immediate results to stay engaged, oils will drain you. Acrylics or gouache might suit you better.
Keep going if: You find yourself squinting at the light on a coffee cup in the morning, mentally mapping the shadow edge against the highlight, wondering how you'd mix that exact warm tone on the rim.
Acrylic Painting for Beginners — if the slow drying of oils frustrates you, acrylics are the faster, more forgiving alternative worth trying first.
Watercolor Painting for Beginners — a completely different relationship with water, transparency, and control; worth understanding how it compares to oil's opacity.
Gouache Painting for Beginners — opaque like oils, water-soluble, and much faster to set up and clean up; a good companion medium for oil painters.
Charcoal Drawing for Beginners — the fastest way to build the value observation skills that oil painting demands; many oil painters treat charcoal as essential warmup practice.
Creative Hobbies List — if you're still figuring out which medium fits how you think, the full BB creative hobbies list covers everything from drawing to printmaking.
A basic starter kit with quality paints, brushes, canvas, and solvents typically costs $50–$150, depending on brand choices. You don't need expensive professional-grade materials initially; student-grade supplies work well for learning fundamentals. As you progress, you can invest in higher-quality materials.
Canvas, canvas boards, and wood panels are the most common surfaces for oil painting. Pre-stretched and pre-primed canvases are ideal for beginners since they're ready to use immediately. Avoid paper or fabric without proper priming, as oil paint requires a prepared surface to adhere correctly.
Most beginners can grasp fundamental techniques like brush control and basic color mixing within 2–4 weeks of regular practice. Developing confidence and creating finished pieces typically takes 2–3 months of consistent effort. Progress depends on how frequently you practice and your willingness to experiment.
Oil painting has a moderate learning curve—it's easier than some mediums like watercolor because oils are forgiving and blend easily. The main challenge for beginners is understanding drying times and managing solvents safely. With patience and practice, most people can produce satisfying results within their first month.
Use a palette (glass, ceramic, or disposable paper) and blend oils directly with a brush or palette knife. Start with small amounts of paint and gradually add more to avoid waste. Understanding primary colors and how to create secondaries will help you develop a strong foundation for color work.
Yes—oil paints and solvents release fumes, so work in a well-ventilated space with open windows or a fan running. A dedicated studio corner with cross-ventilation is ideal. Odorless solvents are available if ventilation is limited, though they still require some air circulation for safety.