BoredomBusted — Find Your Next Favorite Thing To Do
Discover hobbies, activities, places, and ideas that spark joy. Whether you're looking for something creative, active, social, or relaxing, BoredomBusted helps you find your next favorite thing to do.
Browse our hobby guides, things-to-do collections, and place ideas to never be bored again.
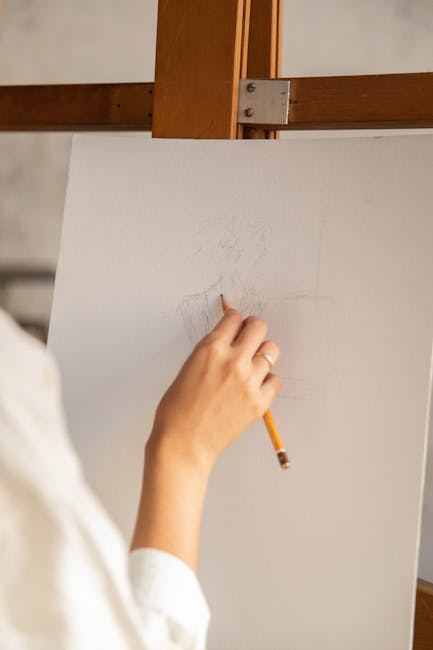
Unlock your artistic potential with our guide to gesture drawing for beginners! Learn essential techniques to capture the dynamic flow of human figures, avoid common mistakes, and explore various mediums. Enhance your skills and elevate your drawing practice today!
Most people think gesture drawing is just a warm-up — a few rushed scribbles before the "real" drawing starts. It's not. Gesture drawing is its own discipline, and the artists who do it well are solving a specific problem: how do you make a static mark on paper feel like it's mid-motion?
If you've ever looked at a figure drawing and felt like the person might actually move, that's gesture. It's a skill, and like every skill, it has mechanics you can learn.
From the outside, gesture drawing looks like fast, loose scribbling. But there are three real technical challenges underneath that casualness.
First: the line of action. Every strong gesture has a single dominant curve running through the entire body — from head to foot. Finding that curve before you put down a single body part is the fundamental move. Most beginners skip it and end up with stiff, segmented figures.
Second: construction versus observation. Gesture drawing is not copying what you see. It's interpreting what you see into simplified masses and rhythms. The model's shoulder might technically be at 40 degrees, but you draw it at 50 because that's what makes the pose read.
Third: time pressure as a tool, not a constraint. The 30-second or 2-minute timer isn't there to stress you out. It forces you to commit to only what matters. That constraint is the whole point.
You'll open a free reference site like Line of Action or SenshiStock, set the timer to 30 seconds, and the first pose will appear. You'll freeze for about 10 of those seconds, then frantically scratch some marks, and the pose will be gone before you've drawn a head.
That's normal. The surprise isn't the timer — it's realizing you don't yet have a system for where to start. Most beginners start with the head. That's the wrong instinct. Start with the spine curve.
By the end of a 20-minute session — maybe 15 to 20 poses — your hand will be looser than when you started. That looseness isn't sloppiness. That's your grip reflex unwinding, and it's exactly what's supposed to happen.
The most common first-session mistake: erasing. You don't have time, and the erasing habit is what gesture drawing is specifically designed to break. Commit to every line, wrong or not.
Here's the thing working artists understand that beginners don't: the torso is not a box. Beginners draw the ribcage and pelvis as two separate flat rectangles sitting on top of each other. That's why their figures look like mannequins.
The real move is tracking the opposing tilt between ribcage and pelvis — and drawing the C or S curve of the side of the torso that connects them. When the weight shifts to one leg, the ribcage tips one direction and the pelvis counter-tips the other. That opposing relationship is called "contrapposto," and it's where all the life in a figure actually lives.
Once you start seeing the compressed side versus the stretched side of every torso, you can't unsee it. Your gestures will start reading as human almost immediately.
A ballpoint pen and printer paper. Seriously. Gesture drawing doesn't care about materials — it cares about volume. Free reference sites like Line of Action (line-of-action.com) and SenshiStock on DeviantArt give you unlimited timed poses at no cost.
A sketchbook (Strathmore 400 series), a set of Staedtler or Faber-Castell graphite pencils in a few hardnesses, and a felt-tip pen for inking. A subscription to Proko, Ctrl+Paint, or New Masters Academy runs $10–$30/month and is worth it if you're doing this daily.
A drawing tablet (Wacom Intuus Small or Huion H610 Pro) opens up digital gesture practice in Procreate or Clip Studio Paint. Books like "Force" by Michael Mattesi and "Figure Drawing" by Andrew Loomis are one-time buys that pay back for years.
A medium-weight sketchbook (50–60 lb): Nothing fancy. You're going to fill it fast and not love half the pages. That's the point.
A ballpoint pen or HB pencil: Ballpoint is actually ideal for gesture because you can't erase it and it varies line weight with pressure. That's two gesture fundamentals enforced by the tool.
Timer or free timed reference site: Line of Action lets you set intervals, choose body parts (hands, faces, full figures), and track your session length. Free and sufficient for months.
Anatomy books and figure drawing courses: These are high-value — but only after you've done 20+ sessions and know what questions you're actually asking.
Drawing tablets: Great if you want to draw digitally, but they add a learning curve on top of gesture. Analog first.
Specialty paper (newsprint pads, toned paper): Nice to have once you know what you want from a drawing session. Overkill at the start.
Beginners almost always start with 5-minute poses. That sounds reasonable — more time, more detail, better drawing. The problem is that 5 minutes is long enough to start noodling but short enough that you don't actually finish anything. You get the worst of both worlds.
Start with 30-second or 1-minute poses and do a lot of them. Twenty 1-minute poses teaches you more than four 5-minute poses. The short interval forces you to identify the essential information immediately — spine curve, weight distribution, main shapes — and skip everything else.
Once you can consistently nail the line of action in 30 seconds, extend to 2 minutes and start adding torso and limb shapes. Work up to 5-minute poses only after the shorter intervals feel controlled, not frantic.
Not every figure drawing class is actually teaching gesture. Here's how to filter:
The instructor draws alongside you. Watching a working artist solve the same problem you're solving is worth ten lectures about technique.
They use timed poses with a live model or rotating reference. Static single-pose classes are useful, but they're not gesture practice. You want variety and time pressure.
They critique line of action specifically, not just overall "likeness" to the model. Ask this before you sign up.
Open figure drawing sessions are often better than structured classes for building raw mileage. Check local art schools, museums, and community centers — many run drop-in sessions for $10–20.
Online is legitimate here. Proko's YouTube channel alone will take you further than most studio courses. If you want to explore what else pairs well with gesture drawing, the BB creative hobbies list is a good place to find complementary disciplines.
Gesture drawing has a surprisingly active online community, mostly because the daily practice format makes it easy to share work regularly.
r/learnart and r/ArtFundamentals on Reddit are the most active figure drawing communities with regular critique threads. Post your gestures and ask specifically about line of action — you'll get useful responses.
Proko on YouTube is the single best free resource for figure drawing fundamentals. His gesture series is where most serious self-taught artists start.
Discord servers like the official Ctrl+Paint Discord and community servers around New Masters Academy run daily gesture challenges and live critique streams.
In person, open figure drawing sessions at local art centers are where you'll find the most committed practitioners. The people who show up weekly to draw from life are usually serious and generous with feedback.
Give it 30 sessions before you decide anything. Here's what those sessions should look like:
Sessions 1–10: Everything feels too fast. Your figures are disconnected — head here, arms somewhere else. Focus on drawing one continuous line of action before anything else. Don't worry about likeness.
Sessions 11–20: The timer stops feeling like an enemy. You'll start consistently nailing the line of action and placing the torso. Some poses will surprise you — they'll look alive. Notice what you did differently on those ones.
Sessions 21–30: You'll have a personal vocabulary — the shortcuts and habits that are distinctly yours. Figures will have weight. The ribcage/pelvis relationship will be automatic. You'll start extending your intervals because 30 seconds feels workable.
Stop if 30 sessions in, you're still dreading the timer and every session feels like a chore with no payoff. The timer should feel purposeful, not punishing, by then.
Keep going if you're watching people walk down the street and mentally tracing the curve of their spine, noticing which hip is higher, seeing weight shift in the way someone leans against a wall. When the practice follows you out of the sketchbook, it's already yours.
Pencil Sketching for Beginners — if gesture drawing is making you want to slow down and sketch in detail, this is the natural next step.
Charcoal Drawing for Beginners — charcoal is one of the best mediums for gesture because it's fast, expressive, and easy to build tonal mass quickly.
Ink Drawing for Beginners — ink rewards the commitment gesture drawing teaches. No erasing, no second-guessing. A natural companion practice.
Digital Drawing for Beginners — once you have the fundamentals, digital tools open up gesture practice with reference apps, layers, and undo — useful for studying your own linework.
BB Creative Hobbies List — a full directory of creative hobbies if you want to see what else might fit alongside or after gesture drawing.
Gesture drawing is a technique focused on capturing the essence, movement, and energy of a subject in quick, loose sketches—usually completed in seconds to a few minutes. Unlike detailed figure drawing or portraiture, gesture drawing prioritizes dynamic flow and expression over anatomical precision, making it ideal for understanding how bodies move and balance.
Most beginners see noticeable progress within 2–4 weeks of consistent daily practice, with significant skill improvement visible within 2–3 months. The key is practicing regularly—even 15–30 minutes daily is more effective than occasional longer sessions.
You'll need basic supplies: paper (sketch pad or regular printer paper), a pencil or charcoal stick, and an eraser. Many artists also use ink pens, markers, or colored pencils for variation. There's no need to invest in expensive supplies—the fundamentals matter far more than the tools.
Gesture drawing is one of the most beginner-friendly drawing practices because it doesn't require perfect technique or anatomical knowledge—mistakes are actually part of the learning process. The loose, fast-paced nature reduces pressure and makes it feel more experimental than technical.
Free online resources include YouTube gesture drawing video tutorials (with timed intervals), websites like Line of Action and Quickposes that provide reference images, and social media platforms with figure reference libraries. You can also practice with family members, mirrors for self-study, or even observation from daily life.
Gesture drawing can be learned completely free using materials you likely already have at home and online resources. While paid courses, books, and workshops exist ($15–$50+), they're optional—many excellent free tutorials and reference sites are available to get you started.