BoredomBusted — Find Your Next Favorite Thing To Do
Discover hobbies, activities, places, and ideas that spark joy. Whether you're looking for something creative, active, social, or relaxing, BoredomBusted helps you find your next favorite thing to do.
Browse our hobby guides, things-to-do collections, and place ideas to never be bored again.
Unlock your creativity with our beginner's guide to Conté drawing! Discover essential techniques and tips to master stunning cell art. Elevate your skills and create captivating artwork with depth and dimension using this versatile medium. Start your artistic journey today!
Most people see a Conté drawing and assume it was made with charcoal or chalk. It wasn't. Conté is its own thing — denser than charcoal, smoother than pastel, and far more controllable than either. That combination is exactly why portrait artists have used it for centuries and why it's still worth your time now.
The catch is that Conté rewards patience with paper and punishes anyone who skips the fundamentals. This guide gives you what you actually need to start — no fluff, no art-school intimidation.
Conté sticks are made from compressed pigment, clay, and a small amount of wax or oil binder. That formula puts them in a middle zone — they grip paper tooth like charcoal but resist smearing like a wax pencil. The result is a mark that blends beautifully up to a point, then locks in.
There are three technical realities that shape everything you do with Conté. First, pressure is permanent. Unlike charcoal, heavy Conté marks can't be fully lifted — the pigment embeds in the paper fibers. Second, Conté is highly sensitive to paper texture. The same stick behaves like two different materials on smooth bristol versus rough cartridge paper. Third, Conté's color range is narrow by design — traditionally black, white, sanguine (red-brown), and bistre (warm gray) — and that constraint forces you to think about value relationships rather than color matching.
Those three constraints are not weaknesses. They're the framework that makes Conté drawing coherent.
You'll pick up a sanguine stick, make a mark, and immediately want to blend it. Do that. Then you'll press harder trying to darken a shadow area — and that's where most beginners run into trouble. The mark won't blend out anymore. That's your first lesson about working light to dark and saving pressure for the very end.
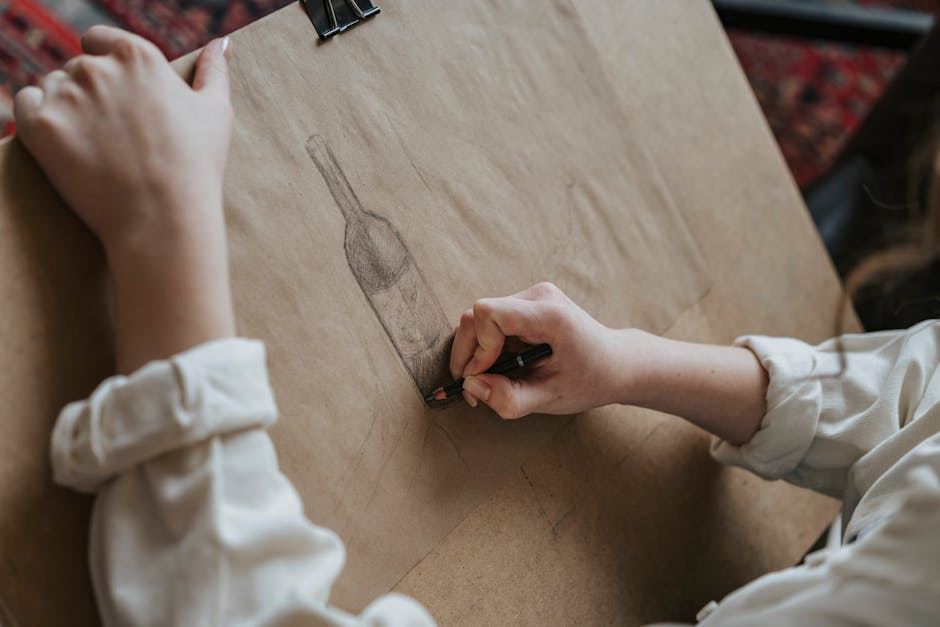
A good first session looks like this: pick a simple object — a mug, a boot, a crumpled cloth — and spend 45 minutes just blocking in the major shadow shapes with the side of the stick. No outlines. No detail. Just big tonal areas. Most beginners start with line because that's what pencil trained them to do, but Conté rewards mass-first thinking.
The surprise most people report: Conté drawings start looking 'done' faster than expected. That's both a gift and a trap. The temptation to overwork a drawing that already reads well will ruin more Conté pieces than bad technique ever will.
The insight that working Conté artists share — and beginners almost always miss — is that the paper itself is your mid-tone. Skilled Conté artists choose a toned paper (warm gray, brown, or ochre) so that the unworked surface already represents the middle value of the subject. They then work in two directions: dark marks for shadows, white Conté for highlights. Nothing in between gets touched.
This three-value system — dark pigment, paper tone, white highlight — is why classical Conté portraits look so luminous. The white marks aren't drawn over a completed dark drawing. They're placed strategically on bare paper from the very beginning of the session, mapped out before most of the dark work is done.
If you're working on white paper and adding white Conté highlights at the end, you've misunderstood how the medium works. Start with toned paper and the whole system clicks.
A set of four classic Conté sticks (black, white, sanguine, bistre) runs about $10–$15. Add a pad of toned newsprint or kraft paper and a kneaded eraser and you're drawing for under $30. This setup is completely legitimate — the limitation is paper quality, not your ability to learn.
Move to quality toned drawing paper (Canson Mi-Teintes or Strathmore 400 Toned), add Conté pencils for detail work, and pick up a fixative spray. You're now working on surfaces that hold blends properly and can be sprayed to preserve finished pieces. Budget around $60–$80 total.
At this tier you're adding a full range of Conté pencils for fine detail, premium paper by the sheet (Fabriano Tiziano is a favorite), a proper drawing board, and good lighting. Framing materials become a consideration once you have pieces worth keeping. Ongoing costs are low — a set of sticks lasts a long time.
Conté à Paris 4-stick set (black, white, sanguine, bistre) — the standard starting point, around $10–$12
Toned paper pad (gray or brown, 60–80 lb) — Canson Mi-Teintes pads or basic kraft paper both work to start
Kneaded eraser — lifts light marks without abrading the paper surface
Blending stump (tortillon) — for softening edges and blending tonal areas cleanly
Conté pencils — great for fine detail work, but useless before you've built core stick technique
Fixative spray — essential eventually, but unnecessary until you have finished pieces worth preserving
Extended color sets — the four classic colors are enough for 90% of what you'll do in the first year
Drawing board with clips — a hardback sketchbook or a piece of MDF does the same job while you're learning
Most beginners reach for white cartridge paper because that's what they drew on as kids. It's the wrong call for Conté. White paper removes your mid-tone and forces you to render every value relationship from scratch — that's a much harder problem than it sounds.
The second mistake is paper that's too smooth. Conté needs tooth — a slightly textured surface that grabs the pigment. On glossy or hot-pressed paper, Conté slides around and refuses to blend properly. You want cold-pressed or laid paper with a visible grain.
Start with a warm gray or brown toned paper — Canson Mi-Teintes in 'Bisque,' 'Tobacco,' or 'Steel Gray' are all solid choices. The color of the paper becomes part of your drawing. That's not a compromise; that's how the medium is meant to work.
Conté-specific classes are rare, but figure drawing and classical drawing workshops almost always include Conté work. Here's how to filter the good ones from the generic:
The instructor draws in front of you. Demonstration is non-negotiable for a physical medium where technique is visible.
Toned paper is provided or specified. Any class handing out white copy paper for Conté work doesn't understand the medium.
Value structure is taught before rendering. If the curriculum jumps to texture and detail in session one, skip it.
Class size is small. Drawing is a hands-on correction sport. More than 12 students per instructor and feedback becomes generic.
The instructor can point to actual work they've made. Credentials matter less than a visible body of finished Conté drawings.
Local art centers, community colleges, and atelier programs are the best places to look. See the BB creative hobbies list for broader ideas on where to find instruction across different mediums.
Conté doesn't have its own dedicated corner of the internet, but the communities that cover it are active and genuinely helpful. r/learnart and r/drawing both see regular Conté work posted for critique. The feedback culture in those spaces is blunt but fair — exactly what you need early on.
For video instruction, search for 'classical drawing Conté' or 'atelier Conté portrait' on YouTube. Channels focused on atelier-style drawing — Watts Atelier, Proko, and New Masters Academy — all publish Conté content alongside their broader figure drawing curricula. These are more useful than generic 'Conté for beginners' tutorials.
In person, life drawing sessions are where Conté artists congregate. Most cities have open figure drawing nights at art centers or studios — no instruction, just drawing from a model alongside other artists. Bring your sticks and your toned paper and you'll meet people immediately.
Give it 30 sessions before you decide. Here's what those sessions should look like:
Sessions 1–10: You're fighting the medium. Marks go too dark too fast, blending feels unpredictable, and nothing looks the way you pictured it. That's expected. Focus only on blocking in large shadow shapes with the side of the stick.
Sessions 11–20: You start understanding pressure. You learn to work lighter longer, and your three-value system (dark, paper, white) begins to feel intentional rather than accidental. At least one piece surprises you.
Sessions 21–30: You're choosing toned paper deliberately, thinking about where the highlights land before the dark marks go down, and starting to develop a consistent approach. Your still life drawings have volume. You've stopped overworking them.
Stop if the physical limitation of four colors feels like a cage rather than a challenge, or if you're consistently frustrated that mistakes can't be undone. Conté punishes rather than rewards that mindset.
Keep going if you find yourself noticing the tonal structure of faces and objects when you're away from your sketchpad — squinting at shadows in a coffee shop, mentally mapping where the highlights would land on someone's cheekbone. Conté has its hooks in you.
Charcoal Drawing for Beginners — the closest cousin to Conté in terms of technique and surface sensitivity
Pastel Drawing for Beginners — if Conté's limited palette frustrates you, pastel's full color range may be a better fit
Pencil Sketching for Beginners — strong foundation for the value-structure thinking Conté demands
Ink Drawing for Beginners — another medium where marks are permanent and pressure decisions are final
BB Creative Hobbies List — if drawing in general isn't clicking, here's the full range of creative directions worth considering
Conté drawing uses hard, pigmented sticks made from compressed powdered graphite or chalk that create richer, darker tones than standard pencils. The medium allows for blending, layering, and creating dramatic contrasts, making it ideal for expressive artwork with depth and dimension.
A basic starter kit with assorted Conté sticks, blending stumps, and paper typically costs $15–$35, making it an affordable entry point. You can begin with just a few essential sticks and add specialty materials as your skills progress.
No, Conté drawing is beginner-friendly because the medium naturally encourages blending and forgiving mark-making. With basic technique practice around shading, pressure control, and composition, most beginners see results within their first few sessions.
A small study or sketch can take 30 minutes to an hour, while a detailed finished piece typically requires 2–8 hours depending on size and complexity. The time varies based on your desired level of detail and blending.
Medium-weight drawing paper, toned paper, or specification papers with slight texture work best because they hold the pigment and allow for blending. Avoid smooth paper as it doesn't grip the Conté stick effectively.
Yes, Conté drawings should be sealed with fixative spray after completion to prevent smudging and protect the work. Allow the piece to dry fully before applying fixative, and store finished work in a cool, dry place away from direct sunlight.