BoredomBusted — Find Your Next Favorite Thing To Do
Discover hobbies, activities, places, and ideas that spark joy. Whether you're looking for something creative, active, social, or relaxing, BoredomBusted helps you find your next favorite thing to do.
Browse our hobby guides, things-to-do collections, and place ideas to never be bored again.
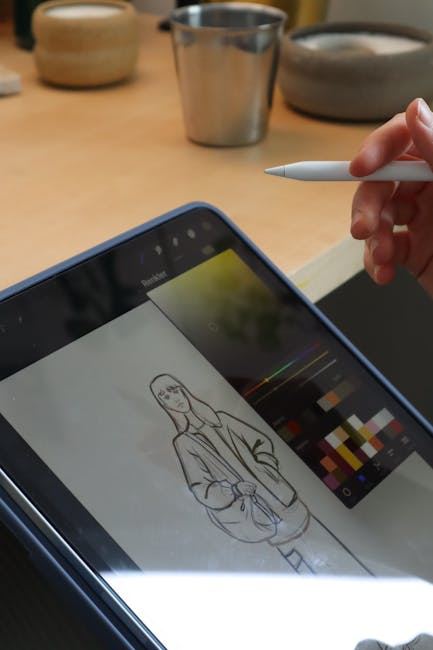
Discover the exciting world of digital drawing with our ultimate guide for beginners! Learn about essential tools, techniques, and tips to unleash your creativity. Embrace the accessibility and endless possibilities of digital art, and start your artistic journey today!
Most people assume digital drawing is easier than traditional drawing because you can hit Ctrl+Z. That's like saying driving is easier than walking because you have a steering wheel. The undo button doesn't draw anything for you — and the gap between what you see on screen and what your hand is doing will humble you fast.
Digital drawing is a real skill that takes real time to build. But once it clicks, you get a working environment that no physical medium can match for flexibility, speed, and creative range. Here's what you actually need to know before you start.
The setup alone involves hardware, software, drivers, and settings — and every one of those layers can introduce friction before you've drawn a single line. Most beginners spend their first week troubleshooting pen pressure instead of making art.
The three core technical challenges are hand-eye disconnection, brush engine settings, and layer management. On a non-display tablet, your hand moves somewhere your eyes aren't looking — that coordination takes weeks to build. Brush engines in apps like Procreate or Krita have dozens of variables (opacity, flow, taper, jitter), and the defaults don't always behave like anything in the physical world.
Layers are powerful and disorienting in equal measure. They become a source of constant confusion until you develop a consistent naming and grouping habit. Knowing these friction points exist means you won't mistake early struggle for a lack of talent.
Your first session will likely go like this: you open your software, pick a brush that looks cool, try to draw a circle, and it looks wrong in a way you can't explain. The line wobbles differently than it does on paper, and your muscle memory keeps fighting you.
What surprises most beginners is the surface texture. A tablet screen or the glass of an iPad has almost no tooth — your stylus glides in a way that feels nothing like pencil on paper. Your lines will overshoot. Your curves will flatten. This is normal and it passes, but it takes longer than most people expect.
The biggest first-session mistake is opening a blank canvas and trying to make something finished. Spend your first two or three sessions filling pages with lines, curves, and basic shapes at different speeds. You're training your hand, not making art yet. That distinction matters.
Open software, choose one brush
Don't browse the brush library for 20 minutes. Pick the default pencil or pen and stay on it for the whole session.
Draw lines and basic shapes only
Horizontal lines, vertical lines, diagonals, circles, ellipses. Fast strokes and slow ones. Fill the whole canvas.
Notice where your hand fights you
Overshooting on long strokes, wobble on slow curves, disconnection between eye and hand — these are the specific things you're here to fix.
Adjust your tablet angle and zoom
Most people draw at 100% zoom when they should be zoomed in further. And most tablets should be tilted slightly, not flat on the desk.
End the session by saving a brush settings file
Even if you didn't touch the settings. Get into the habit of knowing where your presets live.
Every serious digital drawing app has a line stabilizer — a setting that smooths your stroke as you draw, correcting for hand tremor and slow muscle response. Most beginners either never find it or crank it to maximum and wonder why their lines feel mechanical and dead.
The actual skill is using stabilization selectively: high for clean linework, zero or low for loose sketching and textured brushwork. When working artists talk about a brush feeling "right," they're usually describing a stabilization level they've tuned to match the specific task — not a magic brush preset.
The other dividing line is understanding that digital drawing rewards working in passes. Rough sketch on one layer, refined lines on another, color blocking underneath everything. Artists who treat digital like paper — one layer, draw it once — hit a ceiling fast. The layered, iterative approach is what the medium is actually built for.
If you already own an Android phone or tablet, download Sketchbook (free) and use a cheap stylus to start. It's not ideal, but it's enough to figure out if the medium interests you. A Wacom Intuos Small runs around $80 and works with free software like Krita — that's a legitimate starting setup.
A mid-size Wacom Intuos or Huion Kamvas tablet in the $150–$250 range gives you enough drawing area to work comfortably. Pair it with Krita (free) or Clip Studio Paint (around $50 one-time or $25/year) and you have a professional-quality setup. iPad users should budget for an Apple Pencil — second-gen runs about $130 on top of the iPad cost.
A display tablet (Huion Kamvas 16, Wacom Cintiq 16) in the $350–$650 range removes the hand-eye disconnect entirely and feels closest to drawing on paper. iPad Pro with Apple Pencil plus Procreate ($13 one-time) is a comparable all-in-one option that many professional illustrators use daily. At this level, the hardware stops being the bottleneck.
Graphics tablet or iPad — The single non-negotiable. Even the most basic pressure-sensitive tablet is miles ahead of a mouse.
Drawing software — Krita (free, Windows/Mac/Linux), Procreate ($13, iPad only), or Clip Studio Paint. Start with one and stay with it.
Tablet glove — A two-finger artist glove ($8–$15) reduces friction and palm rejection issues. Cheap and genuinely useful from day one.
Replacement nibs — Your stylus nib wears down. Most tablets include extras; keep them somewhere you'll actually find them.
Display tablet — Genuinely helpful but not necessary to start. Plenty of professional artists work exclusively on non-display tablets.
Premium brush packs — The default brushes in Krita, Procreate, and Clip Studio are more than enough for your first year. Buying brush packs before you know what you actually need is a displacement activity.
Adobe Creative Cloud — Photoshop is powerful but expensive for a beginner. The free and low-cost alternatives are legitimately better for learning.
Textured screen protector — Some iPad artists swear by paper-feel screen protectors. They do add drag. Try the bare glass first — you may not miss the texture at all.
The choice between a standalone graphics tablet and an iPad isn't about which is better — it's about how you actually work. Most beginners default to iPad because it feels intuitive and portable, without realizing the tradeoffs.
iPad with Procreate is unbeatable for portability and ease of use, but you're locked into Apple's ecosystem and a single app's feature set. A Wacom or Huion tablet connected to a desktop gives you access to every piece of professional software — Krita, Clip Studio, Photoshop, Affinity — on a larger screen with more processing power.
If animation, concept art, or eventually working professionally interests you, the desktop route gives you more runway. The wrong move is buying both before you know what you need — pick one path, spend 30 sessions on it, and then decide. The skills transfer completely between platforms.
Most digital drawing instruction happens online, which means the quality gap between a great course and a waste of time is enormous. The filter that actually works is checking whether the instructor shows their process, not just the finished result.
They show their layer stack and settings mid-drawing — If an instructor never shows you what's happening under the hood, you're watching a performance, not a lesson.
They teach fundamentals before software features — Line confidence, value, form. Any course that leads with "here's how to use the fill tool" is teaching you buttons, not drawing.
The course includes exercises you can actually do — Not just demos to watch. If you finish a video with nothing drawn, the structure isn't working for you.
There's a community component — Discord, forum, or critique thread — Getting feedback on your work from other learners is worth more than any lecture. Courses with active communities are significantly better for progress.
The instructor works in the same software you're using — A Procreate-specific course is genuinely less useful if you're on Krita. Interface familiarity matters when you're still building basic habits.
Digital drawing has one of the most active online communities of any creative hobby. The problem isn't finding people — it's finding the right corner of it. Instagram and TikTok are full of finished work that can wreck your motivation if you compare it to your week-three sketches.
For actual learning and feedback, the better places are r/learnart and r/ArtFundamentals on Reddit, the Ctrl+Paint forum, and Discord servers tied to specific software communities (Krita Artists, Procreate Community). These spaces are genuinely oriented toward process and improvement, not showing off.
In-person options exist too — community college continuing education programs, local art meetups, and Drawspace or Skillshare cohorts with live critique sessions. The in-person feedback loop is faster. If there's a figure drawing session near you that accepts digital artists, go.
Give it 30 sessions before you decide. Not 30 hours — 30 actual sit-down sessions where you drew something, even if it was just exercises. The early sessions are deceptive because the hardware friction masks whether you actually like drawing.
By session 10, you should feel noticeably more comfortable with your tablet. Lines that used to wobble should start to land more confidently. If you still feel like you're fighting the hardware at session 10, revisit your stabilizer settings and tablet angle — don't assume it's a talent problem.
By session 20, you should have a layer workflow that feels natural — rough sketch, refined pass, color underneath. If you're still drawing everything on a single layer, go back and practice the multi-layer approach deliberately. It unlocks the actual power of the medium.
By session 30, you should have finished at least one piece you'd actually share — even if it's rough. The test isn't whether it's good. The test is whether you wanted to finish it.
Stop if you dread opening the software and sessions feel like chores. Digital drawing should feel frustrating sometimes, but the frustration should sit on top of genuine curiosity about what you're going to make next.
Keep going if you find yourself sketching thumbnails on paper during the day — rough ideas for things you want to try in your next session. When the art starts living in your head between sessions, it has its hooks in you.
What Is Karate? — If you're drawn to physical discipline alongside your creative practice, this beginner's guide to Karate covers what to expect from your first class.
What Is Judo? — A breakdown of one of the most accessible martial arts for complete beginners, covering costs, gear, and what the first session actually feels like.
What Is Muay Thai? — The complete beginner's guide to the art of eight limbs, including honest cost breakdowns and what separates good gyms from bad ones.
What Is Tai Chi? — If you're looking for a slower, more meditative physical practice to balance the focused nature of digital work, this guide to Tai Chi is worth reading.
Full List of Martial Arts on BoredomBusted — Browse every martial art covered on BB, from striking arts to grappling to weapons-based disciplines.
At minimum, you'll need a computer or tablet, drawing software (free options like Krita or Procreate Lite are beginner-friendly), and ideally a stylus or pen tablet for better control. Many beginners start with just a mouse or trackpad to test if they enjoy digital art before investing in a graphics tablet.
You can start completely free using software like Krita, GIMP, or Autodesk Sketchbook, paired with a mouse or basic stylus. If you want premium tools, expect $50–$150 for entry-level graphics tablets and $10–$20 monthly for apps like Procreate or Adobe Creative Suite.
Digital drawing has a gentler learning curve than traditional art since you can undo mistakes instantly and adjust pressure/opacity easily. The main challenge is getting comfortable with the stylus-to-screen coordination, which typically takes a few weeks of practice to feel natural.
You can create recognizable art in a few weeks of regular practice, but developing a personal style and strong fundamentals usually takes 3–6 months of consistent work. Progress depends on your practice frequency and willingness to study composition, color theory, and anatomy.
Yes, you can absolutely start with a mouse or trackpad and learn the software basics, but a graphics tablet (even a budget one) makes the experience much more intuitive and enjoyable. Many artists recommend upgrading to a pen tablet once you're sure digital art interests you.
Raster drawing works with pixels and is better for painting, sketching, and realistic art (think Photoshop), while vector uses mathematical curves and is ideal for logos and clean illustrations (think Adobe Illustrator). Most beginners start with raster since it's more forgiving and closer to traditional drawing.