BoredomBusted — Find Your Next Favorite Thing To Do
Discover hobbies, activities, places, and ideas that spark joy. Whether you're looking for something creative, active, social, or relaxing, BoredomBusted helps you find your next favorite thing to do.
Browse our hobby guides, things-to-do collections, and place ideas to never be bored again.
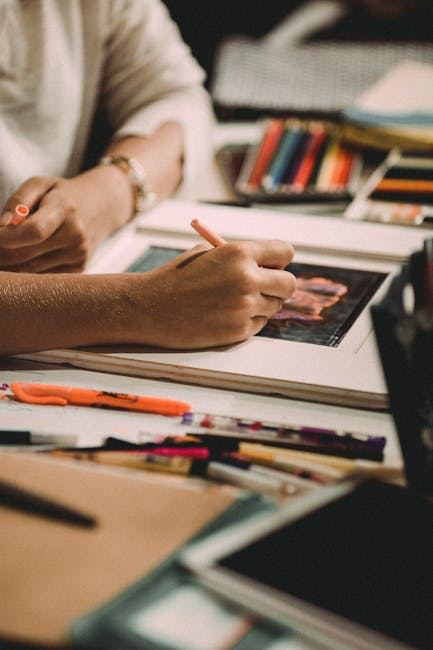
Discover the vibrant world of colored pencil art! This post explores essential techniques like layering, shading, and blending to enhance your drawings. Whether you're a beginner or seasoned artist, learn how to choose the right pencils and unlock your creativity for stunning, expressive artwork.
Colored pencils look like the most approachable art supply on earth. You've been using them since you were five. How complicated could it really be?
Pretty complicated, it turns out. Colored pencil art is a slow, deliberate medium that rewards patience and punishes rushing. The artists whose work stops you mid-scroll have usually spent dozens of hours on a single piece. But if that sounds appealing rather than exhausting, you might be exactly the right person for this.
The medium has three core challenges that catch beginners off guard. First, colored pencils are subtractive in reverse — you build color by layering light to dark, and you can't erase your way back to white once you've committed. Second, the waxy binder in most pencils has a ceiling called wax bloom, where over-layered areas get a cloudy film that dulls your colors. Third, the paper does most of the heavy lifting — a bad paper choice will fight you at every stage.
Unlike paint, you can't premix colors on a palette. Every color relationship has to be built directly on the paper, one layer at a time. That constraint is what makes colored pencil work look almost photographic when done well — and what makes the learning curve steeper than most people expect.
Most beginners pick a reference photo, sketch it lightly in pencil, then start filling in color — and immediately wonder why it looks flat. That's because they're pressing too hard too soon and skipping the early light layers that create depth.
A better first session: draw a simple object with strong light and shadow — an apple, a glass, a single piece of fruit. Apply your lightest color with barely any pressure. Add the next layer slightly darker. Keep building. The big surprise for most beginners is how long this takes, and how good it starts to look once they stop rushing.
The thing beginners consistently get wrong is treating colored pencils like markers — heavy, fast strokes meant to fill space. The actual technique is closer to whisper strokes that accumulate. The more you try to force color quickly, the worse the result.
Here's the insight that changes everything: the color you see in a finished colored pencil drawing is almost never the color of any single pencil. It's the optical mix of four, six, sometimes ten layers sitting on top of each other. A vivid green shadow in a leaf might be built from yellow, blue, brown, and a touch of red.
Working artists think in terms of color temperature before they think about hue. Shadows are cool or warm relative to the light source — not just darker. A shadow on a red apple isn't just dark red. It has blue or purple in it. Once you start building shadow colors this way, your work looks dimensional instead of flat.
The second part of this insight: burnishing at the end changes the game. Once you've built up enough layers, pressing hard with a colorless blender or white pencil fuses those layers into a dense, luminous surface. That's how people achieve that almost-painted look with dry pencils.
A 24-count set of Prismacolor Premier pencils runs around $20–$25. Pair that with a pad of smooth Bristol paper and you have everything you need to find out if this medium suits you. Skip the Crayola or off-brand sets — the pigment quality gap is real and will frustrate you before you figure out whether the issue is you or the pencils.
A 48- or 72-count set of Prismacolor Premier or Faber-Castell Polychromos gives you enough color range to work seriously. Add a colorless blender pencil, a quality electric sharpener (a dull tip ruins layering), and better paper options like Stonehenge or Canson XL. Budget $100–$130 total.
Caran d'Ache Luminance or Pablo sets are the gold standard — oil-based, archival, and extraordinarily lightfast. A 76-count Luminance set runs around $200 on its own. Add specialty papers like Uart sanded pastel paper (which holds far more layers than regular paper) and solvent-based blending supplies. This is where serious collectors shop.
Prismacolor Premier 24-set — Soft wax core, beginner-friendly blending, widely available. The starting point most instructors recommend.
Smooth Bristol paper (vellum or plate finish) — Takes multiple layers without tooth breakdown. 70 lb or heavier.
Colorless blender pencil — Prismacolor makes one for $3. Non-negotiable for burnishing.
Electric pencil sharpener — A sharp tip is critical for detail work and clean layering. Manual sharpeners break soft leads constantly.
Odorless mineral spirits or Gamsol — Solvents dissolve the waxy binder and create paint-like blending. Powerful but needs ventilation and intentional technique.
Uart sanded paper — Holds 20+ layers and produces extraordinary depth. But it chews through pencils fast — expensive until you're sure you need it.
Caran d'Ache Luminance or Polychromos sets — Exceptional pencils. But at $2–$4 per pencil, spend a year with Prismacolor first.
Lightbox — Useful for transferring underdrawings cleanly without heavy graphite marks. Worth it eventually, not urgent.
Most beginners grab whatever colored pencils look good on the shelf without realizing there are two fundamentally different binder types — and they behave very differently under your hand.
Wax-based pencils (Prismacolor Premier, Derwent Coloursoft) are soft, blend easily, and respond beautifully to burnishing. The downside: wax bloom. Over-layered wax-based work develops a chalky film after a few days. Fix it by wiping lightly with a soft cloth or spraying with fixative.
Oil-based pencils (Faber-Castell Polychromos, Caran d'Ache Luminance) hold a sharper point, layer more densely, don't bloom, and are more lightfast. They're harder to blend by hand but respond well to solvents. Most professional illustrators working for print or archival purposes prefer oil-based.
Many serious artists use both — wax-based for initial soft layers, oil-based on top for detail and density. Start with one type so you understand its behavior before mixing.
Colored pencil instruction is everywhere online, but quality varies wildly. Use this checklist before committing to a course or instructor:
They show their layering process in real time. Finished work reveals nothing about how to get there. Look for instructors who film themselves working, not just explaining.
They talk about paper and pencil type, not just technique. Instruction that ignores supplies is incomplete. How the technique behaves depends entirely on what you're using.
The instructor makes beginner mistakes visible and fixable. Good teachers don't just show the path — they show the ditches.
Projects are completable in a single sitting or two. Early wins matter. A beginner class that assigns a 40-hour portrait as the first project is setting you up to quit.
In-person options exist in most cities through local art centers and community colleges. A live instructor watching your hand pressure and stroke direction is worth months of solo YouTube watching. Check BB's creative hobbies list for more ways to explore art forms and find your fit.
The colored pencil community is unusually generous with process photos and technique breakdowns. r/ColoredPencils on Reddit is active and helpful — people post work-in-progress shots and answer specific technique questions without condescension.
On YouTube, Ann Kullberg and Kirsty Partridge both have extensive free libraries covering layering, blending, and specific subjects like portraits and animals. Both are working artists who show their actual process.
The Colored Pencil Society of America (CPSA) runs local chapters and an annual international exhibition. It's a legitimate entry point into the serious end of the medium — juried shows, workshops, and a community of artists who treat colored pencil as a fine art medium, not a craft supply.
Give it 30 sessions before you decide. Here's what to watch for:
Sessions 1–10: You're figuring out pressure control and why your colors look flat. Complete small, simple objects — a single piece of fruit, a shell, a shoe. Focus on light versus shadow, not detail.
Sessions 11–20: Layering starts to click. You'll complete one piece and immediately see what you'd do differently. That's the medium working on you. Try your first burnished area and compare it to the un-burnished sections next to it.
Sessions 21–30: You're making intentional color choices instead of reaching for the obvious hue. You understand what your paper can hold. You've started thinking about what you want to draw next before the current piece is finished.
Stop if the slow pace genuinely drains you — if you finish a session feeling like you wasted an afternoon rather than made something. Colored pencil is not a fast medium and it never becomes one.
Keep going if you find yourself noticing the shadow colors in everyday objects — looking at a piece of fruit and thinking about which pencils you'd need to capture it, or picking up a cup and actually studying how the light wraps around it. That's the medium living in you between sessions.
Pencil Sketching for Beginners — Covers the foundational drawing skills that transfer directly to colored pencil work.
Charcoal Drawing for Beginners — Another dry medium focused on value and tone — a useful companion discipline for understanding light and shadow.
Watercolor Painting for Beginners — If you want more color range and faster coverage, watercolor is the natural step sideways from colored pencil.
Pastel Drawing for Beginners — Pastels share the layering logic of colored pencils but work faster and bolder — worth exploring once you understand how dry pigment behaves.
Creative Hobbies List — Not sure colored pencil is the right medium? Browse the full list of creative hobbies to find what fits.
You can start with a basic set of 24–48 colored pencils for $15–40, which is sufficient for learning fundamental techniques. As you progress, professional-grade pencils range from $1–3 per pencil, so investing in a larger collection happens gradually based on your needs and budget.
Layering involves applying multiple colors on top of each other to build depth and create new hues through transparency, while blending is the process of smoothing and merging colors together to create seamless transitions. Both techniques work together to achieve vibrant, expressive results in your drawings.
Basic techniques like shading and layering can be grasped in a few weeks of regular practice, but developing realistic blending and mastery typically requires 2–6 months of consistent effort. Your timeline depends on how frequently you practice and your prior drawing experience.
Yes—beginners can produce impressive results quickly by mastering key techniques like color selection, layering, and shading, even with mid-range pencils. The quality of your work depends more on technique and practice than on expensive supplies.
Heavyweight paper with a slight texture (like 140 lb cold-pressed watercolor paper or dedicated colored pencil paper) holds more layers and prevents wax buildup. Avoid thin or glossy paper, as it can't support multiple pencil applications and produces muddy colors.
Start with light layers and gradually build color intensity, avoid over-blending which mixes colors too much, and strategically use white pencils to brighten highlights and enhance vibrancy. Limiting your color palette to complementary shades also helps maintain clarity and expression.