BoredomBusted — Find Your Next Favorite Thing To Do
Discover hobbies, activities, places, and ideas that spark joy. Whether you're looking for something creative, active, social, or relaxing, BoredomBusted helps you find your next favorite thing to do.
Browse our hobby guides, things-to-do collections, and place ideas to never be bored again.
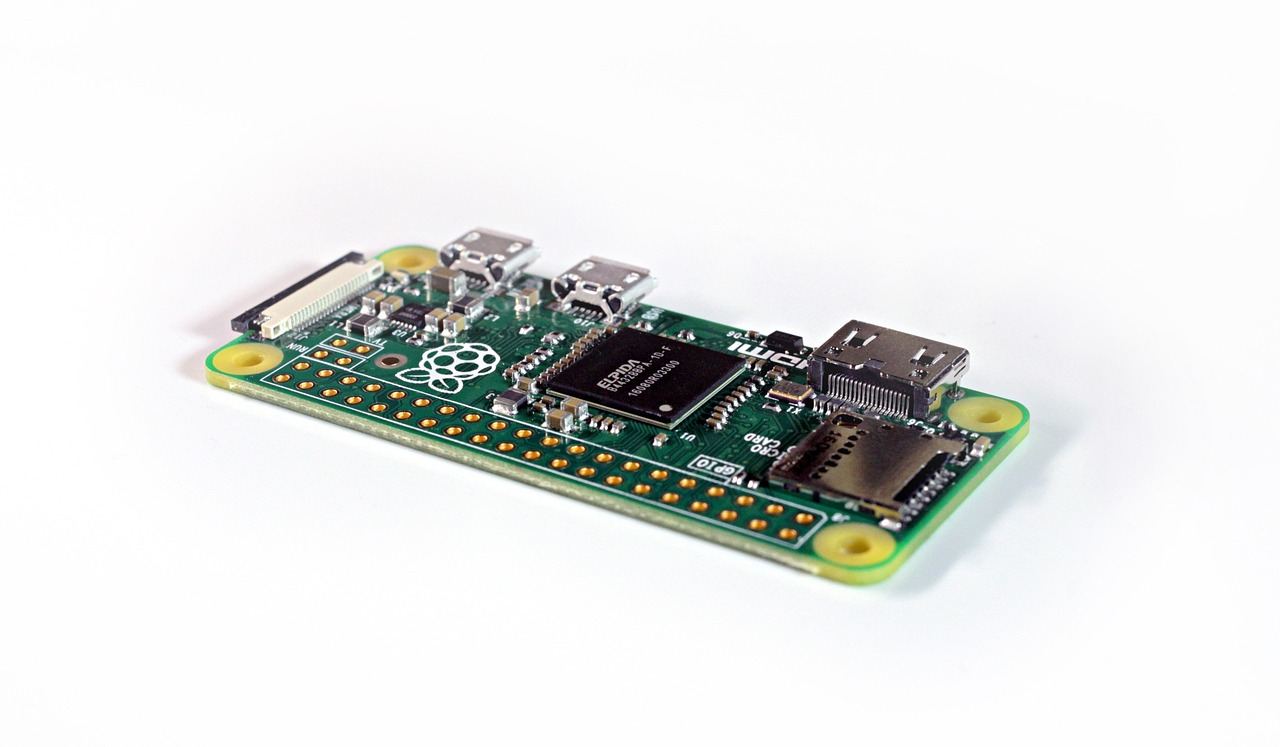
Raspberry Pi projects can lead to a flow state not through simplicity, but by challenging you with ever-escalating complexity that enhances creativity.
Getting started with Raspberry Pi projects as a beginner opens up a world of possibilities, allowing you to create innovative tech solutions with a small, versatile computer. Raspberry Pi is a credit-card-sized computer that runs Linux and connects to real-world hardware through programmable pins.
You build things with it – retro game consoles, home automation systems, security cameras – by writing code that controls physical components.
Unlike app development, your software does something you can touch.
In Raspberry Pi projects, you engage in hands-on assembly and programming of a compact computer to create devices like media servers or retro gaming consoles, involving tasks like wiring components, typing terminal commands, and debugging code.
Raspberry Pi projects induce a flow state through escalating complexity, providing rapid skill feedback as you troubleshoot issues and refine designs, fostering a sense of accomplishment and creative expression through continuous customization and community interaction.
You think Raspberry Pi is a coding project for people who already know how to code. You're picturing a terminal window, a blinking cursor, and someone who already knows what they're doing.
It's not just a digital puzzle, it's a hands-on adventure where you build real, tangible things in just an afternoon. Most beginner projects rely on pre-written code you simply configure.Problem-solving and systems thinking matter here, not syntax memorization.
The community has already solved your first fifteen problems.
Every error message you'll encounter has a forum thread with the answer, often from years ago.
Picture this: a first-timer with zero coding background transforms an old monitor, a $15 Pi Zero, and a free image file into a dedicated retro gaming console in about two hours.
No code, just configuration. Curiosity and a USB controller.
The real entry point isn't skill – it's having a project you actually care about finishing.
That's exactly where the next section starts.
Starting with a Raspberry Pi isn't as smooth as a polished YouTube video. The reality is a mess of wires and commands. Things won't go as planned right away.
After a few hours, your achievement might be a single blinking LED. Terms like GPIO will feel foreign, leaving you puzzled.
In the first week, simply installing the Raspberry Pi OS is a project in itself. You'll spend most of your time formatting an SD card and figuring out your first SSH connection.
A small wiring mistake will consume hours of debugging in the second week.
Finally, in week three, you'll experience a success. Whether it's a blinking light or a temperature readout, it feels amazing.
You'll start your second project without finishing the first by the fourth week. This mix of projects is typical for Pi builders.
The challenge is not just about technical skill with Raspberry Pi. It's about adapting to a $35 Linux computer's quirks, not just plugging and playing.
Save yourself time by noting down your Pi's IP address. Losing it leads to unnecessary stress when the address changes, while your Pi remains perfectly fine.
When to start: Morning
Duration: 1 hour
Cost to try: $10
Success criteria: If you boot the Pi to a first Raspberry Pi OS desktop or login prompt on the monitor, do session 2.
Rushing to buy the Pi 5 seems logical. Newer means better, right? But beginners often get stuck with too much power and no plan.
Focus on your project needs instead. Start with a Pi Zero 2 W or Pi 4. Your project dictates the board, not the other way around.
Mistaking a generic USB charger for a proper 3A supply is common. They look alike, deceiving many beginners.
Opt for the official Raspberry Pi power adapter. Undervoltage causes freezes that mimic software issues, wasting days of pointless debugging.
A sudden power cut can corrupt your Pi's filesystem. One day it just won't boot, and you're left confused.
Always shut down with `sudo shutdown -h now` and maintain a clean backup image on your computer from the start.
Commands from outdated tutorials can conflict. A script meant for Bullseye might wreak havoc on Bookworm.
Review the comments or repository issues before running scripts older than 18 months.
With 40 pins that look similar, it's easy to choose the wrong one. This mistake can fry your components.
Open pinout.xyz every time you handle GPIO. Even experienced makers do this to protect their hardware.
Raspberry Pi projects are perfect for home setups—your desk, kitchen table, or a corner of the garage. But that's just the start.
For more serious collaboration, explore a makerspace, hackerspace, or public library maker lab in your area.
Introduce yourself with: "I just got my first Pi – I haven't built anything yet." This will connect you with someone eager to help you start, offer spare components, and guide you with their experience.
Transform a Pi into your home's command center. Control lights, thermostats, and sensors from one dashboard.
Impact your day-to-day life. It's not just tech on a shelf.
Home Assistant is free, but expect to spend $50–$150 on smart gadgets.
Load RetroPie on a Pi and emulate dozens of classic consoles like NES and PlayStation 1.
Immediate fun for beginners. Setup is easy, with tons of community support.
Expect to spend $80–$100 for a Pi, case, and controllers.
Use a Pi as a network ad blocker at the DNS level. It quietly blocks ads for every device at home.
For those who get networking basics. It's straightforward, but not everyone loves command lines.
A Pi Zero W handles this well for around $15.
Wire sensors to the Pi for a hands-on weather station. Track temperature, humidity, air pressure, and more.
Get hands-on with hardware. This isn't just software – it's your gateway to electronics.
Connect a Pi 4 to your TV for a media server using Kodi or Plex. It's cheap, quiet, and low-power.
Simple and effective. No need for deep coding skills.
Cost is around $60, less than two months of streaming fees.
If this resonates, Home Improvement explores a similar direction.
If you want a related angle, Circuit Building is the natural next stop.
If this resonates, Engine Rebuilding explores a similar direction.
Most beginners spend months searching for the right project, gathering parts, and watching tutorials.
The real obstacle isn't a lack of inspiration – it's not being able to read an error message and know exactly where to go next.
Systematic debugging through process of elimination is key. It's about pinpointing whether your problem is in the hardware, wiring, or code before making changes.
Not 'Googling the error.' Not 'trying stuff.' You form a hypothesis, test one variable, rule it out or confirm, and then proceed.
Can you spot the fault layer? If so, a broken project becomes a solvable puzzle. Without this skill,
every failure sends you spiraling through forums, changing five things at once, and learning nothing.
With it, you stop needing tutorials to hold your hand, because you trust yourself to figure out the unfamiliar.
This approach sets the stage for mastering complex projects.
Engage in 8 sessions over a 30-day period, about twice a week. Initial sessions are largely setup and troubleshooting; the real fun starts after you pass those hurdles.
If you're eager for the next project before finishing the current one, that's a strong sign. It's not just interest; it's the pull of creation. Dive into intermediate projects and consider learning basic Python to enhance your skills.
If projects functioned but didn't thrill you, this may point to external tutorials lacking personal relevance. Give it another two weeks focusing strictly on personal passion projects you want to exist.
If working with the terminal feels punishing and waiting for scripts is intolerable, accept that the technical process isn't for you. Some enjoy the concept but not the execution. A clean answer, not a flaw.
Finding yourself thinking about new automations during a TV show is key. You're not just enthusiastic about electronics; your mind is actively seeking out small-scale fixes. That lingering background thought proves an authentic connection.
Raspberry Pi Projects is one path among many — browse the full hobbies list to weigh it against the rest.
If nothing here clicks, our guide to what to do when bored covers shorter, lower-commitment options.
A basic Raspberry Pi board costs $25–$75 depending on the model, and most beginner projects require an additional $50–$200 for components like sensors, cables, and power supplies. Many entry-level projects like media centers or retro gaming setups can be completed for under $150 total. Costs scale up with complexity, but Raspberry Pi is one of the most affordable ways to learn embedded systems and IoT.
No—many beginner-friendly projects use visual block-based coding or simple Python scripts with tutorials that guide you step-by-step. However, learning basic programming concepts (especially Python) will unlock more complex and creative projects. Most hobbyists pick up coding skills naturally as they build, starting simple and progressing as confidence grows.
Popular starter projects include LED blink circuits, weather stations, retro game emulators (RetroPie), and home automation basics like smart lights or plant watering systems. These projects teach core concepts—GPIO control, sensors, networking—without requiring advanced electronics knowledge. Tutorial communities and pre-built kits make these projects very approachable for complete newcomers.
Simple projects like blinking LEDs or setting up a media center take 1–3 hours, while intermediate projects like weather stations or home automation hubs typically require 5–15 hours over a few days or weeks. Complex projects like custom robots or full smart home systems can take 20+ hours spread across multiple months. Time varies greatly based on your familiarity with electronics and your attention to detail.
The Pi 5 and Pi 4 are the latest, fastest models with more RAM and USB ports, suitable for demanding projects; the Pi Zero is tiny and ultra-cheap ($5–$15) for minimalist builds; and older models like Pi 3 work fine for most educational projects. For beginners, a Pi 4 or Pi 5 strikes a good balance of power, compatibility, and available tutorials. Your choice depends on project complexity and budget.
Yes—Raspberry Pi is one of the best platforms for learning IoT fundamentals because it teaches both hardware (sensors, networking) and software (Python, databases, APIs) in real-world contexts. You can build genuinely useful systems like smart thermostats, security cameras, or device monitoring dashboards that integrate with your home. Many professional IoT engineers started with Raspberry Pi hobby projects.