BoredomBusted — Find Your Next Favorite Thing To Do
Discover hobbies, activities, places, and ideas that spark joy. Whether you're looking for something creative, active, social, or relaxing, BoredomBusted helps you find your next favorite thing to do.
Browse our hobby guides, things-to-do collections, and place ideas to never be bored again.
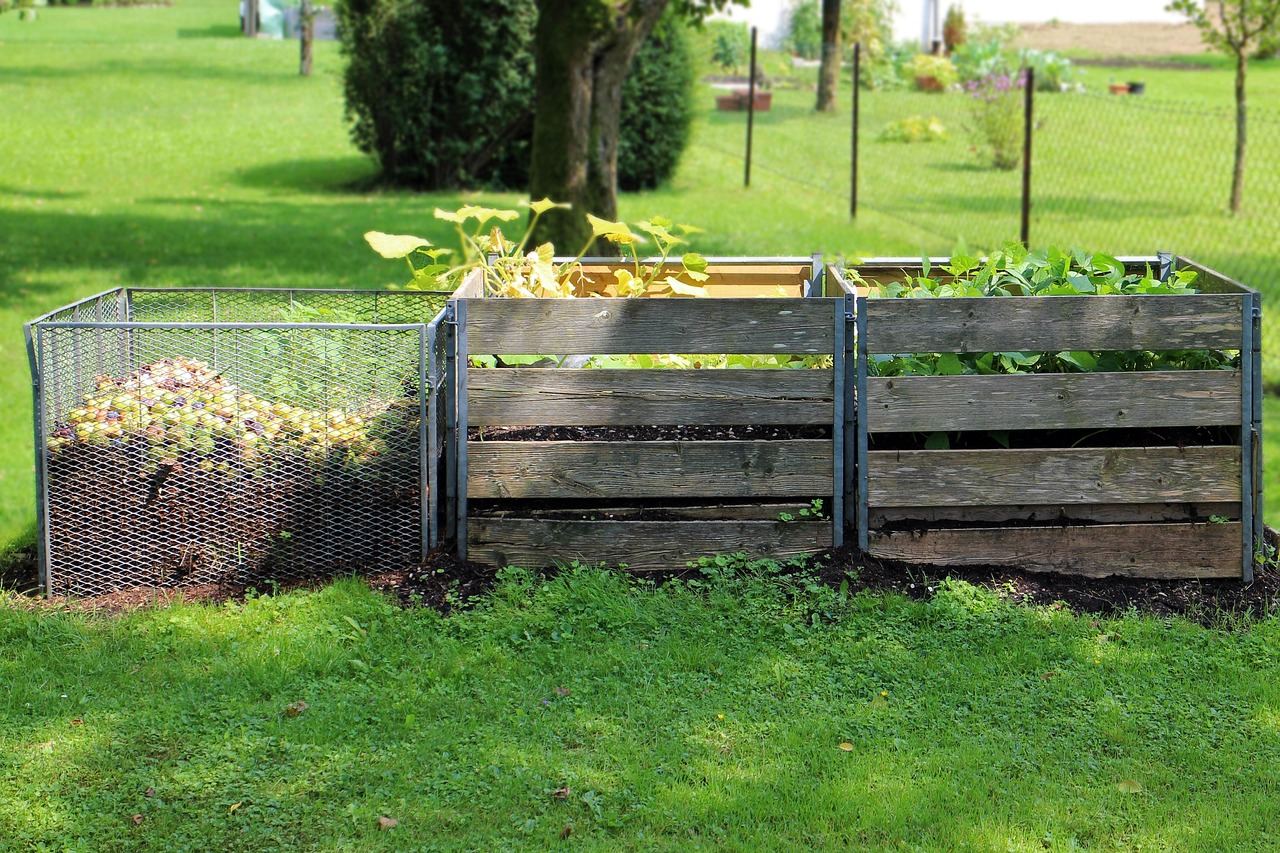
Composting isn’t just a smelly pile; it's a dynamic microbiology experiment where the right carbon-to-nitrogen balance can achieve remarkable temperatures and speeds.
Learning composting as a beginner is a rewarding way to transform food scraps and yard waste into nutrient-rich fertilizer for your garden. Through natural microbial decomposition.
You manage the conditions – moisture, airflow, carbon-to-nitrogen ratio – and biology does the rest.
Unlike gardening, the output is the point – you're not growing something, you're building the foundation everything else grows in.
Composting involves physically collecting kitchen scraps and yard waste, sorting and shredding them for faster decomposition, layering them in a compost bin, and actively turning the pile every 1-2 weeks to aerate it and monitor moisture levels. Hobbyists also experiment with unconventional additions like hair or fabric scraps, burying them under layers and checking back periodically for readines…
Engaging in composting creates a sense of accomplishment through tangible results as you nurture organic material into usable compost, providing both immediate feedback and a connection to environmental sustainability that combats feelings of numbness or restlessness.
You think composting is a smelly bin that produces dirt anyone could buy for $4.
A glorified trash pile with extra steps isn't composting. What most people miss is that composting is a living system you're actually managing – and that changes everything about why it's interesting.
You're not just rotting food; you're feeding a vibrant ecosystem. This ecosystem responds to what you give it, influences how wet the pile is, and how much air circulates.
Ratios matter. Too much nitrogen and it smells like ammonia; too little moisture and it won't break down.
A compost pile reaching 140°F is creating its own heat, bringing an aspect of microbiology into your own backyard. Error is growth here.
A well-managed pile can turn kitchen scraps into compost in just 6–8 weeks. Ignore it, and a year later, you have smelly mush and no knowledge.
Now you're curious about what you actually need to get started.
Watching videos on composting makes it seem effortless. You expect to just pile things up and get dirt. But the reality is that you become unexpectedly invested in what is, technically, a slow rot project.
Initially, you'll have a vague idea of what qualifies as "food scraps." You might feel guilty about the bin smell and be unsure if your compost is progressing at all. You'll find yourself checking it like it owes you something.
Eventually, you'll know your pile's temperature by touch. You'll start recognizing good versus bad smells and might even get excited about cardboard.
At first, you'll add scraps, cover them, and feel unsure if you've done it right. Nothing will seem to change, and you may wonder if your pile is broken. Then, you'll spot your first real heat or white mycelium threads. This is the moment many people quit before reaching, but it's a breakthrough. Finally, the bottom layer's texture will shift, and you'll unconsciously start thinking in terms of brown-to-green ratios.
It's not that composting becomes exciting quickly. The feedback loop is slow, so by the time it hits, you've already learned to notice and care about it.
Your carbon-to-nitrogen ratio is more crucial than your effort level. If your pile isn't heating up, you likely have too many browns. Add some fresh grass clippings or coffee grounds, and check back in 24 hours.
When to start: Early morning
Duration: 1.5 hours
Cost to try: $20
Success criteria: If you can build a layered pile that covers all kitchen scraps with 4–8 inches of yard waste and leaves it evenly moist, do session 2.
Kitchen scraps are the easiest place to start composting. They're visible and satisfying to throw in. But when you only use greens, you end up with wet, smelly sludge. That happens because without airflow, nothing breaks down properly.
Balance your pile with browns. Match each bucket of kitchen waste with torn cardboard, dry leaves, or shredded paper bags.
A dry compost pile can be deceiving. It may look finished, but it's just paused. That's because dry compost stops breaking down.
Check moisture by squeezing a handful. It should feel like a wrung-out sponge. If it feels dusty, add water gradually while turning the pile.
Avocado skins and whole eggshells can linger for a year in your pile. Large vegetable stalks also take forever to break down. Size and shape slow decomposition.
Chop or crush everything to fist-size or smaller. Microbes need more surface area to effectively break down waste.
Beginners often feel accomplished after turning the pile once. Then they wait, thinking their job is done. Without regular turning, composting only happens at the surface. The center remains untouched.
Turn the pile every one to two weeks. Set a reminder to move outside material to the center.
Throwing out meat and cooked food feels wasteful. And technically, they're organic. But this mistake attracts rats and creates foul anaerobic pockets, turning compost into a smelly mess.
Avoid these items unless you're managing a hot system. Keep your pile more controlled by composting only raw materials.
Composting can start right at home in your backyard, balcony, or even a community garden plot. Some cities offer drop-off composting sites where you can experience the process hands-on before setting up your own system.
A quick Google search of 'community composting [your city]' reveals local programs faster than any other method.
Let others know you're a beginner without a setup yet — often, they will offer a system tour and some compost to help you start.
Compost enthusiasts love sharing what they know. Show curiosity, and you might leave with more tips than you expected.
Hot composting is about managing heat, moisture, and airflow. It breaks down materials in 4–8 weeks, not months. You're running a system, not just a pile. Frequent turning and specific temperature targets keep it active. Perfect for those with a lot of organic waste who enjoy being hands-on. A compost thermometer, costing $15–$25, is the only special tool you'll need.
Cold composting requires almost no effort or management, but it's very slow. Pile up your scraps, add occasionally, and wait six to twelve months. Ideal for beginners, renters, or anyone who wants compost eventually without much thought.
Vermicomposting uses worms, specifically red wigglers, to turn scraps into highly effective castings. Little space needed, as it can be done indoors or out in a bin. Best for apartment dwellers or those without outdoor room. A starter worm bin costs $40–$80, but you can DIY one for under $20.
Bokashi uses inoculated bran to ferment food waste, taking care of items like meat and dairy. Perfect for households wanting to compost beyond just fruits and vegetables. Bokashi bran comes at an ongoing cost, around $15–$20 per bag.
Trench composting involves burying scraps directly in the garden. No bins or turning needed, and it leaves no finished product to manage. Ideal for gardeners who prefer a simple, no-maintenance approach.
For something adjacent, see Birding.
Some of the same instincts show up in Bass Fishing — worth a look if this clicked.
If you want a related angle, Astronomy is the natural next stop.
Most beginners focus on adding things—coffee grounds, egg shells, the perfect ratio. That's not the lever. The lever is learning to read your pile.
*Sensory diagnosis* is the essential skill—using smell, texture, and temperature to assess what your pile needs before it stalls.
Not checking a chart. Not following a schedule. Reading the actual pile in front of you and responding to what it's telling you right now.
With sensory diagnosis, you prevent issues like ammonia stink or slimy clumps before they spoil your compost. Without this, it's just guesswork. With it, you catch a nitrogen spike days early or see that your pile is drying out before you lose a week.
Composting thrives on a balance of neglect and patience. Too much or too little and you're likely to feel frustrated.
Commit to 8 check-ins over 30 days – roughly twice a week. That's it. Show up, add material, turn the pile, observe. Eight visits offer enough time to witness initial decomposition and determine if the process suits you.
If you catch yourself saving vegetable scraps without thinking, or peeking at the pile on off-days, the habit's growing on you. Dive deeper by starting a second bin or exploring hot composting methods.
If the sessions felt unremarkable, and nothing stirred interest, the reward cycle might be leisurely for your taste right now. Consider extending your trial another month. Sometimes the breakthrough moment is seeing the effect of your first batch of compost on plants.
If irritation grew with each session, with the smell and routine wearing thin, that's your answer. Composting doesn't become more thrilling; it remains constant. This may indicate it's not the hobby for you.
Feel annoyed when you throw food scraps in the trash?
That low-level irritation is a strong instinct towards composting. If it's present naturally, composting aligns with your values.
For ideas that take five minutes instead of five weeks, see things to do when you're bored.
Finished compost typically takes 2–6 months in an active compost bin with regular turning, or 6–12 months in a passive pile. The timeline depends on temperature, moisture, materials, and how often you turn it. Faster methods like hot composting (with ideal conditions) can produce usable compost in 6–8 weeks.
You can compost fruit and vegetable scraps, coffee grounds, eggshells, yard waste, leaves, and paper products. Avoid meat, dairy, oils, diseased plants, and pet waste, as these attract pests or introduce pathogens. A balanced mix of 'green' materials (nitrogen-rich) and 'brown' materials (carbon-rich) speeds decomposition.
You can start with just a pile in your yard, but a compost bin, tumbler, or designated area keeps it organized and pest-free. Entry-level bins range from $30–$100, while premium tumblers cost $150–$300. Even a simple DIY bin made from pallets or wire works well for beginners.
Composting is beginner-friendly—it's hard to fail since decomposition happens naturally. The main skill is maintaining the right moisture (like a wrung-out sponge) and occasionally mixing materials, though even neglected piles eventually break down. Most people see results within a few months with minimal effort.
A compost bin needs just 2–3 square feet, making it ideal for small yards, patios, or even balconies. If you prefer a pile system, 3×3 feet is a good starting size. Space requirements are minimal, so apartment dwellers can use compact containers or vermicomposting setups.
Compost is decomposed organic matter rich in nutrients and microbes, while potting soil is a growing medium mix that includes peat, bark, and other components. You can use finished compost to amend garden soil or blend it into potting soil, but potting soil is sterilized for indoor plants and seeds. Homemade compost is perfect for outdoor gardens and vegetable beds.