BoredomBusted — Find Your Next Favorite Thing To Do
Discover hobbies, activities, places, and ideas that spark joy. Whether you're looking for something creative, active, social, or relaxing, BoredomBusted helps you find your next favorite thing to do.
Browse our hobby guides, things-to-do collections, and place ideas to never be bored again.
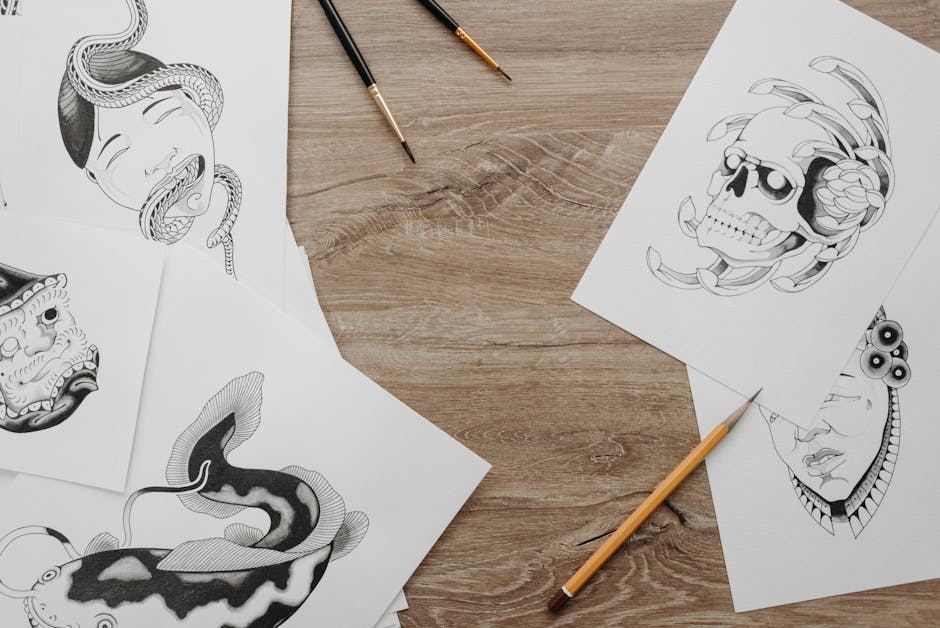
Unlock your creativity with our complete beginner's guide to ink drawing! Discover essential techniques, materials, and step-by-step instructions to create stunning artwork. Whether for fun or professional aspirations, immerse yourself in the versatile world of ink and express your imagination on paper.
Most people think ink drawing is just drawing, but in pen. It's not. Ink is permanent, it bleeds, it pools, and it dries exactly the way it wants to — not the way you planned. That's what makes it interesting.
The medium forces a kind of commitment that pencil doesn't. Every mark you make is a decision. Once you make peace with that, ink drawing becomes one of the most satisfying things you can do with a few dollars and an hour.
Finished ink drawings look effortless. They're not. There are three technical realities that catch beginners off guard, and knowing them upfront saves a lot of frustration.
Ink has no take-backs. There's no erasing, no blending over a mistake, no undoing a line that went wrong. You either plan your marks or you learn to work with your errors — and most experienced ink artists do both.
Pressure control is everything. With a brush pen or dip pen, the weight you put on the nib directly controls line width. A hairline and a thick stroke can come from the same tool — but only if your hand knows what it's doing.
Paper matters more than the pen. Put the wrong ink on the wrong paper and your lines feather, bleed, or pill. The surface you choose shapes every mark before you even touch it.
Your first session will probably be about 45 minutes of drawing something simple — a cup, a plant, a shoe — with a fineliner. You'll start confidently, make a line you hate, and then spend the rest of the session figuring out how to work around it.
The surprise for most beginners is how much the drawing improves after the mistake. Ink forces you to commit to a direction and keep going, and the results often look more confident than anything you'd produce in pencil while second-guessing every line.
What most beginners get wrong first: they move too slow. A hesitant, stop-start line looks exactly like what it is — uncertain. Ink rewards a single fluid stroke more than five careful ones that try to trace the same path.
The thing working ink artists understand that beginners don't: you build value and form entirely through mark density, not through tone. Ink is binary — it's either on the page or it's not. So shadow isn't darker ink, it's more ink per square inch.
The skill is knowing how far apart to space your marks. Widely spaced hatching reads as light. Tight, overlapping cross-hatching reads as deep shadow. The transition between them — and how smoothly you navigate it — is what separates a flat drawing from one that has genuine depth.
This is also why stippling is harder than it looks. Dots seem random, but their spacing encodes every tonal shift in the image. Get the spacing wrong and the whole drawing goes flat. Get it right and the result looks almost photographic.
A Staedtler or Sakura Pigma Micron fineliner set (3 nib sizes), a basic sketchbook with 90gsm+ paper, and you're working. Fineliners are forgiving, consistent, and cheap to replace. This is genuinely enough to find out if ink drawing is for you.
Add a brush pen (Pentel Pocket Brush is the standard recommendation), a bottle of India ink, and a dip pen with a few interchangeable nibs. You can now vary line weight dramatically, experiment with washes, and start understanding what different tools do differently.
Quality drawing paper pads (Strathmore 300 or 400 series), a range of dip pen nibs (mapping, crow quill, spoon), premium inks from Sumi or Higgins, and possibly a lightbox for transferring pencil sketches cleanly before inking. At this level, your tools stop being a limitation.
Pigma Micron fineliners (0.3, 0.5, 0.8) — Waterproof, consistent, and available everywhere. The industry standard for a reason.
90gsm+ sketchbook — Anything lighter and ink will bleed through. Leuchtturm1917 and Strathmore both work well at entry price.
A mechanical pencil for underdrawing — You'll sketch lightly first and ink over it. The pencil lines erase cleanly once the ink dries.
Dip pens and nib sets — Beautiful tools with a steep learning curve. Nibs catch on paper, ink blobs unexpectedly. Learn control on fineliners first.
Colored inks — Fun, but most aren't lightfast. Spend your early sessions mastering black and white. Color adds complexity before you need it.
Lightbox — Genuinely useful once you're doing finished work from sketches. Not where you start.
Most beginners either buy a single cheap ballpoint pen or go straight to a dip pen because they look impressive. Both are the wrong call. The ballpoint won't teach you anything about ink behavior, and the dip pen will frustrate you before you've learned what good marks feel like.
Start with fineliners in at least three nib sizes. Having a thin (0.3mm), medium (0.5mm), and thick (0.8mm) pen teaches you about line weight variation without requiring any pressure control. That's a real skill you're building — not a compromise.
Once you're intentionally choosing which nib to reach for — and why — that's the moment to try a brush pen. The Pentel Pocket Brush is the benchmark. It rewards what you've already learned and opens up a completely different expressive range.
A lot of ink drawing instruction online is either too abstract or too focused on one specific style. Here's what to look for before you commit time or money to a class:
The instructor shows their process in real time — not just finished work. You need to see how they handle mistakes and pacing.
It covers mark-making explicitly — hatching, stippling, contour lines. If it skips straight to rendering a subject, find something else.
It's medium-specific — not a general drawing course that happens to mention ink. Ink technique is distinct enough to deserve dedicated instruction.
Student work is visible in reviews — Look for reviews that include photos of student drawings, not just star ratings. You want to see what people actually produced.
Local figure drawing or sketching groups count — Structured observation sessions with other people drawing alongside you are often more useful than any formal class. Check the BB creative hobbies list for more ways to find your people.
Ink drawing has an unusually active online community because finished drawings photograph cleanly and share well. The work travels.
Online: r/learnart and r/drawing on Reddit both have active ink communities. Instagram and Tumblr still carry serious ink art culture — search #inkdrawing or #penandink. YouTube channels like Alphonso Dunn cover technique in genuine depth.
In person: Urban sketching groups (find them at urbansketchers.org) are the most accessible entry point. They meet in public spaces, draw together for a few hours, and share results. No pressure, no instruction required.
Local art supply stores often run evening workshops — these tend to be small, informal, and genuinely useful. Worth calling ahead and asking what's on.
Give it 30 sessions before you decide. Here's what those sessions should feel like if it's working:
Sessions 1–10: You're getting comfortable with fineliners, learning to draw without erasing, and discovering which line weights you instinctively reach for. Some drawings will look worse than your pencil work. That's expected.
Sessions 11–20: You're starting to build value with hatching, you've probably tried stippling, and you have at least one drawing you're proud of. You might be experimenting with brush pens or wash.
Sessions 21–30: You have a tool preference. You understand why certain marks work and others don't. You're making deliberate decisions before you put pen to paper.
Stop if the permanence still feels like punishment rather than constraint after 20 sessions. Some people genuinely need the reversibility of pencil or paint, and that's a real compatibility issue — not a skill problem.
Keep going if you've started looking at brick walls, tree bark, and fabric textures and thinking about how you'd render them in hatching. When the world starts presenting itself to you as a series of mark-making problems, ink drawing has its hooks in you.
Pencil Sketching for Beginners — If you want to get your underdrawing technique solid before you start inking over it.
Charcoal Drawing for Beginners — A good counterpoint to ink: it's all about tone, blending, and reversibility — the opposite of what ink demands.
Zentangle for Beginners — Structured pattern-based ink drawing. A low-pressure way to build mark-making habits and get comfortable with a pen.
Watercolor Painting for Beginners — Ink and watercolor wash is a classic combination. If you want to add color to your ink work, this is the natural next step.
Calligraphy for Beginners — Shares dip pen technique and pressure-sensitive line work with ink drawing. If you enjoyed the dip pen, this is worth exploring.
You'll need ink pens (ballpoint, gel, or fountain pens), drawing paper or sketchbooks, and optionally brushes for brush pen techniques. Start with affordable options like a basic ink pen set and standard drawing paper; you can invest in premium materials as your skills develop and preferences become clearer.
Most beginners see noticeable improvement within 4–8 weeks of consistent practice (2–3 hours per week). Mastering advanced techniques takes several months to a year, but you can create satisfying work much sooner by focusing on fundamentals like line control and composition.
Ink drawing is less forgiving because you can't erase, making it feel more challenging initially. However, this constraint actually forces better planning and builds confidence faster—many beginners find it liberating once they accept mistakes as part of the creative process.
India ink or liquid drawing inks are affordable and versatile options for beginners, though ballpoint or gel pens are easier to control and require no special setup. Start with pens since they're mess-free and more forgiving, then graduate to liquid ink and brushes as you gain confidence.
A basic beginner kit costs $15–$40 and includes pens, ink, and paper—everything you need to start. You can spend more on professional-grade supplies later, but high-quality results don't require expensive materials when you're learning fundamental techniques.
Absolutely—many ink artists are self-taught through online tutorials, books, and consistent practice. The key is studying other artists' work, experimenting with techniques, and drawing regularly to develop your own style and muscle memory.