BoredomBusted — Find Your Next Favorite Thing To Do
Discover hobbies, activities, places, and ideas that spark joy. Whether you're looking for something creative, active, social, or relaxing, BoredomBusted helps you find your next favorite thing to do.
Browse our hobby guides, things-to-do collections, and place ideas to never be bored again.
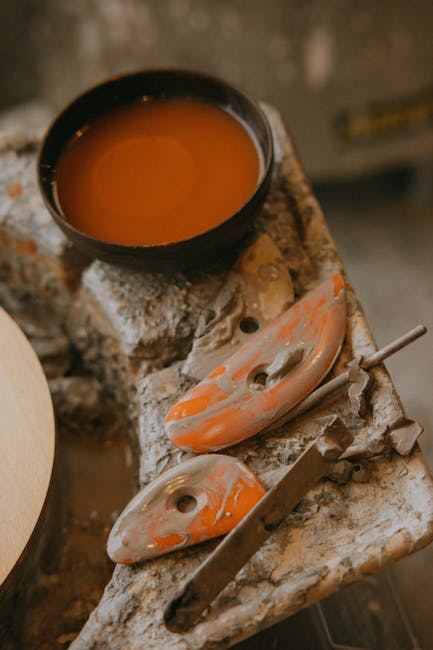
Glazing isn’t just the decorative finale; it dictates the entire outcome with its chemistry, thickness, and application nuances before firing.
Learning ceramic glazing as a beginner involves understanding the techniques of applying a glass-like coating to your pottery before re-firing it for that perfect finish.
The heat transforms raw minerals into color and texture you can't fully predict until the kiln opens.
Unlike painting or decorating finished pieces, the real work happens inside the fire – not on your worktable.
In ceramic glazing, you physically apply liquid glazes to bisque-fired pottery through techniques such as dipping, pouring, or brushing, preparing surfaces by cleaning them and mixing glazes for consistency, then layering colors and textures before final kiln firing to create finished pieces.
Ceramic glazing fosters a flow state through hands-on, repetitive tasks that enhance focus and skill mastery, while providing immediate visual feedback on techniques, a sense of accomplishment from transforming raw clay into vibrant ceramics, and opportunities for creative expression that keep each session engaging.
You think glazing is the paint part. The bit you do at the end, the fun reward after the real work of throwing and firing. That assumption will make your first ten pieces look like accidents.
The color you see in the bottle is almost never the color you get. Thickness, layering, and the clay body all influence the final outcome.
Most beginners treat glaze as a single variable, but it's chemistry, surface texture, and temperature. That's why the same glaze looks different on two pots fired together.
Drips and flat patches aren't bad luck – they're the result of choices you make before firing.
Take a celadon glaze. Brushed thin, it fires to a pale, barely-there wash. Pooled thick in a foot ring, it goes deep jade green. Same jar, same pot, same fire – the difference is where your brush paused for half a second.
That's not a finishing step. That's a craft.
Once you understand that glazing has its own logic – separate from forming, separate from firing – you stop guessing and start making real decisions.
Ready to get your hands covered in glaze from day one?
From a distance, glazing pottery seems calming, like watching colors dance effortlessly. But in reality, it feels chaotic your first time. Brushstrokes don't flow. Colors appear dull. You feel like your work might not survive the kiln.
The transformation is shocking. What seemed drab turns to vibrant hues after firing. Smooth surfaces replace drag marks. Even your 'ruined' piece might surprise everyone after it's fired.
It's confusing at the start. Colors never match the bucket. But everything changes once the kiln opens, revealing what was hidden. That mystery is why many continue with pottery — the process is endlessly surprising.
Glazes can betray you on curved surfaces. Gravity pulls glaze on vertical surfaces during firing, causing drips that can bond your piece to the kiln shelf. Apply glaze thinner than you think on the sides to avoid this problem.
When to start: Morning
Duration: 1 hour
Cost to try: $15
Success criteria: If you coat one bisque piece with 2 even glaze layers and leave the bottom clean, do session 2.
Raw clay absorbs glaze so fast it can crack the piece before it even reaches the kiln.
Apply glaze at the leather-hard stage instead, or bisque-fire first – which is what most studio workflows do anyway.
Glaze thickness controls everything – color depth, texture, whether it runs onto your kiln shelf.
Dip a pin tool in and aim for 1/16 to 1/8 inch of coverage, and do a test tile before committing to a full piece.
Glaze on the bottom of a piece will fuse it permanently to the kiln shelf – and the shelf usually wins.
Brush liquid wax resist onto the foot ring before glazing, then wipe any drips within a half-inch of the base.
Two beautiful glazes don't automatically play well together – differences in thermal expansion can cause crawling, pinholing, or full crackle disasters.
Run a test tile with your layered combination at least one firing before using it on something you care about.
Unfired glaze looks almost nothing like its final color – that matte grey slop is going to be cobalt blue, or not, depending on your kiln's atmosphere.
Check the manufacturer's fired-result swatch, not the wet glaze, and keep a fired test tile library so you're never guessing twice.
Ceramic glazing happens in pottery studios, community art centers, and dedicated ceramics co-ops – places with kilns, which is the non-negotiable piece of equipment you can't fake at home.
Some makerspace memberships include kiln access, so don't overlook those if you're near a city.
Tell the studio host or instructor you're a beginner who hasn't glazed before – that one sentence typically gets you a 10-minute orientation, a glaze sample sheet, and someone steering you away from the techniques that ruin a first firing.
Most studios would rather spend five minutes up front than rescue a kiln shelf from a drip disaster.
Paint color onto unfired clay, then glaze over it. This creates sharp detail because underglaze stays put during firing.
Beginners looking for decorative detail without dealing with glaze movement should start here.
Paint on a white opaque base glaze before firing. The colors sink into the glaze, but watch out for smudging as the unfired surface is chalky.
Ideal for those interested in historical European pottery or folk art.
Remove pots from the kiln while they're still hot and place them in a container with combustible material. Smoke and rapid cooling create metallic and crackle effects.
Not for home studios — budget for a raku workshop or class.
Salt or soda ash is vaporized in the kiln, coating the work with a unique orange-peel texture.
Dependent on specific kiln setups — access a studio that runs these firings.
Most start with commercial glazes. While mixing saves money long-term, it requires chemistry skills and comes with risks.
Start commercial, then mix once you have a clear vision of your goals.
A close neighbor worth considering: Screen Printing.
Some of the same instincts show up in Fabric Painting — worth a look if this clicked.
Most beginners obsess over which glazes to buy and which combinations look good on Pinterest. That's not the lever – the lever is learning to read your bisqueware's surface before a single drop of glaze touches it.
The key skill is surface reading. It's about identifying porosity, texture, and absorbency by sight and touch. This helps you adjust your application method to match. A rough, thirsty surface pulls glaze in fast and thick. A smooth surface repels it. Same glaze, same brush – wildly different results if you don't know which one you're holding.
When you can read the surface, you stop blaming the glaze for crawling, pinholing, or going on thin and patchy. You'll know you caused it by applying to a surface that wasn't ready for that method. Without this skill, you're essentially glazing blind and never understanding why the results vary.
Commit to six sessions over 30 days. Aim for one to two sessions per week to move beyond early mistakes and make an informed decision.
If you're eager to start your next piece before the current one is finished, glazing has hooked you. This goes beyond simple enjoyment. It's a sign that the delayed feedback loop fits your rhythm. Begin building a small personal palette of glazes you understand.
If six sessions leave you feeling neutral, this is clarity. It's likely the solitary and slow nature of glazing isn't resonating with you. To know for sure, try a session focusing just on experimenting with different glaze techniques.
If you dreaded going and felt relieved with cancellations, that's a clear answer. The idea of glazing might appeal to you, but the reality doesn't fit. Time to redirect your creative energy elsewhere.
One sign you shouldn't ignore: you find yourself captivated by the ceramic surfaces around you, whether in a store or restaurant, instead of paying attention to the people you're with. This subconscious focus reveals a genuine interest in glazing.
No studio access nearby is a real problem. Without a kiln, you're dependent on someone else's schedule, which may frustrate you.
Repetitive motion injuries mean glazing is risky. The patient brush control required will only worsen your condition.
If quick feedback keeps you engaged, glazing isn't ideal. The wait between application and results can erode your interest long before you develop real skills.
If ceramic glazing doesn't feel like the right fit, our hobbies list has plenty of other directions to try.
If nothing here clicks, our guide to what to do when bored covers shorter, lower-commitment options.
You'll need basic brushes, a glaze mixing container, a kiln (or access to one at a community studio), glazes, and ceramic pieces to decorate. Most beginners start with a pottery wheel or hand-formed pieces, though you can glaze pre-made ceramics from a supply store to learn techniques without the wheel-throwing investment.
Basic glazing techniques can be learned in a few hours, but developing consistency and understanding glaze chemistry takes weeks to months of practice. Most hobbyists see meaningful progress within 4–6 weeks of regular practice, though mastery is an ongoing journey.
A beginner setup costs $100–$300 if you have access to a kiln through a community studio; buying your own kiln adds $500–$3,000+. Glazes, brushes, and ceramics are relatively affordable, typically $1–$5 per item, making the ongoing hobby budget modest once you have equipment access.
Mistakes like uneven coating, contaminated glazes, or improper firing temperatures may result in dull colors, rough texture, or glaze running off during the kiln cycle. Most mistakes are learning opportunities—you can sand the piece and try again, though some pieces may be too damaged to salvage.
No—most beginners use community pottery studios, art centers, or local potters who offer kiln access for a small fee per firing. Many studios provide glazes and tools, so you only need to bring your ceramic pieces, making it accessible without a home kiln investment.
Yes, glazing is a standalone skill you can learn without throwing pottery—you can practice on store-bought ceramic blanks, bisque-fired pieces, or work with a pottery partner who throws while you glaze. This is an excellent entry point for people interested in color and design but not hand-building clay.