BoredomBusted — Find Your Next Favorite Thing To Do
Discover hobbies, activities, places, and ideas that spark joy. Whether you're looking for something creative, active, social, or relaxing, BoredomBusted helps you find your next favorite thing to do.
Browse our hobby guides, things-to-do collections, and place ideas to never be bored again.
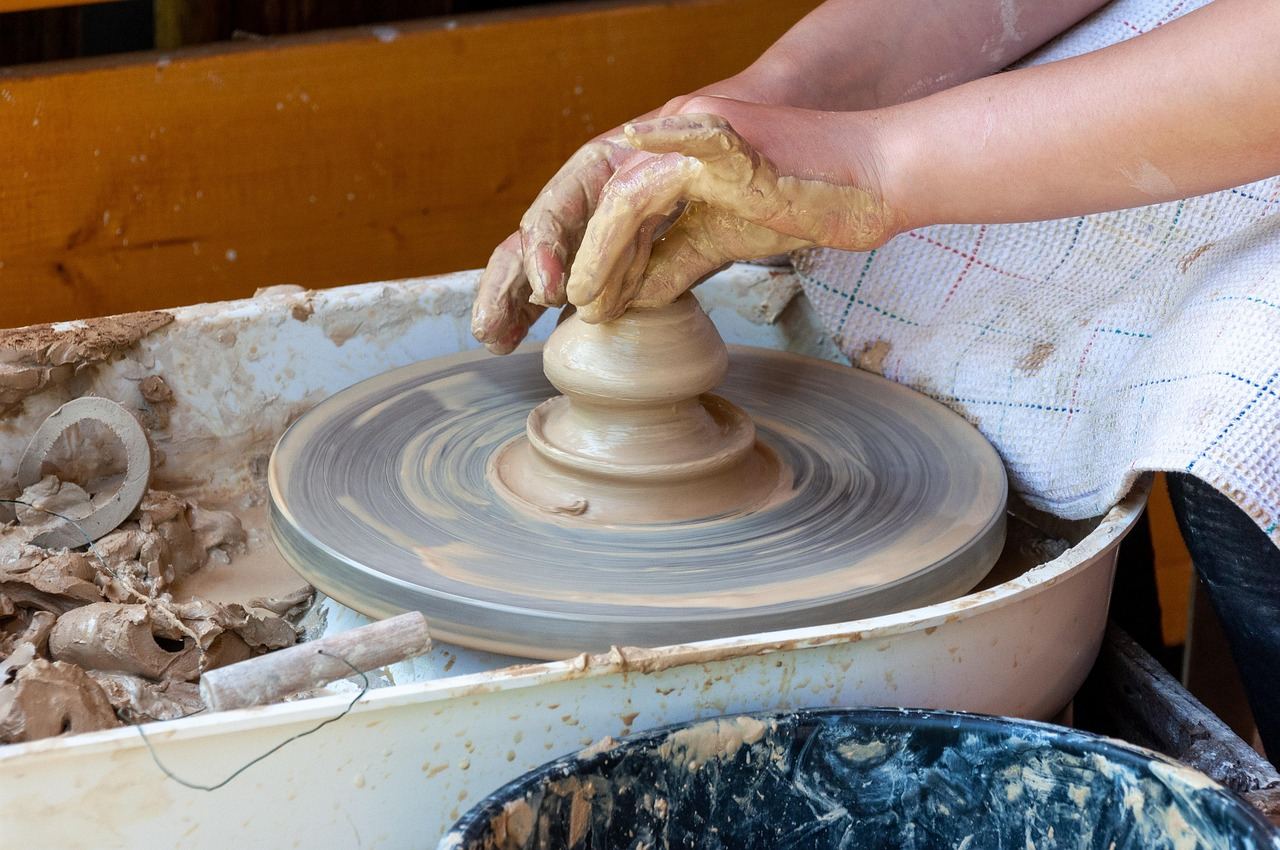
Clay sculpting isn't just about creating; it develops spatial reasoning and pressure control while offering a satisfying escape from distractions.
Getting started with clay sculpture as a beginner invites you to engage in a tactile experience, shaping raw clay into expressive three-dimensional forms using your hands and simple tools.
Every decision in clay is hands-on and changeable, allowing you to add, remove, or smooth material until it feels right.
Once satisfied, your creation can be hardened by firing it in a kiln or letting it air-dry.
In clay sculpture, you manipulate various types of clay using your hands and tools to create shapes and forms, engaging in actions like kneading, rolling, pinching, and coiling, before finishing with texturing and refining techniques.
Clay sculpture fosters a flow state through tactile feedback and iterative experimentation, allowing for rapid skill progression and a sense of control, as well as providing immediate results from trial-and-error, which keeps your mind engaged and focused.
You think clay sculpture belongs in art class. The kind where you end up with a lopsided bowl that cracks in the kiln. You feel vaguely embarrassed.
That assumption is holding you back from a hobby that absorbs your attention like nothing else.
One Reddit user described their first month in clay: they started with a face and ended up with a melting potato. An hour spent fixing just the nose grabbed their undivided attention – they forgot about their phone entirely.
That's the kind of engagement you can expect from your first session.
Shaping clay seems relaxing when you watch someone else do it. In reality, your first creation might look more like a defeated potato. That gap is normal, and it's part of learning from the process.
Feelings of control come gradually. You'll notice hands not moving as you want, clay refusing to hold form, and terms like "center" feeling elusive. The video made it look easy, but your forearms feel the strain as your creation wobbles and collapses twice. Frustration may build, but each session gives you a reason to return.
Initially, you'll wrestle with the clay more than shape it. You'll apply pressure, not force. By the second week, a piece might stand for a minute before you trim away too much. Real progress is subtle at first. Week three feels different. Centering suddenly makes sense, not from strength, but because you've learned to relax. By the fourth week, you produce one piece you're proud of, sparking a desire to improve it.
Even when your creation collapses again, and quitting crosses your mind, the wheel keeps turning. Clay offers instant feedback. Around ten failures in, your hands start to learn faster than your mind realizes. Understanding this keeps you going.
Before you start, remember: wedge your clay thoroughly with 50 to 100 firm pushes against the table. It removes air pockets that could make your piece burst in the kiln. Skipping this step isn't metaphorical — it's explosive.
When to start: Morning
Duration: 1 hour
Cost to try: $15
Success criteria: If you knead the clay smooth, form a 2-inch ball or coil, add 3 textures, and wrap it moist, do session 2.
Water feels like a solution when clay starts cracking or sticking – so beginners add more, and more, until the whole piece turns into a slump.
Stop adding water after the first few minutes – if clay is cracking during shaping, it needs wedging, not wetting.
It looks solid, and that feels safe – but thick walls trap air and moisture, and kilns don't forgive either.
Keep walls at a consistent ¼ inch by using two wooden dowels as guides while you roll or pinch.
Two pieces of clay pressed together looks joined – it isn't, and the seam will crack clean open during drying.
Score both surfaces with a fork or needle tool, apply slip to each side, then press and blend the seam thoroughly.
A warm room or a sunny windowsill seems helpful, and the piece looks fine – until hairline cracks show up everywhere overnight.
Wrap your piece loosely in plastic and let it dry over several days at room temperature, not in a rush.
A thin neck, a long arm, an upright figure – clay is heavy, and gravity wins before the piece even dries.
Build an internal wire skeleton for anything with a dimension taller than three inches or thinner than a thumb.
Clay sculpture requires access to studios. Try pottery studios, community art centers, or makerspaces. Most offer kiln rentals and clay sales by the pound.
Find open studio nights at local universities. These programs are affordable and often offer excellent facilities for beginners.
Ask your local community college ceramics department about non-credit studio access. Staff can recommend materials and offer guidance on starting out.
No kiln or firing needed. Air-dry clay hardens over 24–48 hours. Ideal for beginners, it's a simple way to start creating. The quality gap with fired clay is not as big as you'd think for decorative work.
Watch out for shrinkage and cracking. Hollow cores help avoid these problems in thick pieces.
Polymer clay stays workable until oven-baked and is perfect for small, detail-oriented creations like jewelry or figurines.
Great for those who value precision and variety in color. Brands like Sculpey and Fimo cost $3–$10 per block, keeping startup costs low.
Earthenware and stoneware involve shaping, drying, and firing pieces in a kiln.
Kiln access is essential, typically through a studio membership or local class.
Best for making mugs, bowls, and plates if you're ready for regular practice.
Using the same clay, wheel throwing means centering a lump on a wheel and forming it with your hands.
It has a steep learning curve. Expect to collapse your first few pieces.
Studio access with wheel time typically costs $30–$60 per month.
Sculpt larger or complex figures with internal supports like wire or foam. Think animals, figures, or abstract forms.
Not a separate medium, this technique opens up possibilities beyond solid clay's limits.
Ideal for intermediates pushing boundaries with their existing skills.
If the texture of this appeals to you, Sand Sculpture is built on similar bones.
For something adjacent, see Wood Sculpture.
Readers who enjoy this often gravitate toward Wire Sculpture next.
Reading clay through your hands is the key skill that sets successful sculptors apart. See your work with your fingers by detecting uneven thickness as you build. Avoid using your eyes as a crutch; your sense of touch tells the full story.
It's all about catching thin spots before they ruin your piece. Consistent thickness detection prevents warping, cracking, and slumping. Without it, you're essentially decorating a structural problem, and no amount of surface work fixes a wall that's 4mm on one side and 12mm on the other.
Commit to six sessions in 30 days, about one session every five days. This allows enough time for your hands to adapt without fully investing in something that might not be your passion.
If you're eagerly planning the next session before the current one ends, that's where the magic happens. Being dissatisfied with your initial pieces is common; use that to improve. Dive deeper into the craft by exploring new techniques and styles.
If you felt lukewarm and didn't think about it between sessions, it's possible the medium isn't right. Experiment with different types of clay, like air-dry or stoneware, to see if this changes how you engage with it. Sometimes the material makes the difference.
If you found yourself dreading the sessions, that's a clear signal to reevaluate. The idea might appeal more than the practice, which is completely normal. Acknowledge it, and consider exploring a different creative outlet that better suits your pace or style.
The subtle sign that clay speaks to you is when you keep returning to ceramics online or in stores and feel a sense of recognition rather than envy. This interest can appear even before you handle clay yourself.
For ideas that take five minutes instead of five weeks, see things to do when you're bored.
You'll need clay (earthenware, stoneware, or polymer), a workspace with a flat surface, and basic tools like a wooden modeling tool, sponge, and rolling pin. Many beginners start with air-dry clay or polymer clay at home before investing in a kiln. A pottery class or community studio can provide equipment and guidance.
You can learn fundamental techniques like pinching and coiling within your first few sessions—even your first day. However, developing control, consistency, and your artistic voice typically takes several weeks of regular practice. Most people see noticeable improvement within a month of weekly practice.
Clay sculpture has a gentle learning curve—it's forgiving and intuitive compared to many art forms. Your hands naturally learn how clay responds, and mistakes are easily fixed by rewetting and reshaping the material. The hardest part is usually understanding how to prevent cracking during drying and firing, not the sculpting itself.
Hand-building (pinching, coiling, slab work) creates organic, asymmetrical forms and requires no equipment. Wheel throwing shapes clay on a spinning potter's wheel and produces symmetrical, functional pieces like bowls and pots. Both are clay sculpture, but hand-building is more accessible for beginners without studio access.
A beginner kit with clay, tools, and sculpting supplies costs $20–$50. Air-dry or polymer clay is cheapest and needs no kiln. If you want to fire traditional clay, expect kiln access through a community studio ($10–$30 per firing) or consider a home kiln ($200–$2,000+).
Yes—air-dry clay and polymer clay don't require a kiln and work perfectly at home on a kitchen table or workspace. Air-dry clay hardens naturally in 24–48 hours, while polymer clay hardens in a home oven. Traditional clay requires kiln firing, but you can hand-build with it and fire later at a studio.