BoredomBusted — Find Your Next Favorite Thing To Do
Discover hobbies, activities, places, and ideas that spark joy. Whether you're looking for something creative, active, social, or relaxing, BoredomBusted helps you find your next favorite thing to do.
Browse our hobby guides, things-to-do collections, and place ideas to never be bored again.
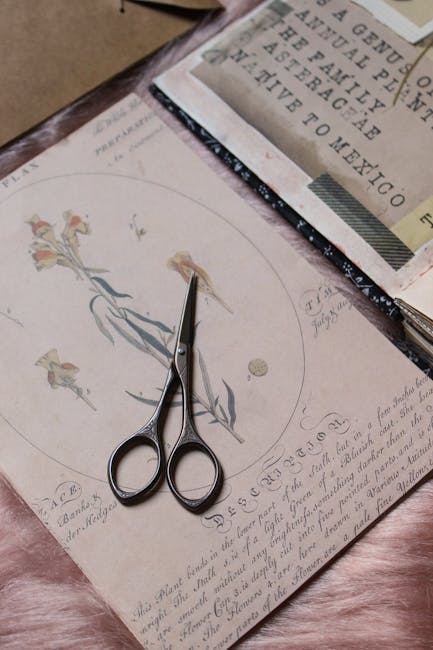
Decoupage isn't just kids' crafts — it's a transformative art form that can scale from furniture restoration to fine art, changing the entire material narrative.
Getting started with decoupage as a beginner is a rewarding way to transform everyday objects into personalized works of art using simple materials. Decoupage is the art of decorating surfaces by gluing cut paper – images, tissue, napkins – then sealing everything with layered varnish until it looks built-in, not stuck-on.
You cut, glue, smooth, seal, repeat.
What separates it from scrapbooking or collage is the finish – the goal is a clean, lacquered surface where the paper disappears into the object itself.
In decoupage, you select a base object like a wooden box or picture frame, cut or tear decorative materials such as magazine clippings or fabric, and apply these cutouts with a brush and decoupage glue. You smooth the materials to avoid bubbles, layer them for depth, and seal the surface with multiple coats, resulting in personalized art that transforms ordinary items into unique decor.
Decoupage induces a flow state by requiring focused attention on precise cutting and layering, while immediate tactile feedback from your work reinforces skill development and mastery. This process provides a sense of accomplishment through upcycling everyday items into art, fostering creative expression and social belonging in communities sharing their projects.
You think decoupage is tissue paper glued onto flowerpots. Maybe a rainy-day craft you did in third grade and forgot about. That assumption is costing you a genuinely versatile skill.
Decoupage transforms surfaces. It's not just about sticking paper down. You're building a sealed, unified layer that changes the object's entire feel and look.
Texture, sheen, and depth are controlled by the medium. Matte, gloss, and gel finishes all behave differently.
Decoupage shares DNA with collage, lacquerwork, and printmaking. It's not limited to kids' crafts.
In Lyon, a furniture restorer used rice paper, a quality medium, and four coats to refinish a water-damaged side table. The result looked like it came out of an antique shop. No paint or stain. Just paper and patience.
It's a simple technique with complex potential. Your first project can unlock endless possibilities.
Your first brush with decoupage feels chaotic. A mix of sticky hands and paper refusing to cooperate. The videos skip the messy part when nothing lines up.
Wrinkles and tears? Expect them on day one. Tissue paper disintegrates mid-stroke, Mod Podge dries unexpectedly cloudy, and fingerprints mar the finish. By morning, corners that seemed glued lift rebelliously.
But then you start catching on. Sealing surfaces. Working in smaller areas. Letting every layer dry fully. The tricks pile up as you read the surface texture and begin to trust the process.
The first week, you'll overuse Mod Podge. Bubble battles follow, and you'll waste ten minutes smoothing them out.
Week two is harsh. Thin layers reign over thick ones, a lesson you'll learn on a cherished project. By week three, edges behave, surface prep becomes a clear priority, and your decoupage feels purposeful by week four.
Keep in mind that tissue paper and napkins are wildcards. They act incredibly different from standard decoupage paper. Tissue tears at the touch of a wet brush if glued directly first. Instead, apply Mod Podge to the base, lay tissue dry, and then gently brush. Your first piece will be a wreck, the second confusing, but by the third, something finally clicks.
This process isn't a failure dragging out; it's the timeline that leads to decoupage mastery.
When to start: Morning
Duration: 1-2 hours
Cost to try: $15
Success criteria: If you end with a small box or frame fully covered in smooth paper pieces and a dry, even Mod Podge seal, do session 2.
Thin napkins or tissue paper break apart or bubble when glue hits them without warning. To prevent this, pre-seal with a thin layer of Mod Podge on the surface. Let it get tacky before laying down the paper.
Chasing bubbles just moves them and dries them under edges. Push from the center outwards using short strokes.
Do this before the glue starts setting for the best results.
Piling up layers quickly leads to a sticky mess. Let each coat clear and feel dry before adding more.
Avoid a white edge making your work look unfinished. Cut inside the printed edge or rotate the paper for a cleaner look.
Standard Mod Podge clouds and peels with moisture or handling. Apply 2–3 coats of varnish or resin for a durable finish used daily.
Decoupage is primarily a home-based hobby. Start on your kitchen table, but when you're ready for company, local craft studios, community art centers, and workshops often host guided sessions.
Decoupage thrives on its community. There's no single national governing body, so diving into local groups is key. Mention your home practice to prompt supply tips and even a practice session before you officially start crafting together.
You're adding paper or fabric to large surfaces – chairs, dressers, side tables. The scale demands patience with wrinkles and seam-matching.
Transform your living space with unmistakable results. Budget for extra Mod Podge; furniture absorbs a lot.
Cutting and layering identical images creates raised, dimensional scenes. Fiddly, slow, and oddly addictive.
Perfect for fans of model kits or precise, patient crafting. Low cost; the challenge is all in the technique.
Fabric replaces paper causing different adhesive behavior and edge fraying.
Textile familiarity aids in mastering this method. Expect challenges in achieving clean seals.
Thin decorative napkins are layered and applied, blending beautifully.
Great for beginners. Mistakes hide under delicate texture. No special tools; any cocktail napkins work.
Print designs from home for exact imagery and scale control.
Ideal for those with a keen eye for design who dislike searching for supplies. A decent inkjet printer and patience with sizing are key.
If this resonates, Etching explores a similar direction.
If you want a related angle, Sketching is the natural next stop.
A close neighbor worth considering: Pencil Drawing.
Beginners obsess over getting bubbles out – pressing harder, working faster, buying better brushes.
The bubbles aren't the problem. Saturation timing is.
The one skill is knowing exactly how wet your paper needs to be before it touches the surface – not damp, not soaked, but that 8-to-10-second sweet spot where the fibers have relaxed but haven't started to disintegrate.
Tissue paper behaves differently than napkins. Napkins differ from magazine pages. Until you can read that by feel rather than by clock, you're working blind.
When you nail the moisture window, paper conforms to curves without tearing, adhesive bonds evenly underneath, and bubbles stop forming in the first place rather than needing to be chased.
Without it, you're reacting to symptoms – smoothing over problems that were locked in the moment paper met surface.
Five sessions over 30 days is the test—one session per week with some space to reflect between them.
The early stages of decoupage are challenging. If you're eager to rearrange scraps before you even start, it's a good sign. Invest more time. Tackle a larger project with layers and a deadline.
If the five sessions seem unremarkable, it might be the material, not you. Create something meaningful, like a box or a tray you'd use personally. It can turn indifference into interest.
If there was dread at every session, don't dismiss it. Decoupage requires a love for slow, careful work. If you felt it was tedious rather than relaxing, it's a clear indication to stop.
Saving scraps without a plan is the telltale sign. If you're collecting materials and you're not sure why, decoupage might be clicking with you.
If nothing here clicks, our guide to what to do when bored covers shorter, lower-commitment options.
You'll need decorative paper or napkins, scissors, a brush, adhesive (like decoupage glue or Mod Podge), a clear varnish or sealant, and an object to decorate like a wooden box or mug. Most starter kits are under $15 and available at craft stores, making it affordable to begin with basic supplies.
A simple project typically takes 1–2 hours hands-on time, though drying between layers adds another 1–2 hours. More complex designs with multiple layers can stretch to 3–4 hours of work spread across a day or two.
No—decoupage is one of the easiest crafts to learn. There's minimal technical skill required; steady hands and patience matter more than experience. Even imperfect placements often look charming, making it forgiving for newcomers.
You can decoupage almost any non-porous or porous surface: wooden boxes, furniture, glass vases, frames, coasters, terracotta pots, mirrors, and storage containers. The key is preparing the surface properly so the adhesive and varnish bond well.
After gluing down your paper designs, you apply multiple thin coats of varnish or mod podge—usually 3–5 coats—letting each dry completely between applications. This protects the paper from moisture, fading, and wear, making your finished piece durable and long-lasting.
Yes—decoupage makes excellent personalized gifts because you can customize designs to match someone's taste. A sealed decoupage piece is durable enough for daily use, making it both beautiful and practical for birthdays, housewarmings, or holidays.