BoredomBusted — Find Your Next Favorite Thing To Do
Discover hobbies, activities, places, and ideas that spark joy. Whether you're looking for something creative, active, social, or relaxing, BoredomBusted helps you find your next favorite thing to do.
Browse our hobby guides, things-to-do collections, and place ideas to never be bored again.
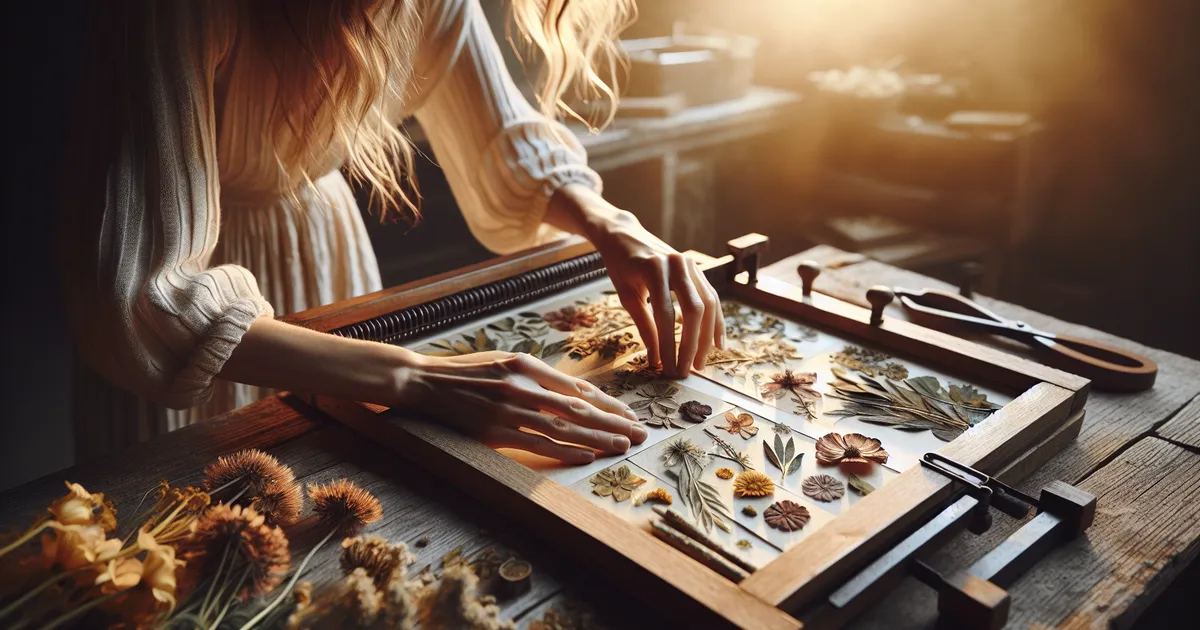
Flower pressing isn’t just a nostalgic craft — it's a science of preservation that teaches compositional skills akin to photography, with serious potential for artistic growth.
Learning flower pressing as a beginner allows you to preserve the beauty of nature by flattening and drying plants to maintain their shape and color.
Specimens go between absorbent layers, weighted down or in a press. Moisture evaporates slowly over days or weeks.
The result is two-dimensional art perfect for framing, journaling, or resin work.
Flower pressing involves selecting and foraging flowers, preparing them by placing them between layers of blotting paper or cardboard, and applying pressure to flatten them over days or weeks. After drying, you arrange the pressed blooms on paper or cardstock, using tweezers for precision, and then glue them into creative displays or crafts like wall art and personalized gifts.
This hobby induces a flow state through its rhythmic cycle of foraging, pressing, and composing, allowing you to immerse yourself fully in the process, while skill feedback loops help you refine your techniques and observe tangible results, fostering a sense of accomplishment and creative expression with each completed piece.
You think flower pressing is something your grandmother did. A quiet, fussy hobby – flowers flattened in a heavy book and forgotten. Then glued into a card nobody asked for.
Pressing isn't just crafting; it's preservation science. You're controlling moisture and oxidation to halt decay.
Design decisions mirror a photographer's: focusing on negative space and color tension, all in a medium that can die quickly.
It scales with you. Start with a $3 book and printer paper. Transition to UV-protective resin as your skills grow.
Emma Sherlock pressed specimens for the Natural History Museum – not as decor, but scientific record. The difference was intention, not method.
Next, we'll dive into what your first session looks like. And why your first flower will teach you something the second won't.
Pressing flowers looks serene. A book, some blooms, and patience.
Opening your first press can reveal brown mush instead of a delicate buttercup.
Your initial attempts might feel like a mess. There's no immediate correction — it's all trial and error. You wait weeks for results and only then learn what you got wrong.
Understanding flower moisture is crucial. Without drying them for about 48 hours, they rot inside the press despite your best efforts.
Frustrations aside, there's a moment when you spot a perfect pansy or learn to notice flowers differently. Next, we tackle mistakes that keep you from reaching these satisfying moments sooner.
When to start: Early morning
Duration: 1 hour
Cost to try: $0
Success criteria: If you press 3 flowers flat in a book, with no overlap and stems trimmed short, do session 2.
Moisture harms a clean press. Fresh flowers are soaked with it.
Let them rest face-down on a paper towel for 30–60 minutes. This helps excess moisture evaporate without wilting the petals.
Copy paper traps humidity. This only leads to rotting flowers.
Choose watercolor paper, blotting paper, or coffee filters. They pull moisture away effectively.
Fully open flowers are overripe for pressing. Their petals are thick and loaded with water.
Pick flowers at 75–80% open. This ensures vibrant color and firm structure.
Peeking breaks the process. It disturbs flowers and lets humidity back in.
Leave it closed for a week. Swap paper on day seven and leave it again until day fourteen.
Match weight to flower type. Delicate blooms need light pressure; thick ones need heavy.
Use two or three heavy books for thicker blooms. For thinner petals, a single paperback is enough.
Flower pressing usually happens at home. Any flat, dry spot will do — even a kitchen table.
Botanical gardens and craft studios often host workshops. Spring and summer are prime times for these events.
The fastest way to connect is Facebook Groups. Search for 'flower pressing [your city/county]' or 'botanical art [your region]' for active groups.
Meetup.com is another great option. Use terms like 'botanical crafts' or 'pressed flower art.' Smaller town groups sometimes include these themes within broader crafting categories.
Check your local botanical garden or herbarium. Informal pressing circles often operate under the radar.
In the UK, explore the British Pressed Flower Guild at britishpressedflowerguild.org. In the US, local botanical art societies linked to the American Society of Botanical Artists offer similar resources.
Mention you're a beginner at these gatherings. You might score a materials list, a loaner press, and tips on avoiding beginner mistakes.
Oshibana takes flower pressing to an artistic level, creating framed pieces that look like paintings. Each element is carefully arranged over days to build detailed botanical scenes.Perfect for those seeking a thoughtful, long-term creative project with stunning results.
Glycerin preservation keeps flowers in a lifelike, three-dimensional state.Ideal for those wanting arrangements or wreaths that look fresh, not flat. A glycerin soak preserves the color and texture better than traditional pressing, offering a vivid alternative.
Microwave presses dry flowers in minutes instead of weeks but can yield mixed results.Best for beginners eager for quick wins over pristine quality. Microwave press kits cost $15–30 and fit a fast-paced approach.
Seal pressed flowers into resin for items like jewelry and coasters.Great for crafters aiming to create and sell tangible goods. Expect to invest $40–80, mainly in resin materials, and prepare for a learning curve in resin techniques.
Botanical contact printing transfers plant pigments to fabric or paper through steaming.Perfect for those passionate about natural dyes and textile artistry. The focus is on creating colorful impressions rather than preserving the flowers themselves.
If you want a related angle, Origami is the natural next stop.
Candle Making is a sibling pursuit and often surfaces the same kind of curiosity.
If the texture of this appeals to you, Etching is built on similar bones.
Beginners focus too much on pressing time and paper type. But the real bottleneck happens before the flower ever touches the press.
Moisture reading is the game changer. It means knowing how much water is in a stem or petal before you press it, and adjusting your method to match. A peony fresh from morning dew needs two days of air-drying first. A dried-out cosmos from a hot afternoon can go straight in.
Same flower, different day, completely different outcome.
Nail this skill and watch your colors stop browning. Petals won't turn into translucent mush anymore. You'll understand why Tuesday's batch came out perfect while Friday's disintegrated.
Every other variable you tweak is noise until moisture is under control.
After 20 entries, you'll start seeing patterns that make all the difference in your results.
Commit to 4 sessions over 30 days – roughly one per week. That's enough time to press your first batch, wait for results, and actually see finished pieces rather than just wet flowers sandwiched in a book.
Flower pressing creates a delay between effort and outcome, and how you handle that tells you everything. That waiting period is the whole point of the test.
You keep thinking about it between sessions – what flowers to try next, what you'd frame, whether that roadside weed would press flat. That's not obsession, that's the hobby working. Start building a drying archive and explore new flower types.
You finished the sessions but felt nothing either way. That's a sign the solo, quiet format didn't click. One extension worth trying: press flowers from a place that matters to you. If that doesn't shift it, move on.
You resented sitting down each time. The slow pace, the fiddling with petals, the waiting – if all of that felt like friction and not focus, this one isn't yours. Read that clearly and don't override it.
You've been saving flowers – from a bouquet, a walk, a garden visit – without a real plan for them. Not once. Repeatedly. That's not sentimentality. That's the hobby already asking to exist in your life.
Flower Pressing is a deeper commitment than most boredom cures — for lighter options, check things to do when bored.
Most flowers take 1–3 weeks to dry completely when pressed between heavy books or in a flower press. Thicker flowers and fleshy blooms like roses may need closer to 4 weeks. The exact time depends on humidity, flower thickness, and the pressing method you use.
Thin, delicate flowers like pansies, daisies, and baby's breath press beautifully and retain their color well. Avoid thick, fleshy flowers like sunflowers and dahlias, which tend to rot or lose their shape. Leaves, ferns, and small wildflowers are also excellent choices and add texture to your designs.
You can begin with almost nothing—heavy books and paper are free if you have them at home. If you want to invest in tools, a flower press costs $15–$40, specialty pressing paper runs $10–$20, and quality glue or resin for finished projects adds another $10–$30. Most people spend under $50 to get started.
Pressed flowers fade over time, especially when exposed to direct sunlight, but they stay vibrant for months to years if stored properly in a cool, dark place. Using UV-protective glass or resin when displaying them significantly slows fading. Some colors—like blues and purples—hold up better than reds and oranges.
Flower pressing is one of the easiest crafts to learn—there's almost no way to fail. Simply place flowers between paper and press them under weight; the hardest part is patience while they dry. Once dried, you can create cards, bookmarks, wall art, or jewelry with basic glue or craft supplies.
Pressed flowers work beautifully in greeting cards, bookmarks, framed art, scrapbooks, and resin jewelry like pendants or coasters. You can also use them to decorate candles, create botanical art prints, or press them into acrylic blocks. The possibilities are limited only by your creativity.