BoredomBusted — Find Your Next Favorite Thing To Do
Discover hobbies, activities, places, and ideas that spark joy. Whether you're looking for something creative, active, social, or relaxing, BoredomBusted helps you find your next favorite thing to do.
Browse our hobby guides, things-to-do collections, and place ideas to never be bored again.
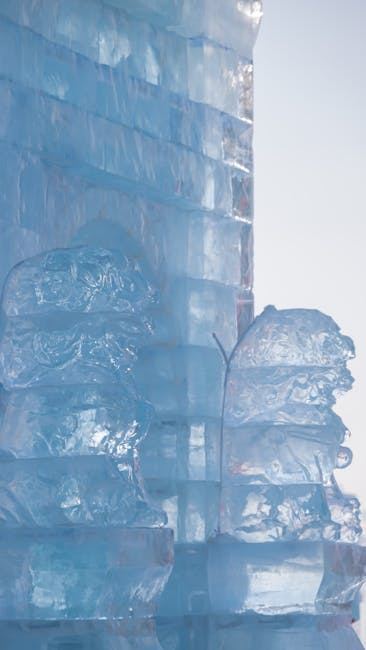
Ice sculpture teaches decisiveness with every cut and provides instant feedback, making it an accessible and liberating entry point for creativity.
Getting started with ice sculpture as a beginner involves understanding the essential techniques needed to carve intricate shapes from large blocks of ice using chisels, chainsaws, and grinding tools.
Unlike woodcarving or stone sculpting, your material melts – which means every decision is time-pressured, and the finished piece is never permanent.
In ice sculpture, hobbyists start by preparing a block of ice and creating a template for their design, then they carefully chisel away excess ice using various tools, adapting their technique to the melting and shifting texture of the ice as they work towards a finished piece.
Ice sculpture induces a flow state through intense focus and adaptation to the material's constraints, providing instant skill feedback as visible progress is made, satisfying creative expression and offering a sense of accomplishment with each unique, albeit temporary, sculpture created.
You probably think ice sculpture is only for culinary graduates or hotel displays. That image of a guy in an apron with a chainsaw, that's what's in your head, right? But this assumption is costing you an experience like no other hobby on this list.
Ice demands decisiveness – every cut you make is permanent. This builds a confident approach that you won't find sculpting clay or wood for years.
Its impermanence is a feature. You know it's going to melt, so you have to concentrate on the process instead of worrying about the outcome.
Instant physical feedback tells you if your technique is flawed. When ice cracks or clouds, it communicates what no instructor can.
A hobbyist in Portland bought a $40 block of ice and used just a hand chisel. No chainsaw, no training. By the sixth session, she was creating precise geometric sculptures. The local farmers market even invited her to make a piece for their winter event.
You don't need fancy tools or years of training to start. That's exactly where we're headed next.
The first session is a reality check. You expect clean lines and control, but what you find is ice behaving unpredictably. Your hands are cold, the ice doesn't cut as planned, and you're fighting to understand its quirks.
You'll start over more than once. Forget the neat swan you had in mind; your gloves are wet, and chunks keep falling off.
Hitting a low point by the second week is common. The moment comes when the tool slips, the shape collapses, and the whole block seems to be melting away. This is the turning point. It's when sculptors realize ice demands a commitment nothing else does.
Start at the highest point of your design. This avoids meltwater ruining the detailed areas below. It's a lesson learned quickly, through trial and error.
Now let's talk about the mistakes that might keep you stuck in frustration longer than you'd like.
When to start: Early morning
Duration: 2 hours
Cost to try: $50
Success criteria: if you finished without serious injury, do session 2.
Starting on a 300-pound block seems thrilling, but you'll waste costly ice before mastering your cutting technique.
Use small 10–20 pound blocks to practice chisel angles and depth control first — they're budget-friendly, low-risk, and offer the same mechanical learning.
Many beginners focus on details first, leaving the overall silhouette for later. This leads to problems like vanished arms and fins.
Outline the large silhouette with a chainsaw or angle grinder before refining details with hand chisels.
The grain in ice isn't just an aesthetic concern — directional lines can fracture your sculpture in unexpected ways.
Plan your cuts along the ice grain by observing grain lines in good lighting.
Temperature isn't just a display issue — it actively disrupts your work, softening edges faster than you can carve them.
Ensure your workspace is at or below 40°F. Outdoors, work in shaded areas and mist water to counteract surface melt.
Dull chisels slow you down and lead to unexpected cracks, turning your fine details into rubble.
Regularly sharpen your chisels on a whetstone; ice demands more precision than wood or stone.
The National Ice Carving Association (NICA) at nica.com is a powerhouse for enthusiasts. They keep a member directory and list competitions by region.
For local groups, search phrases like "ice carving club [your city]" or "competitive ice sculpting [your state]." Use "carving" as it pulls more results.
Facebook Groups offer connection points, especially for those in the culinary field.
Community colleges can be a lifesaver. Their culinary arts departments often host workshops you can join without enrollment.
When you make contact or attend a meet-up, try saying: "I'm a complete beginner and I want to learn, not just watch."
That simple line can land you a hands-on tool demo, practice materials, and guidance to avoid bad habits.
One large block, chainsaws, chisels — that's the classic image of ice sculpture. Ideal for beginners, this technique helps you learn the fundamentals.
Rent a 300-pound block for $50–$150 depending on area, and grab a chainsaw rated for wet cutting.
Ice stacking builds outward by freezing or bonding smaller pieces. Perfect for exploring shapes like branching structures or dramatic overhangs.
Try if block carving feels limiting and you crave more architectural options.
Theatrical carving happens live, usually against the clock. Speed takes priority over precision because the show is the main attraction.
Great for competitive spirits or hospitality pros who thrive in front of an audience.
A luge features a functional channel to drain liquid. It's a specific form that offers early monetization opportunities at events and parties.
Choose this if you want to earn from a marketable and repeatable design.
Synthetic blocks or dense foam are great for practice. Hone your tool skills without wasting real ice, especially useful between actual sessions.
Ideal if warm climate logistics make real ice cumbersome.
For something adjacent, see Metal Sculpture.
Readers who enjoy this often gravitate toward Wire Sculpture next.
Wood Sculpture lives in the same world — different mechanics, similar appeal.
Mastering ice sculpture hinges on one key skill:
predicting how ice will melt
.Beginners often get lost in perfecting tool technique. Chisel angle and mallet force consume them, seeking sharper blades and better gadgets.
The ceiling on improvement isn't in the tools – it's in reading melt directions before cutting.
Ice never melts evenly. Thin sections disappear first, and edges soften before centers. A feature perfect at minute ten might vanish by minute thirty. This understanding transforms your sculpting. You stop racing against time, instead working with physics.
Beginners often carve delicate parts early, only to see them become mush before the piece is done. To avoid this, sketch a 'melt map' before beginning. Label thin sections as last-cut zones.
Next, we'll look into how bringing this skill into other crafts can impact your work.
Commit to 4 sessions over 30 days, about one per week. The first session's uphill struggle shifts around the third or fourth session, so you'll need this range to see if ice sculpture is truly for you.
If you're sketching out designs between sessions, this isn't just novelty. You're thinking about solutions off the ice, a clear sign you're invested. Go for intermediate workshops and consider entering your own set of chisels. This is your pastime.
If you liked it but didn't think about it afterward, it's a pleasant distraction, not a passion. You might add two more sessions if you're unsure, but if you're indifferent by session four, you likely won't change by session eight.
If you felt cold, restless, or frustrated without excitement, consider that a clear cue. Ice sculpture involves physical discomfort and pressure, which can feel punishing if the activity doesn't land with you.
Compulsively watching ice sculpture videos is your signal. Being captivated by the process, not just the result, suggests this hobby engages you beyond curiosity.
Looking for something lighter? Our boredom-busters guide is built for exactly that.
You'll need basic carving tools like chisels, saws, and specialized ice picks, along with safety equipment including gloves and eye protection. Many beginners start with simple hand tools before investing in more advanced equipment like pneumatic chisels or specialized ice sculpture kits.
Basic techniques can be learned in a few weeks of regular practice, but developing advanced carving skills typically takes 6–12 months. Proficiency depends on how frequently you practice and whether you take formal lessons or learn independently.
Ice sculpture has a moderate learning curve—it's more accessible than stone carving since ice is softer, but it requires patience and precision to avoid cracking. Starting with simple designs like basic geometric shapes or small figures helps build confidence before attempting complex sculptures.
A basic beginner kit with essential hand tools costs $50–$150, while a more complete setup with pneumatic tools can range from $300–$1,000+. You'll also need access to quality ice blocks, which typically cost $20–$50 each depending on size and purity.
Most ice sculptures last 4–8 hours at room temperature, or longer in cold environments like walk-in freezers or outdoor winter events. The lifespan depends on ambient temperature, ice quality, and the sculpture's thickness and design complexity.
Ideally, you should carve ice at temperatures below 32°F (0°C), though many sculptors work in specially cooled rooms or freezers kept at 0°F to -10°F for optimal results. Working in colder conditions prevents the ice from melting too quickly and makes carving cleaner and easier.