BoredomBusted — Find Your Next Favorite Thing To Do
Discover hobbies, activities, places, and ideas that spark joy. Whether you're looking for something creative, active, social, or relaxing, BoredomBusted helps you find your next favorite thing to do.
Browse our hobby guides, things-to-do collections, and place ideas to never be bored again.
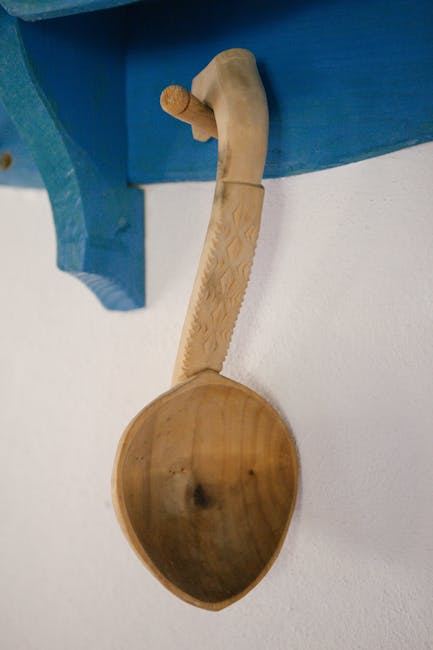
Spoon carving isn't just a quaint craft; it's about mastering micro-decisions in wood grain to create functional art that challenges your spatial reasoning.
Getting started with spoon carving as a beginner only requires a few essential hand tools and a passion for creating beautiful, functional items from wood. Spoon carving is the craft of shaping raw wood into functional spoons using only hand tools – typically a straight knife and a hooked blade called a hook knife.
Unlike woodworking, there's no machinery, no workshop required.
The whole thing fits in a backpack, and you can start a spoon on your lunch break.
In spoon carving, practitioners engage in a meticulous process of shaping wood into functional spoons using hand-held carving knives, starting with initial shaping of the handle, refining the design, hollowing the bowl, and finishing the piece with careful cuts to achieve a smooth surface.
Spoon carving creates incremental skill feedback through visible progress with each stroke, encourages focus and mindful attention, and allows for personal expression within a structured activity, making it an effective antidote to boredom.
You think spoon carving is folk art for retirees – something you'd find at a craft fair next to hand-dipped candles.
Maybe you picture a guy on a porch, whittling something lumpy. That assumption is exactly why most people miss what this hobby actually does to your head.
Wood isn't uniform – every cut reveals whether you've read the grain right or completely wrong, and that feedback loop trains your spatial reasoning faster than most hobbies twice as complicated.
The spoon has to hold liquid without splitting and fit a hand without biting. You're doing functional design with a knife, not making decoration.
Micro-decisions drive the whole process. A furniture maker described her first carved spoon as the moment she finally understood wood – not because the spoon was good, but because she'd destroyed four learning to work with the grain instead of against it.
Good tools are your first real decision – and it's the one most beginners get completely backwards.
Watching someone carve a spoon on YouTube looks meditative. Rhythmic cuts, curling shavings, a finished piece in twelve minutes. Your first session will feel nothing like that.
You'll pick up the knife, make a few confident cuts, and then the grain will go wrong somewhere. The spoon starts looking like a spatula. One blister forms before you notice it. The part nobody warns you about is how fast the wood makes the decision for you — one uphill cut and the fibers tear in a way no amount of sanding fully fixes.
By your third or fourth session, you'll start feeling the grain before you see it. Run your thumbnail along the wood — if it catches, you're going the wrong way. Cutting downhill on the grain isn't a tip, it's the whole game — everything else about control and clean surfaces follows from that one habit.
There's a moment, usually around week two, when the wood splits wrong and you stare at the piece thinking it's ruined. That feeling is the whole thing. Everyone who gets good at this decided to make another one anyway — right at that exact moment. The next section covers the mistakes that keep people stuck there longer than they need to be.
When to start: Early morning
Duration: 1.5 hours
Cost to try: $20
Success criteria: if you finished without serious injury, do session 2.
Carve in the wrong direction, and your tool will jump, catch, and tear. That's the reality of working against the grain.
Feel the direction of wood fibers with your thumb first. When you carve, go with the flow of the fibers, not against them.
Eyeballing it often leads to excessive material left in the bowl area. This turns into a tedious scooping marathon that could be avoided.
Sketch your bowl outline before you start carving. Trim the blank to within 5mm of this line using an axe or saw.
It's natural to drag the hook knife towards you in long strokes, but it barely removes useful wood this way.
Use small rotational arcs. Pull the knife through a short arc by rotating your wrist, not your entire arm.
A tool that starts sharp won't stay that way without attention. Assume dullness sneaks in.
Strop every 10–15 minutes. Leather with honing compound keeps your blade edge keen for easy carving.
Green wood is easy to shape, but it loves to crack if not managed right.
Finish carving in one session or keep it humid. Use a plastic bag to wrap it between sessions to slow the drying process.
Find a stump, log, and knife. Driveway, backyard workshop, or local makerspace—these are perfect carving spots.
Community is key. Spoon carving lacks a central organization, but enthusiasts organize events and meetups.
Let the instructor know you're new. They'll supply a wood blank, recommend tools, and help correct your grip—sidestepping years of bad habits.
Most beginners start here without knowing it has a name – green wood (freshly cut, still moist) is dramatically easier to carve than dried wood.
It splits cleanly, takes an edge well, and forgives slower technique.
Best for anyone just starting out who wants to feel progress quickly.
Dried, seasoned wood is harder and more resistant – which sounds like a downside until you want precision and fine detail.
Best for carvers who've built some muscle memory and want tighter control over the final shape.
Expect to sharpen your tools more often.
This is the inside-of-the-spoon work, done with a curved hook knife rather than a straight blade.
It's a separate skill from shaping the handle – and the one most beginners skip, then regret.
Best for anyone who wants a functional eating spoon rather than a decorative one.
No gouges, no chisels – just a single carving knife and patience.
It's slower and more physical, but it's also the most portable and cheapest entry point.
Best for people who want to start immediately with minimal gear; a decent carving knife runs $25–$40.
This adds decorative geometric patterns to the handle using short, controlled cuts.
It's not about shaping the spoon – it's about making a finished spoon feel like something you actually made on purpose.
Best for carvers who've got the basic form down and want somewhere to take the craft next.
Readers who enjoy this often gravitate toward Relief Carving next.
Carving spoons well requires mastering grain awareness.
Most beginners obsess over knife sharpness and wood selection. These aspects matter, but they don't explain why your spoons look lumpy after hours of work.
The crucial skill is reading the wood grain before cutting. Adjust your knife angle and stroke based on whether you're going with or against the grain.
Most beginners make unconscious decisions about this, battling the wood half the time without knowing why.
Reading the grain ensures the wood peels away with ease. Controlled cuts, smooth surfaces, and no more endlessly sanding those impossible tear-outs.
Guesswork is like trying to solve geometry blind. You might get it right occasionally, but consistent results elude you.
Ready to refine your technique? Let's explore some advanced methods next.
Six sessions over 30 days — roughly one and a half sessions per week, each around 45–60 minutes apart, so you have time to think between them rather than just react.
The first two sessions are just getting comfortable with the knife. Sessions three and four are where frustration either sharpens into focus or just stays frustration. By five and six, you'll have held a finished or near-finished spoon — and your gut response to that object will tell you more than any checklist.
If you kept finding reasons to pick up the wood between scheduled sessions, that's not enthusiasm about a hobby — that's someone already building a practice. The move now is a second knife and harder wood — green basswood won't hold your attention much longer.
If you showed up every time but never thought about it once in between, that's discipline — and discipline alone won't carry a tactile, solitary craft long-term. You could extend to session eight or nine, but if nothing pulls at you between sessions, that pattern tends to hold.
If you sat down and genuinely didn't want to be there — not "it was hard," not "I made mistakes," but didn't want to be there — read that clearly. Spoon carving is slow, quiet, and physically repetitive. Those aren't bugs that disappear with skill.
You're at a restaurant and you catch yourself studying the shape of the spoon handle. You walk past a hardware store and glance at the wood section without meaning to. That low-level noticing — the involuntary kind — is the real signal.
Plenty of people enjoy their sessions. Fewer carry the hobby around without trying to. If that's happening after session two or three, pay attention to it.
Wrist, hand, or repetitive strain issues are a hard stop. Carving loads those joints in very specific ways, and pushing through isn't dedication — it's damage.
If your living situation gives you nowhere to make a small amount of wood shavings and noise, the logistics will grind you down before the craft gets interesting. That's a setup problem, not a motivation problem.
If you need visible progress to stay motivated — not perfectionism, just a reasonable need to feel things moving — spoon carving's learning curve is genuinely flat in the early months, and that's not fixable with better tools.
If spoon carving feels like too much to commit to right now, browse what to do when you're bored for lower-stakes ideas.
You'll need a sharp carving knife or spoon carving knife set, a wooden blank or wood block, and a cutting surface like a carving board. Beginners often start with just a chip carving knife and a pre-made blank, which costs $20–$50 total. As you progress, you can invest in more specialized tools like hooks and detail knives.
A beginner can complete a simple functional spoon in 2–4 hours, while more detailed or ornate designs may take 8–20 hours across multiple sessions. The timeline depends on wood type, spoon size, and complexity of the design. Most carvers work on spoons gradually, making it an ideal hobby for short, regular practice sessions.
Softwoods like basswood, birch, and butternut are ideal for beginners because they carve smoothly and resist splitting. Hardwoods like cherry and walnut create beautiful finished spoons but require sharper tools and more experience. Avoid pressure-treated wood and always use food-safe, untreated wood if you plan to use the spoon for eating.
Spoon carving has a gentle learning curve—basic techniques can be learned in your first session, but skill develops over many projects. The main challenge is keeping tools sharp and understanding grain direction to avoid tear-out. Most people find it meditative and rewarding quickly, with noticeably better results after 5–10 spoons.
You can start for $30–$80 with a basic carving knife set and wood blanks from a craft supplier. A complete beginner starter kit typically costs $50–$120 and includes tools, practice wood, and instructions. Once you have tools, wood costs are minimal, making it an affordable hobby to maintain long-term.
Most spoon carving knives are designed specifically for wood and work best on that material. Some carvers use similar techniques on softer woods and materials like soap or stone, but traditional carving knives may dull quickly on harder materials. Sticking to wood protects your tool investment and lets you develop proper technique.