BoredomBusted — Find Your Next Favorite Thing To Do
Discover hobbies, activities, places, and ideas that spark joy. Whether you're looking for something creative, active, social, or relaxing, BoredomBusted helps you find your next favorite thing to do.
Browse our hobby guides, things-to-do collections, and place ideas to never be bored again.
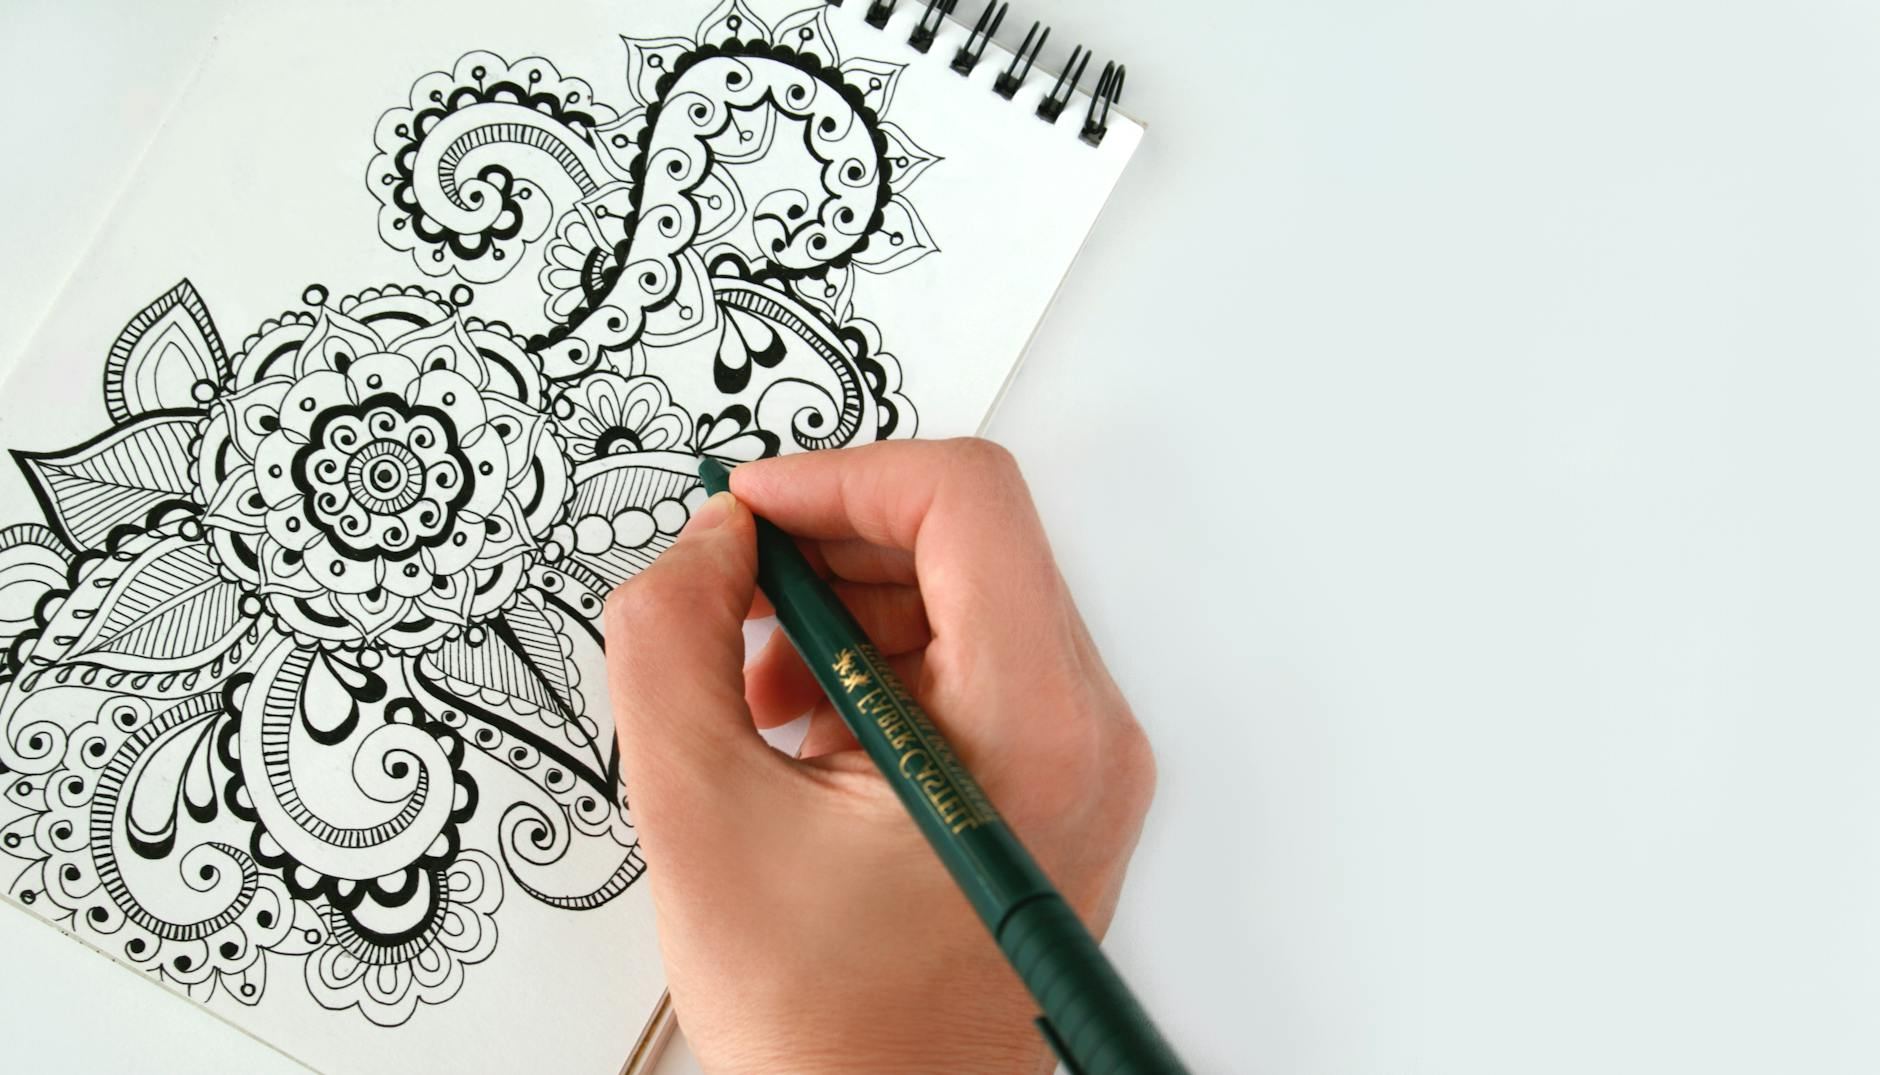
Most people hear "Zentangle" and picture adult coloring books — passive, pre-drawn, low-stakes. That's not what this is. Zentangle is a structured drawing method where you build original patterns from scratch, stroke by stroke, inside a defined space. You're not coloring inside someone else's lines. You're making the lines.
It's also not meditation in disguise. The repetitive mark-making does calm your nervous system, but that's a side effect of focused attention — not the point. The point is learning to fill space with intentional, increasingly complex patterns. That takes real skill, and it builds faster than you'd expect.
A finished Zentangle looks effortless. Getting there involves three things that beginners consistently underestimate: line weight control, pattern sequencing, and shading with graphite after the ink dries.
Line weight is how hard you press and how slowly you draw. A shaky or rushed line reads immediately in ink — there's no erasing it. Beginners tend to rush, and their patterns look scratchy rather than deliberate.
Pattern sequencing means knowing which tangle to place next to which. Dense patterns next to dense patterns create visual noise. Open patterns next to complex ones create breathing room. That spatial decision-making is what separates a composition that works from one that just... exists.
The graphite shading step is where most beginners skip out early. Applied with a tortillon or fingertip after all the ink is dry, shading gives the flat patterns dimension — turning a 2D tangle into something that looks sculpted. It's the step that makes the difference between "nice doodle" and "actual artwork."
Your first session will take about 45 minutes to an hour. You'll start with a small square — traditionally 3.5 inches, called a "tile" — and draw a light pencil border. Then you'll sketch a few curved pencil lines inside called "strings" that divide the space into sections. These stay light because they'll disappear under your ink patterns.
Then you pick one section and fill it with a tangle — a named, repeatable pattern. Beginners typically learn two or three tangles first: something with rounded shapes, something geometric, something with organic curves. You'll fill each section separately, one at a time, without thinking about the whole tile yet.
What surprises people: the ink dries fast, so smearing is only a problem in the first ten seconds. What they get wrong: trying to plan the whole tile before starting. Zentangle works because you commit to each section without knowing exactly where it's going. Trying to control the outcome before you begin kills the process.
Here's the thing working Zentangle artists understand that beginners don't: the string — those light pencil lines you draw before touching ink — is not a cage. It's a suggestion. The most common beginner mistake is filling each string section like it's a coloring book cell, stopping the pattern dead at every pencil line.
Skilled practitioners let patterns bleed across string boundaries. A tangle that starts in one section can creep into an adjacent one, soften the edge, and create visual flow between areas. That overlap is what makes a tile feel cohesive rather than like a patchwork of unrelated doodles.
The string should nearly disappear by the time you're done — absorbed by the patterns around it. If your pencil lines are still visibly defining hard edges when the tile is finished, you've been too obedient to your own guidelines.
A Micron 01 pen ($4–6), a pad of smooth cardstock or Bristol paper ($8–10), and a regular mechanical pencil. That's genuinely enough to learn the fundamentals. Skip the official Zentangle-branded tiles at first — they're nice but not necessary.
A set of Micron pens in multiple sizes (005, 01, 05, 08) gives you real line weight range. Add a tortillon or two for blending graphite shading, a kneaded eraser, and an official Zentangle kit or a pack of pre-cut tiles. A beginner's tangle reference book rounds this out.
At this level you're buying quality sketchbooks for larger ZIA (Zentangle-Inspired Art) pieces, experimenting with colored inks or watercolor washes underneath patterns, and possibly taking a Certified Zentangle Teacher (CZT) workshop. Workshops run $100–200 for a weekend. None of this is necessary — it's for people who've decided this is their thing.
Micron 01 pen — The standard. Archival, waterproof, consistent line width. One pen to start.
Smooth cardstock or Bristol paper — Copier paper bleeds. You need something with tooth that holds ink cleanly.
Mechanical pencil — For drawing strings. Any 0.5mm pencil works.
Tortillon or blending stump — For the graphite shading step. Costs about $1. Do not skip this.
Official Zentangle tiles — Beautiful, consistent, and pricey per tile. Cardstock first.
Full Micron pen set — Multiple nib sizes matter more once you're building complex compositions. One pen first.
Tangle reference books — Useful after session 10 when you've exhausted free online tangle libraries.
Colored inks or watercolor — For ZIA (Zentangle-Inspired Art) backgrounds. A later experiment, not a starting point.
New practitioners usually go straight for the most complex, intricate tangles they find on Pinterest. This backfires. Complex tangles require consistent line control you haven't built yet, so they come out muddy and discouraging.
Start with tangles that have clear step-by-step breakdowns and use only 3–5 strokes per repeat unit. The official Zentangle site publishes free stepouts — structured instructions for individual tangles — and those are the right place to begin. Tipple, Hollibaugh, and Flux are three starter tangles that build foundational skills: dots with shading, overlapping lines with depth, and flowing organic curves.
The more important decision is structural variety. Pick one tangle that's geometric (straight lines, grids), one that's organic (curves, flowing shapes), and one that's textural (dots, stippling, hatching). With those three categories covered, you can build a visually balanced tile. Choosing three tangles from the same structural category is what makes beginner tiles look repetitive.
Not every "Zentangle class" actually teaches the method. Here's what to check before you pay:
The instructor is a Certified Zentangle Teacher (CZT). Anyone can call a class "Zentangle" — CZTs have completed official training from Zentangle Inc.
The class covers stepouts, not just free drawing. You should learn specific named tangles with structured steps, not just be told to doodle freely.
Class size is small. Zentangle benefits from individual attention on technique. Groups over 15 usually mean less feedback on your actual line work.
Materials are included or clearly specified in advance. A good instructor knows exactly what you need and tells you before you show up.
The instructor shows their own work. If there's no portfolio visible anywhere, keep looking.
If in-person classes aren't nearby, the online CZT community is active and legitimate. You can also browse other structured art hobbies at the BoredomBusted creative hobbies list to see if something else clicks first.
The Zentangle community is unusually welcoming for an art form. There's almost no gatekeeping, partly because the method is by design non-competitive — tiles aren't ranked or judged against each other.
Online, r/Zentangle on Reddit is active and posts daily work across all skill levels. Instagram's #zentangle tag has millions of posts and most practitioners are generous with technique questions in comments. YouTube has solid free content — search for specific tangle names plus "stepout" and you'll find video walkthroughs for almost any pattern.
In person, local CZTs often run small group sessions that double as community meetups. Art centers and libraries occasionally host Zentangle nights. The Zentangle Inc. website has a CZT locator tool — search by zip code and you'll likely find someone teaching within reasonable distance if you're in or near any mid-size city.
Give it 30 sessions before you decide. Here's what to track:
Sessions 1–10: You're learning to slow down your line speed and commit to marks in ink. By session 10, you should have 5–8 tangles you can draw from memory without looking up a stepout.
Sessions 11–20: Composition starts to click. You're making intentional decisions about which patterns go next to each other, and your shading is adding real depth rather than smudges.
Sessions 21–30: You're starting to modify tangles, combine them in new ways, and feel genuinely frustrated when a tile doesn't live up to the composition you had in mind. That frustration means your eye has developed faster than your hand. That's growth.
Stop if the constraint of working small and in ink feels claustrophobic rather than focusing. Some people need scale and freedom — that's a real preference, not a failure.
Keep going if you've started noticing repeating patterns in the world around you — tile floors, window screens, leaf venation, fabric weaves — and your brain automatically starts breaking them into tangle-able units. When you look at a brick wall and start mentally assigning it a stepout sequence, Zentangle has its hooks in you.
Ink Drawing for Beginners — If Zentangle's use of ink intrigues you, this guide covers broader ink drawing techniques and tools.
Pencil Sketching for Beginners — Strengthen the graphite shading and line control skills that make Zentangle tiles sing.
Calligraphy for Beginners — Another meditative mark-making practice built around deliberate, controlled strokes.
Colored Pencil Art for Beginners — For when you want to bring color into your Zentangle-Inspired Art without switching to paint.
BoredomBusted Creative Hobbies List — Full index of creative hobby guides if you want to compare Zentangle against other options before committing.
You'll need very minimal supplies: a pencil, black ink pen (like a Micron pen), a square tile or sketchbook paper, and an eraser. Many beginners start with the official Zentangle kit, but basic pens and paper from any art or office supply store work just as well.
A beginner-friendly Zentangle tile typically takes 30 minutes to 2 hours, depending on pattern complexity and your pace. The beauty of Zentangle is that there's no time pressure—you can work as slowly as you want and stop whenever you feel satisfied.
No—Zentangle is specifically designed for people of all skill levels, including those who think they can't draw. You focus on repeating simple patterns and strokes rather than realistic representation, which makes it accessible and confidence-building for beginners.
You can start for under $10 using supplies you might already have at home. An official Zentangle starter kit costs $15–$25, but basic pens and paper are equally effective and much cheaper than other art hobbies.
Zentangle is highly meditative and can reduce stress, anxiety, and racing thoughts through focused, repetitive patterns. Many practitioners find it promotes mindfulness, improves concentration, and provides a calming creative outlet similar to meditation.
Yes, you can sell your original Zentangle art as prints, framed pieces, or digital downloads. However, if you use official Zentangle patterns or techniques, you may need to credit the Zentangle method in your marketing materials.