BoredomBusted — Find Your Next Favorite Thing To Do
Discover hobbies, activities, places, and ideas that spark joy. Whether you're looking for something creative, active, social, or relaxing, BoredomBusted helps you find your next favorite thing to do.
Browse our hobby guides, things-to-do collections, and place ideas to never be bored again.
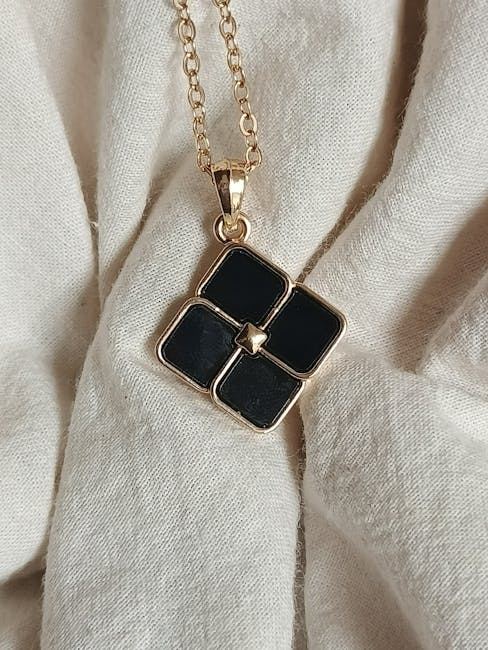
Jewelry design isn't just crafting beauty — it's an engineering challenge where understanding material physics can make or break your piece.
Getting started with jewelry design as a beginner opens up a world of creativity, allowing you to craft unique wearable art using various materials like metal, wire, beads, or gemstones into intentional forms.
You sketch or plan a concept, then build it by hand using techniques like wire-wrapping, soldering, or beading.
Unlike general crafting, every decision is structural and aesthetic simultaneously – a misplaced loop can make a piece unwearable, not just ugly.
In jewelry design, you manipulate materials and tools to create wearable objects, engaging in activities such as wire wrapping, beading, soldering, and setting gemstones while making design decisions that require attention and precision.
This hobby provides a sense of accomplishment as you create tangible pieces, satisfying a creative drive and offering incremental skill feedback through the progression from simple techniques to more complex metalworking.
You think jewelry design is arts and crafts. A hot glue gun, some beads, maybe a YouTube tutorial running in the background while you half-pay-attention.
That assumption is exactly why most people never try it – and why the ones who do can't stop.
Imagine you're making your first wire-wrapped ring. You aren't just bending metal. You're learning why the wrap splits at the shank. That's when you find out why jewelers charge what they do.
That learning curve is very real. Curious about what your first real session will be like? And what tools you might actually need?
At first, working with wire seems like it should be straightforward. But when the wire slips from your grasp or puckers unexpectedly,you realize your fingers have never felt clumsier before.
The excitement is palpable. You have a Pinterest board brimming with ideas and a box of wire ready for your new creative journey. You swiftly discover, though, that almost everything goes off script. Wire kinks in places you didn't anticipate. Cuts end up shorter than intended. Your pliers make unexpected marks, and you're left with joints that refuse to close neatly, leaving you feeling a bit deflated.
You'll complete your initial piece and probably dislike it immensely. It's okay. There's more growth in that one awkward creation than any polished tutorial can offer. Soon, your sense of wire tension starts to sharpen. You sense what too tight or too loose feels like. But be prepared—what worked once might not work again, which sounds counterintuitive, but that unpredictability is what shapes real skill.
Despite the struggles, by the fourth piece, something has changed. It's not perfect, but it feels crafted. **You put thought into it, made choices, and it reflects more than just practice.
In the beginning, wasted wire and unsatisfactory results seem like constant companions. It's not about complexity; it's thatyour hands need to repeat the motions hundreds of times before they truly align with your intent.
Here's a tip: opt for half-hard wire. Dead-soft wire may appear more forgiving, but it lacks structure, causing early pieces to fall apart. Half-hard wire sustains its shape, helping you see your progress unfold.
When to start: Morning
Duration: 1.5 hours
Cost to try: $30
Success criteria: if you finished without needing expert help, do session 2.
Walking into hardware stores and bead shops often leads to overstocking supplies without knowing your preferred projects.
Stick to 20-gauge and 24-gauge copper wire until you find your focus. These two gauges handle most beginner techniques, and copper is affordable enough for trial and error.
Using craft scissors on wire seems convenient, but blunt cuts create sharp edges that can scratch.
Invest in a proper flush cutter and check each cut for snags. A smooth finish prevents skin irritation.
Designs often falsely assume standard wrist and neck sizes, especially when creating gifts.
Measure the intended recipient. If that isn't possible, refer to standard sizing charts like a 16" choker, 18" princess necklace, or 7.5" bracelet.
Combining sterling clasps with copper chains sounds fine, but different metals tarnish at different rates.
Use uniform metals for each piece or coat base metals with Renaissance Wax. This maintains an even appearance.
Loose tension on beaded strands seems graceful until gaps form and the strand breaks easily.
Keep a slight tension when stringing and crimp firmly. Test by tugging the strand before you finish—if beads shift, restring it.
Jewelry design thrives in diverse settings. Many creators work from home workbenches or in makerspace studios. Community art centers often offer classes that include bench time rentals by the hour or session.
Some jewelers benefit from art school continuing-ed programs. These provide access to professional equipment like torches and rolling mills without the need to purchase them.
Snag a spot in your local jewelry scene by starting on Facebook Groups. Search for "jewelry making guild [your city]" for communities that are often more active there than on platforms like Meetup.
The Society of North American Goldsmiths (snagonline.org) is a central hub for connection. Find your nearest chapter for workshops and critique sessions that welcome beginners.
If you're looking for local classes, try CourseHorse or Eventbrite. Search "metalsmithing class [your city]." These offerings are often run by working jewelers who also teach and are well-connected locally.
Entering a new space? Simply say, "I'm just starting out – I've never used a torch or bench tools." This opens the door to the right class level and the lending of safety gear. It often leads to pairing with a mentor who has walked the same path.
This technique shapes and coils wire around stones or beads manually. Ideal for beginners seeking fast results without soldering.
A roll of copper wire and basic pliers cost less than $20.
Thread beads onto cord, wire, or elastic for necklaces and bracelets. Focus is on color and pattern choices, making it creative yet straightforward.
Perfect for those looking for creativity without a steep technical learning curve.
Saw, file, solder, and form raw metal into finished pieces. **Transcends a casual hobby**, turning jewelry design into a serious skill.
Startup costs range from $200–$500 for a torch, bench block, and tools.
Pour liquid resin into molds to embed objects like flowers and foil. The aesthetic is specific, so ensure you like the look.
Molds and resin kits are affordable, but proper ventilation is essential due to fumes.
Link metal jump rings into complex patterns to create flexible structures. Patience and precision take priority, perfect for those enjoying meditative, repetitive tasks.
Readers who enjoy this often gravitate toward Cartoon Drawing next.
Some of the same instincts show up in Etching — worth a look if this clicked.
Some of the same instincts show up in Sketching — worth a look if this clicked.
Proportional scaling is the real breakthrough. Beginners often miss this, focusing on wire wraps and bead spacing instead. It's about seeing each component's visual weight in relation to the entire piece, not just admiring it in isolation.
Once you master proportional scaling, everything speeds up. Design decisions become second nature. You fix issues at the sketch stage, avoiding pieces that feel 'off.' Without this skill, you might blame problems on materials or tools—none are actually the problem.
Commit to 8 sessions over 30 days – roughly two per week. This is enough time to move past the initial awkwardness, complete a piece, and understand the feel of hands-on craftsmanship.
You find yourself eager to start before official sessions begin. Doodling clasps and scanning necklaces on public transit points to a real passion for the craft. It's not just about the end product; it's about solving how tiny parts come together. Move forward by exploring intermediate wire-wrapping or basic metalsmithing next.
You completed the sessions but didn't think about the craft outside of them. This isn't a total wash, but the interest isn't pulling strongly. Try extending to four more sessions with a clear goal, like crafting a gift, to see if more time brings deeper involvement or if it's time to move on.
You dreaded each session and felt relief when they ended. That's clear feedback. The slow pace, detailed focus, and detailed repetition aren't temporary issues. They're central to the craft, so consider moving on to something more suited to your tastes.
The curiosity that counts is your urge to examine the mechanics of jewelry construction at random moments. If you're inspecting how a clasp is attached rather than admiring design, that's your signal.
Sometimes you just need something for the next ten minutes — that's what things to do when bored is for.
You'll need basic hand tools like pliers, wire cutters, and files, plus materials like wire, beads, and gemstones—a beginner starter kit typically costs $30–$100. Many people begin with cold-working techniques like wire wrapping and beading before investing in metalworking equipment like torches and kilns.
Simple designs like beaded necklaces or wire-wrapped pendants can take 30 minutes to 2 hours, while more complex pieces involving metal casting or setting stones may take several hours or multiple sessions. Your pace depends on the technique and your experience level.
Basic techniques like beading, stringing, and wire wrapping are beginner-friendly and have a low learning curve. More advanced skills like soldering, stone setting, and metalworking require practice and patience, but most hobbyists pick them up gradually through online tutorials and hands-on experience.
Jewelry design focuses on creating original concepts and aesthetic vision, while jewelry making is the technical process of building those designs. As a hobby, you'll typically do both—sketching ideas, selecting materials, and handcrafting each piece.
A basic beginner kit with hand tools and materials runs $40–$150, and you can start creating immediately. If you want to expand into metalworking with soldering or casting equipment, expect to spend $200–$500+ for quality tools, but you can grow gradually as you develop your interests.
Yes, many hobbyists sell their handmade pieces on platforms like Etsy, at craft fairs, or directly to friends and family. Just ensure you disclose materials accurately and understand local business and tax requirements if you're selling regularly.