BoredomBusted — Find Your Next Favorite Thing To Do
Discover hobbies, activities, places, and ideas that spark joy. Whether you're looking for something creative, active, social, or relaxing, BoredomBusted helps you find your next favorite thing to do.
Browse our hobby guides, things-to-do collections, and place ideas to never be bored again.
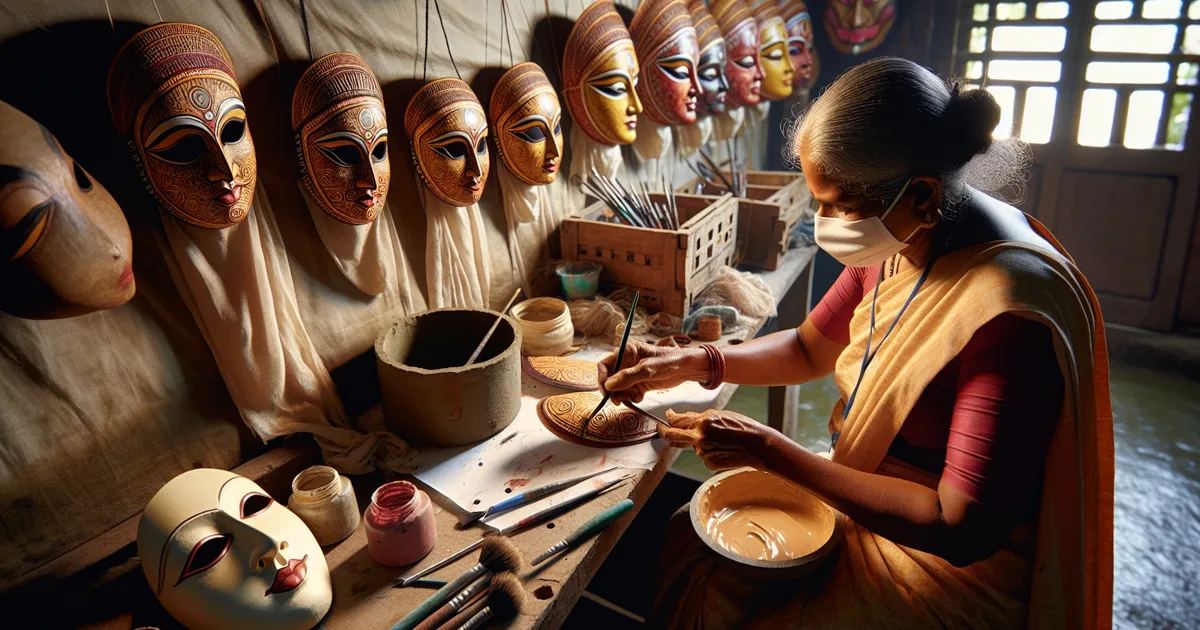
Mask making is far more than just craft — it’s a crash course in sculpture, mold-making, and design that can lead to advanced prop making in months.
Getting started with mask making as a beginner involves exploring various materials like paper mache, plaster, foam, or resin to create unique wearable face coverings from materials like paper mache, plaster, foam, or resin – then finishing them with paint, fabric, or texture.
Unlike sculpture or cosplay prop-building, the design has to function on a human face, which shapes every creative decision from the start.
In mask making, you start by choosing or crafting a mask base from materials like cardboard or plaster. You then meticulously decorate it using layered techniques, applying glue and adhering various decorative elements like fabric, feathers, or sequins. The process involves cutting or tearing materials, layering them, and shaping facial features, culminating in a finished mask that you can name a…
Mask making combats boredom through dual-sided creative expression, allowing you to explore your inner self while crafting an outer persona. The repetitive actions involved create a flow state, where tangible progress and skill feedback—like adhering materials or sculpting features—contribute to a sense of accomplishment. The novelty from personalizing masks keeps the experience fresh, while the …
You think mask making is just a simple craft fair hobby. Papier-mâché, hot glue guns, something you'd never spend real time on.
But it pulls from four skills at once: sculpture, mold-making, material science, and surface design. You're learning far more than you realize.
First, it's foam and paint. Eventually, you'll tackle prop-making and cosplay.
Creating a mask requires artistry that reads well from afar, fits a moving face, and retains its form.
A prop designer began with just a $12 foam sheet and a basic face casting tutorial. Three months in, she was crafting articulated jaw pieces for a touring show. It's the steep skill ladder that surprises most people, not raw talent.
Choosing the right materials is critical from the start. This decision affects every aspect of your initial project.
Next, we'll explore how material choices shape your mask-making journey.
Watching someone shape a mask looks meditative. Smooth pulls, confident cuts, forms that emerge like they were always there.
Your first session will be a surprise. Excitement mixes with confusion. Twelve browser tabs open. Materials half understood. Sure, you'll nail the symmetry.
Instead, one side is higher than the other. Edges crack. You're proud anyway and already planning the next one.
Start slow with your armature. Build it sturdy, even if it feels boring. Jumping ahead leads to warps and collapses. Every flaw in your first masks haunts you, all from sloppy foundations.
You might want to quit, but it isn't about talent. Pushing past week two means accepting that frustration is part of learning. The difference is viewing this struggle as progress, not failure.
When to start: Morning
Duration: 1.5 hours
Cost to try: $15
Success criteria: If you completed a painted mask with embellishments and felt creative, do session 2.
It feels simpler to start flat. But a mask made this way gaps and sags on a real face.Use a mannequin head or your own face cast with alginate. Your mold should match the curves it will sit on.
Materials like paper clay soak up paint unevenly. Beginners often blame their technique for the blotches.Apply two coats of gesso or sealant and let it fully cure before painting.
Measuring from a diagram ignores personal eye placement. Many begin here and miss the mark.Hold the mask to your face, mark pupil centers with a grease pencil, then cut.
Decorations attached to a flexible mask make it warp under their weight.Let the mask dry fully. Then add decorations, starting with the heaviest.
Elastic might seem right for masks, but it creates a pressure point, making heavy masks uncomfortable.
Opt for two ribbon ties, at the temples and back of the crown, for even weight distribution.
Most mask making happens at home using a kitchen table or a craft corner for papier-mâché and foam projects. For more advanced tools like rotary cutters or heat guns, find a nearby makerspace or community art studio.
There's no single national body for mask makers. Theatrical types might join IATSE or United Scenic Artists union if they're more into fine art stuff.
Introduce yourself this way: "I'm new – I've done one or two builds but I don't have a process yet." That line gets you advice without the sales pitch for beginner classes.
Papier-mâché is the go-to method for beginning mask makers. Newspaper strips, paste, and a balloon mold can achieve impressive results. Materials cost almost nothing, so you don't need to worry about mistakes as they are practically free.
Creating Venetian masks focuses more on decoration than durability. Perfect for visual artists, you can skip construction by starting with a pre-formed blank mask ($2–5 each) and dive right into painting, gilding, and adding ornaments.
Wet-formed leather offers masks with lasting contours. Ideal for those looking for longevity, this method involves a technical process that's rewarding for those wanting to upgrade from papier-mâché. Expect to invest $30–60 for leather and tools.
Building foam latex masks combines performance with artistry, perfect for stage or film. Great for performers, these masks are designed for movement and wearability. The mold-making process is time-consuming, making it a task for a weekend, not an afternoon.
Resin casting involves creating a mold and pouring liquid resin to make a solid shell. Ideal for mass production, it's suited for those with a background in 3D printing or sculpting. Initial costs are $80–120 for resin, mold materials, and safety equipment.
DIY Renovation lives in the same world — different mechanics, similar appeal.
A close neighbor worth considering: Stone Sculpture.
For something adjacent, see Blacksmithing.
Contour mapping is essential. It's the skill of visualizing shifts in a mask before you start decorating.
Don't guess. Recognize ridges, valleys, and transitions, and let them guide your material choices.
When you understand a form before starting, your decorations harmonize with the shape. Suddenly, the mask becomes intentional, not cluttered.
Without this skill, you're trapped in flat thinking on a 3D object. More details won't correct that core mismatch.
Try making masks four times over the next month. That's the actual test.
If you find yourself reworking features late at night or browsing reference photos during lunch, you're hooked. This isn't an obsession, it's a genuine fit. Start experimenting with more complex materials and focus on developing a personal style.
If each session is just fine and the hobby never crosses your mind afterward, give it two more tries. Sometimes, the satisfaction appears only with a truly completed mask, not the creation process.
If you dreaded each session, pay attention to that feeling. It's not about lacking discipline; it's a clear signal that this isn't enjoyable for you. Some find the hands-on aspect tedious rather than satisfying, and that's just how it is.
If you're analyzing carnival masks, Venetian designs, or theater pieces just to understand their construction, your brain's already engaging with the craft.
If mask making feels like too much to commit to right now, browse what to do when you're bored for lower-stakes ideas.
You can start with basic supplies like papier-mâché, cardboard, foam, or clay—most are affordable and available at craft stores. For beginners, papier-mâché is the most forgiving option and requires just newspaper, glue, and a mold to build on. As you progress, you can explore leather, resin, fabric, and specialty materials depending on your mask style.
A simple papier-mâché mask typically takes 2-4 hours of active work spread over several days to allow drying time. More complex designs with detailed painting or embellishments can take 1-2 weeks, especially if you're hand-sculpting the base or using materials that require longer cure times. The timeline depends heavily on your chosen technique and desired intricacy.
No—mask making is very beginner-friendly, especially with papier-mâché or foam techniques that have a low barrier to entry. You don't need advanced sculpting or art skills to create something wearable and visually striking. Most beginners see satisfying results within their first project.
Theater masks are designed to be worn and seen from a distance, focusing on exaggerated features and expression clarity. Decorative masks prioritize aesthetics and intricate details for display or wall hanging. Theater masks need lightweight construction and secure fastening, while decorative masks can be heavier and more ornate.
You can start for under $20 with papier-mâché supplies (glue, newspaper, and paint). A basic beginner kit with molds and materials typically costs $30-50, while investing in specialty tools and premium materials runs $75-150. Most hobbyists find the activity affordable to maintain once initial supplies are purchased.
Absolutely—you don't need to sculpt from scratch to create impressive masks. Using existing molds, balloons, or face forms as bases lets you focus on layering, shaping, and finishing instead. Many mask-makers rely on found objects and simple folding techniques rather than traditional sculpture.