BoredomBusted — Find Your Next Favorite Thing To Do
Discover hobbies, activities, places, and ideas that spark joy. Whether you're looking for something creative, active, social, or relaxing, BoredomBusted helps you find your next favorite thing to do.
Browse our hobby guides, things-to-do collections, and place ideas to never be bored again.
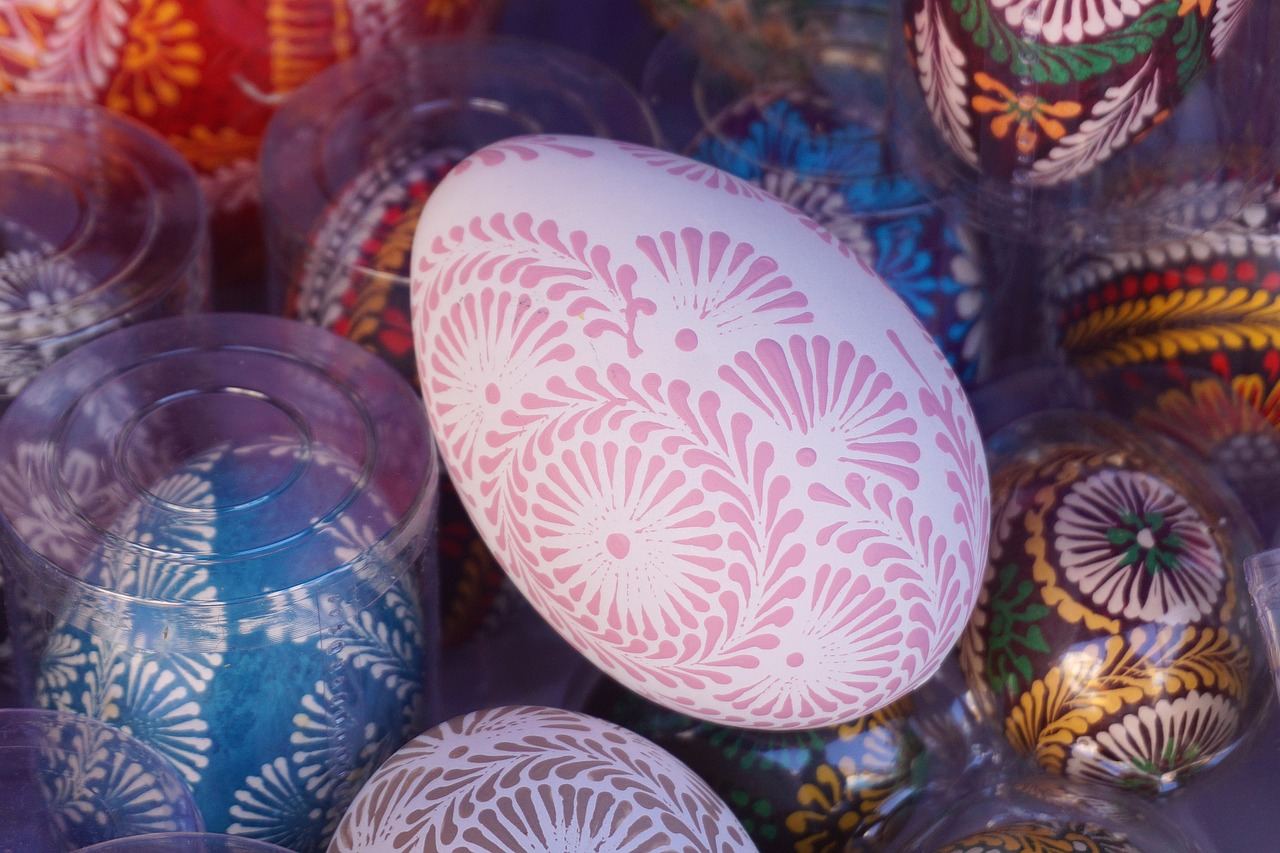
Pysanky isn't just about creativity; it’s a meditative dance of precision and instant feedback that transforms frustration into satisfaction.
Learning pysanky as a beginner opens up a fascinating world of Ukrainian egg decoration through the intricate process of wax resist. Apply beeswax to block dye, layer colors from light to dark, then melt the wax to reveal the pattern.
Design is built in reverse by removing layers instead of adding them. This sets it apart from painting or dyeing eggs.
Pysanky involves using a heated kistka to apply wax in intricate patterns on raw eggs, followed by a process of dyeing, re-waxing, and layering colors until the desired design emerges, culminating in the removal of the wax to reveal the final artwork.
This hobby fosters a flow state through precise motor control and problem-solving, providing immediate skill feedback as designs unfold, alongside a sense of accomplishment when the intricate layers are revealed, all while allowing for creative expression and social interaction in group settings.
You think this is Easter egg decorating. You've already pictured a kitchen table, some dye tablets fizzing in vinegar cups, and a seven-year-old making a mess.
That's not what this is.
Pysanky is not your childhood craft. This wax-resist batik process involves drawing in wax, layering dyes from light to dark, then melting the wax to reveal the pattern. It's a world apart from elementary school art.
The symbols are a language. Geometric motifs like spirals and fish scales carry meanings passed down for centuries. Learning this visual grammar changes your design approach.
Controlled line-work under pressure is the skill. Wax cools fast, showing hesitation. This teaches a focused patience that few hobbies deliver on.
A woman who'd done calligraphy for twelve years picked up a kistka for the first time and said the line discipline felt familiar. But the egg's curve made her feel like a beginner again.
The form keeps you honest. The next question is what starting actually costs you – in time, money, and the first week of inevitable frustration.
Watching Pysanky tutorials feels like seeing someone effortlessly perform fluid, relaxed art.
Pick up a kistka for the first time, and you'll find wax flows unpredictably. Nothing goes where you plan. The gap between watching and doing is wider here than in most crafts.
Week one is mostly about reheating your kistka more than actually drawing. It's frustratingly normal to spend more time adjusting than creating.
By week two, your lines improve, but geometry feels elusive. 'Almost right' is a frequent result, which is more irritating than obviously wrong.
In week three, one egg will surprise you. Most decisions will align, providing more insight than the five attempts before it.
By week four, things start to fall more naturally into place. You leave behind the panic of constant mistakes, trading it for growth.
Don't give up after your first egg. The process of improvement truly begins with the third attempt when wax-resist logic starts making sense in your hands.
Remember to observe the wax color, not the flame.
Clear or golden means it's flowing right.
Dark brown or black means it's burning, which compromises your design.
When to start: Morning
Duration: 1 hour
Cost to try: $20
Success criteria: if you finished without breaking any eggs, do session 2.
Seasoned artists rely on muscle memory to guide their kistka, but beginners don't have this advantage. Wax lines are unforgiving and can't be erased.
Sketch your grid lines lightly in pencil first. This way, you have a framework to follow with the wax, not just a wish for perfection.
It seems efficient to load up on wax, but an overfilled kistka brings trouble. Air bubbles get trapped, leading to blotchy lines.
Add just enough wax to cover the funnel's opening. Reload often to maintain control and keep the tip moving constantly when it's in contact with the egg.
Wet dye looks darker, leading beginners to pull eggs early, resulting in disappointing colors once dried.
Keep eggs in the dye for at least twice what seems enough. Blot with a paper towel to see the true dry shade.
Pysanky relies on wax preserving the base color, so going out of order can spoil your design.
Plan your color sequence from lightest to darkest in advance. Follow it strictly to ensure your final design works as intended.
Keeping the egg near a flame can lead to cracking and scorching.
Maintain a distance of at least six inches from the flame. Rotate the egg constantly and wipe the wax off the moment it turns glossy.
Pysanky thrives at home, on kitchen tables across communities. Yet, cultural centers and art studios, especially those tied to Ukrainian organizations, offer workshops around Easter.
Start by visiting your local Ukrainian Cultural Center or Ukrainian Orthodox/Catholic church. They host Easter-season workshops and have connections to local practitioners.
The Ukrainian Gift Shop (ukrainiangiftshop.com) is another resource. They can connect you with local instructors.
Though no national body governs this hobby, cultural organizations like the Ukrainian Institute of Modern Art play vital roles. Still, finding a church hall or local cultural club is your best bet. Declare, "I've never done this before and I don't own a kistka," and you'll soon be guided by seasoned hands. Expect a loaner tool, real-time beeswax demonstrations, and likely a Ukrainian grandmother eager to see you finish your first egg before leaving.
### If You Crave Authentic Tradition
Use a heated stylus to draw wax lines, then layer dyes from light to dark. The big reveal comes when you remove the wax. It's a surprise every time. Perfect for those who want the full traditional experience and can handle a challenge.
### If You Prefer Scratching over Wax
Cover the egg in a dark color and scratch your design into the shell. Skip the dyes and embrace imperfections as texture. Great for those with a drawing background or who find wax tools intimidating. Just use a stylus or craft knife.
### If You Want Organic Flow
Apply wax-resist with loose, flowing lines. Forget strict geometry. Think more about movement than symmetry. Ideal for artists who enjoy freedom over rules.
### If You Love Beadwork
Use beeswax and tiny beads to craft intricate designs. No heats, no dyes, just patience. Results are stunning, but the process is time-consuming. Perfect for beadwork enthusiasts with plenty of time.
### If You're a Total Beginner
Press real leaves or ferns onto an egg before dyeing for a natural look. It's quick and almost foolproof, offering a rewarding start. Best for those new to the craft needing a quick win before diving deeper.
Car Restoration lives in the same world — different mechanics, similar appeal.
Another variant that pulls from the same roots is Quilting.
Beginners often focus on dyes and beeswax quality, but the real breakthrough comes from mastering wax temperature control at the kistka tip
Reading wax flow in real time is essential. You need to know if your kistka is too hot (wax bleeds), too cool (it drags), or just right. Adjust mid-stroke without lifting the tool for best results.
Master this, and your lines become deliberate. Intricate designs and fine hatching are within reach. You're no longer restarting constantly.
Without mastering this skill, you can't control the tool. A kistka just a few degrees off can ruin designs, no matter how carefully planned.
Plan for six pysanky sessions over a month, ideally one session every five days. This lets you learn without rushing, allowing time for wax to cool and dye to set.
If you're itching to design another egg before the session ends, that's a great sign. You're drawn to solving the challenges of planning layouts and correcting mistakes. Dive deeper by exploring traditional Ukrainian motifs and their meanings.
If you finish six sessions feeling indifferent, consider your materials. Bad kistky or weak dye might be to blame. Try one more session with better supplies. If it still feels off, it might not be for you.
Finding the process itself unappealing signals that this might not be your hobby. The combination of precision and delayed gratification is fundamental. It probably won't grow on you with time.
Start noticing patterns everywhere. If you're mentally planning how they'd look on an egg, that's genuine fit showing itself.
Pysanky is a deeper commitment than most boredom cures — for lighter options, check things to do when bored.
Pysanky are Ukrainian decorated eggs created using an ancient wax-resist dyeing technique. The patterns carry symbolic meanings—stars represent success, flowers symbolize love, and wheat represents a good harvest. Each design tells a story rooted in Ukrainian heritage and cultural tradition.
A single pysanky egg typically takes 1–3 hours to complete, depending on pattern complexity and your experience level. Beginners may need extra time, while experienced artists work faster once they develop muscle memory and confidence with the tools.
A beginner kit costs $20–$50 and includes a kistka (wax pen), beeswax, dyes, and eggs. Quality improves with additional supplies, but you don't need expensive materials to learn—many artists start simple and upgrade tools as they progress.
Pysanky has a gentle learning curve—the basic technique is accessible to beginners, but perfecting detailed patterns takes practice. Your first eggs may have imperfections, but that's part of the creative process and actually adds character to handmade pieces.
You'll need a kistka (a small metal cup on a stick filled with hot beeswax), raw eggs, block dyes or dye powders, candles or a heat source, and vinegar to set colors. Most supplies are affordable and reusable across multiple projects.
Traditionally, pysanky eggs are not eaten because the wax coating seals in the raw contents. However, some people blow out the egg's interior first to create a hollow, non-perishable keepsake that lasts indefinitely as a decorative piece.