BoredomBusted — Find Your Next Favorite Thing To Do
Discover hobbies, activities, places, and ideas that spark joy. Whether you're looking for something creative, active, social, or relaxing, BoredomBusted helps you find your next favorite thing to do.
Browse our hobby guides, things-to-do collections, and place ideas to never be bored again.
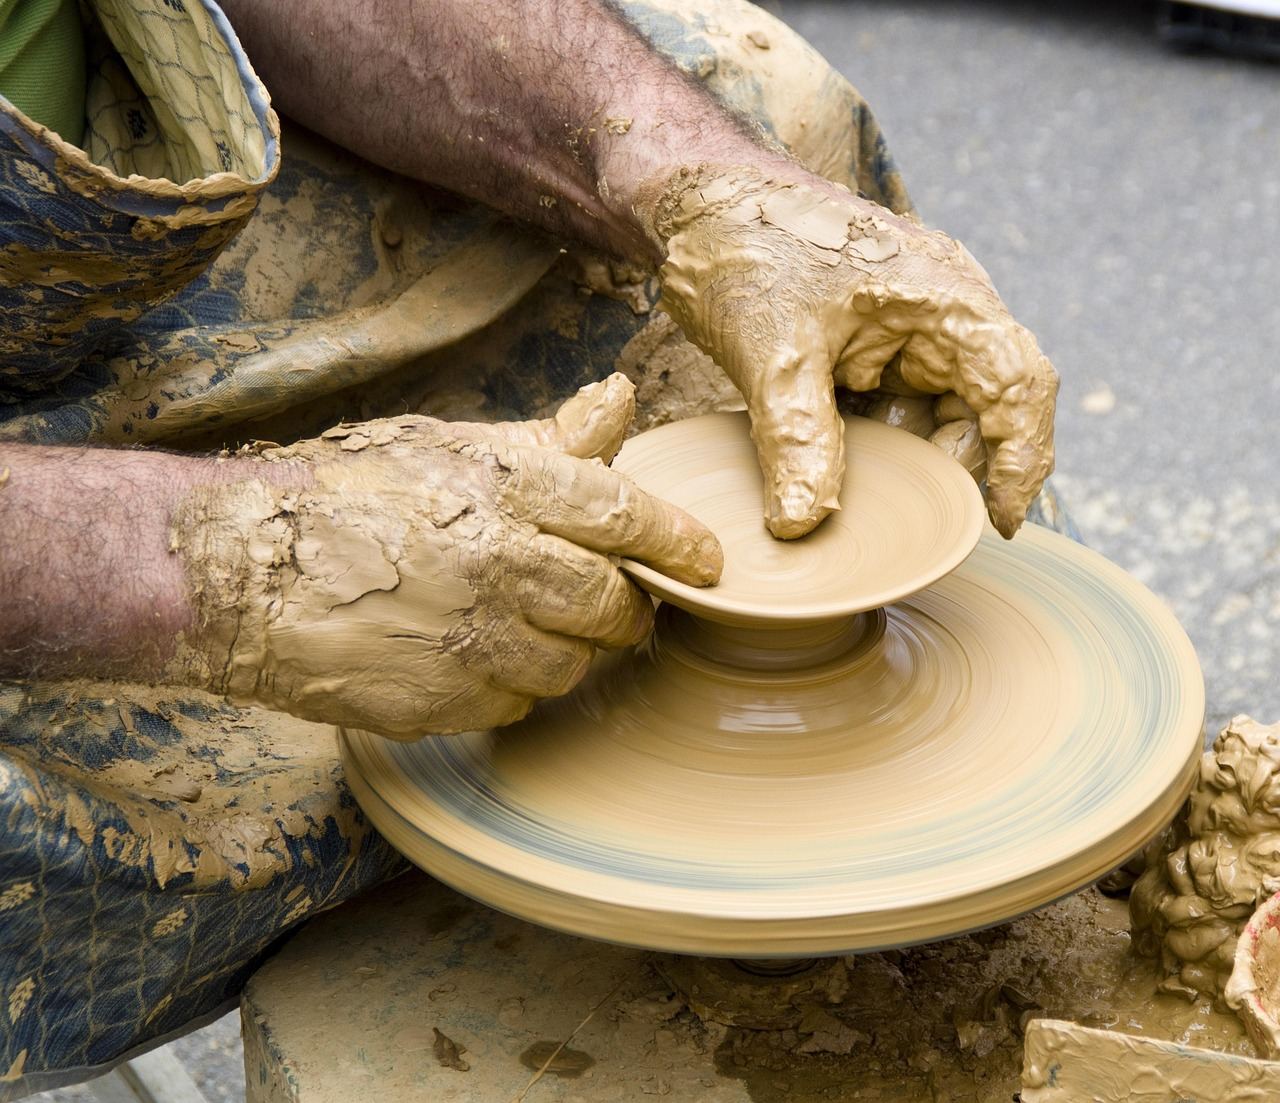
Wheel throwing isn't about creating pretty bowls — it's about mastering the art of negotiation with clay, a lesson in body awareness and patience.
Learning wheel throwing as a beginner is an exciting way to create unique pottery pieces using just clay and your hands.
You center a lump of clay, open it, and pull the walls up while the wheel turns.
Unlike hand-building or sculpting, the wheel does half the work – and fighting it is exactly why beginners struggle.
In wheel throwing, you prepare clay by wedging it to remove air pockets, then center it on a spinning pottery wheel, using your hands to shape it into forms like cylinders or bowls through a series of precise movements, including coning up and down and pulling the clay upwards while constantly adjusting wheel speed for control.
Wheel throwing fosters a flow state through intense focus on hand pressure and timing, offering immediate tactile feedback as you learn from the stability or wobbliness of the clay, while the process of transforming a lump into a vessel provides a sense of accomplishment and opportunities for creative expression as you experiment with forms and techniques.
You think wheel throwing is a relaxing weekend craft. Something you pick up, mess around with, and walk away with a lopsided bowl your mom will pretend to love.
That's the assumption – and it's selling the whole thing short.
A potter named Chris spent six sessions convinced he had no coordination. Then on session seven, he centered a two-pound lump in under a minute – and said it felt less like he'd learned something and more like his body had finally stopped arguing with itself.
That shift – from fighting the clay to working with it – is what the first experience section is actually about.
Watching someone throw a pot looks like meditation. Hands barely moving, clay rising like it's cooperating. Your first session will feel like you're arm-wrestling a living thing — and losing.
Most of your first session is spent figuring out why the clay keeps sliding off-axis. You'll push when you should pull. Water goes everywhere. The lump you were centering spins off the wheel, and you'll sit there genuinely unsure what you did. That confusion is the whole first session, and it's the same for almost everyone.
By week two, you'll center once or twice — then immediately collapse the wall trying to open the floor, which is a completely separate skill. Week three, you pull a wall up. Uneven, thick at the bottom, thin at the top. But up. Week four, you make something that holds water and looks like a cup, and it will be the ugliest cup you've ever loved.
Quit. Come back. Quit again. That's not weakness — that's just what week two feels like for almost everyone who eventually gets good at this. The one thing to know before you sit down: your wheel speed and hand pressure have to move together. Fast wheel, light hands. Slow wheel for the rim, slow hands too. When the clay fights back, those two are out of sync — not a sign you're doing it wrong. The next section covers the specific mistakes that keep beginners stuck in that frustrating half longer than necessary.
When to start: Morning
Duration: 1.5 hours
Cost to try: $20
Success criteria: if you finished without breaking the clay, do session 2.
The wheel looks like a hand tool, so beginners naturally push with their hands – and then wonder why they're exhausted after two minutes.
Anchor your elbows into your thighs and let your core do the compression, not your biceps.
Wet hands feel like control, but every extra splash is dissolving the clay's structure from the outside in.
Keep a sponge nearby instead of a bucket – dab, don't soak, and stop adding water once you're pulling walls.
One confident pull feels like progress, so beginners stack three or four yanks trying to get height in one go.
Do more pulls at lower pressure – four gentle lifts will get you taller, thinner walls than two aggressive ones every time.
You're trying to make room inside the pot, which makes sense – right up until you push through the bottom.
Measure the floor thickness by pressing one finger down from inside and matching it with a finger pressed up from outside, stopping when you feel them meet at about half an inch.
A wobbly rim seems like a finishing problem, but it's usually already set by the time you notice it.
Compress and true the rim with a chamois or two wet fingers at the end of every pull – not once at the end when the damage is done.
Wheel throwing happens in ceramic studios, community art centers, and college continuing-ed programs – not your garage (yet).
Ceramic studio, community art center, and makerspace pages cover what each setup actually offers.
Tell them you've never touched a wheel before – that single sentence gets you pointed toward intro sessions instead of open studio time, which is a completely different (and much less frustrating) experience.
You'll likely also get a materials list upfront, which saves you buying clay you can't fire.
Not every potter works the same way. Beyond the standard wheel-and-clay setup, here's what actually exists — and who each one is for.
Electric wheel throwing is the default for a reason. An electric motor controls the spin, so you focus entirely on the clay. Consistent speed means one less variable while you're still figuring out centering — and that matters more than beginners expect.
Entry-level electric wheels run $400–$800 new. Studio classes let you skip that cost entirely while you figure out if this sticks.
Kick wheel throwing puts you in control of the spin — you power a large flywheel with your foot. The speed is slower and more variable. That variability forces a more intuitive connection with the clay, which is why it suits potters who already have the basics down.
Kick wheels are often cheaper to buy used. But they're heavy — and "I'll put it in the garage" is how they become expensive furniture.
Off-the-hump throwing means centering one large mound and pulling multiple small pieces from the top without re-centering each time. It's the fastest approach for production work — bowls, cups, small vessels in volume.
This is an intermediate technique. If you haven't nailed centering once yet, you're not ready for it.
Altered thrown work starts on the wheel, then goes somewhere else. You throw a basic form, then cut, reshape, or distort it before it fully dries — using hands, paddles, or wire tools. The wheel is just a means to an initial shape, not the finished result.
Best for people who want their work to look sculptural rather than classically turned.
This isn't a different technique — same wheel, different clay body, completely different behavior under your hands. Porcelain tears, collapses, and shows every hesitation; stoneware forgives the mistakes beginners make constantly.
Pick stoneware until centering feels automatic. Porcelain will still be there when you're ready.
If you want a related angle, Raku Pottery is the natural next stop.
For something adjacent, see Hand Building Pottery.
Origami lives in the same world — different mechanics, similar appeal.
Most beginners obsess over centering – getting the clay perfectly symmetrical before they move on.
That's not the bottleneck. Feeling water and friction through your fingertips is.
The one skill is reading clay pressure in real time – knowing, through touch alone, whether the clay is pushing back, giving way, or about to collapse, and adjusting hand pressure within the same second.
Not after it wobbles. Not when it's already off-center. While it's still recoverable.
When you develop this, your hands stop chasing the clay and start guiding it.
The wall rises evenly because you feel the thinning before it becomes a problem.
Without it, you're always one second behind, correcting mistakes instead of preventing them, and every pull becomes a gamble.
Forget whether you'll be "good at it." The only question worth answering right now is whether it's worth 30 days of your actual time.
Here's the test: commit to 6 sessions over 30 days. That's roughly one session every five days – enough to get past the humbling first two sessions, feel the muscle memory start to form, and catch yourself either dreading or anticipating the next one.
Fewer than 6 and you're still in pure survival mode. More than 6 in 30 days is great, but it's not the threshold.
Six sessions is where wheel throwing starts to reveal itself.
You're watching pottery videos at 11pm – not tutorials, just process videos of someone centering clay. That low-level background pull toward the sensory experience of the thing is more predictive than talent. If that's been happening quietly for a while, you already know what this section is going to tell you.
If this still sounds like a yes – or even a maybe – the resources section below covers exactly where to find studio time, what a beginner class actually costs, and what to look for before you book.
For quicker fixes, see our roundup of things to do when you're bored.
Most beginners can create basic cylindrical forms within 4–6 weeks of regular practice, though mastering consistent, refined pieces typically takes 6–12 months. The learning curve depends on practice frequency and instructor quality, but fundamental techniques are achievable fairly quickly.
A quality pottery wheel costs $300–$1,500 depending on whether you buy new or used, and clay supplies run $20–$50 initially. Many people start by taking classes at local studios for $15–$30 per session, which includes wheel access and materials—making this the most affordable entry point.
Wheel throwing has a steep initial learning curve—your first attempts will likely collapse or wobble—but it's not impossible. With proper instruction and consistent practice, most people overcome the frustration phase and start creating recognizable pieces within a few weeks.
You can create bowls, vases, mugs, plates, cups, and decorative vessels of various sizes and shapes. Once you master basic forms, you can combine techniques like trimming, carving, and adding handles to customize your pieces or create more complex functional work.
A tabletop pottery wheel requires about 2–3 feet of workspace, though you'll want extra room around it for comfortable movement and safety. A floor model wheel needs roughly 4×4 feet minimum, plus space for a work table and clay storage.
Taking in-person classes at a pottery studio is ideal for beginners—instructors can correct hand positioning and help troubleshoot problems that are hard to fix from video tutorials alone. This approach also gives you immediate access to professional equipment without the upfront investment of buying your own wheel.