BoredomBusted — Find Your Next Favorite Thing To Do
Discover hobbies, activities, places, and ideas that spark joy. Whether you're looking for something creative, active, social, or relaxing, BoredomBusted helps you find your next favorite thing to do.
Browse our hobby guides, things-to-do collections, and place ideas to never be bored again.
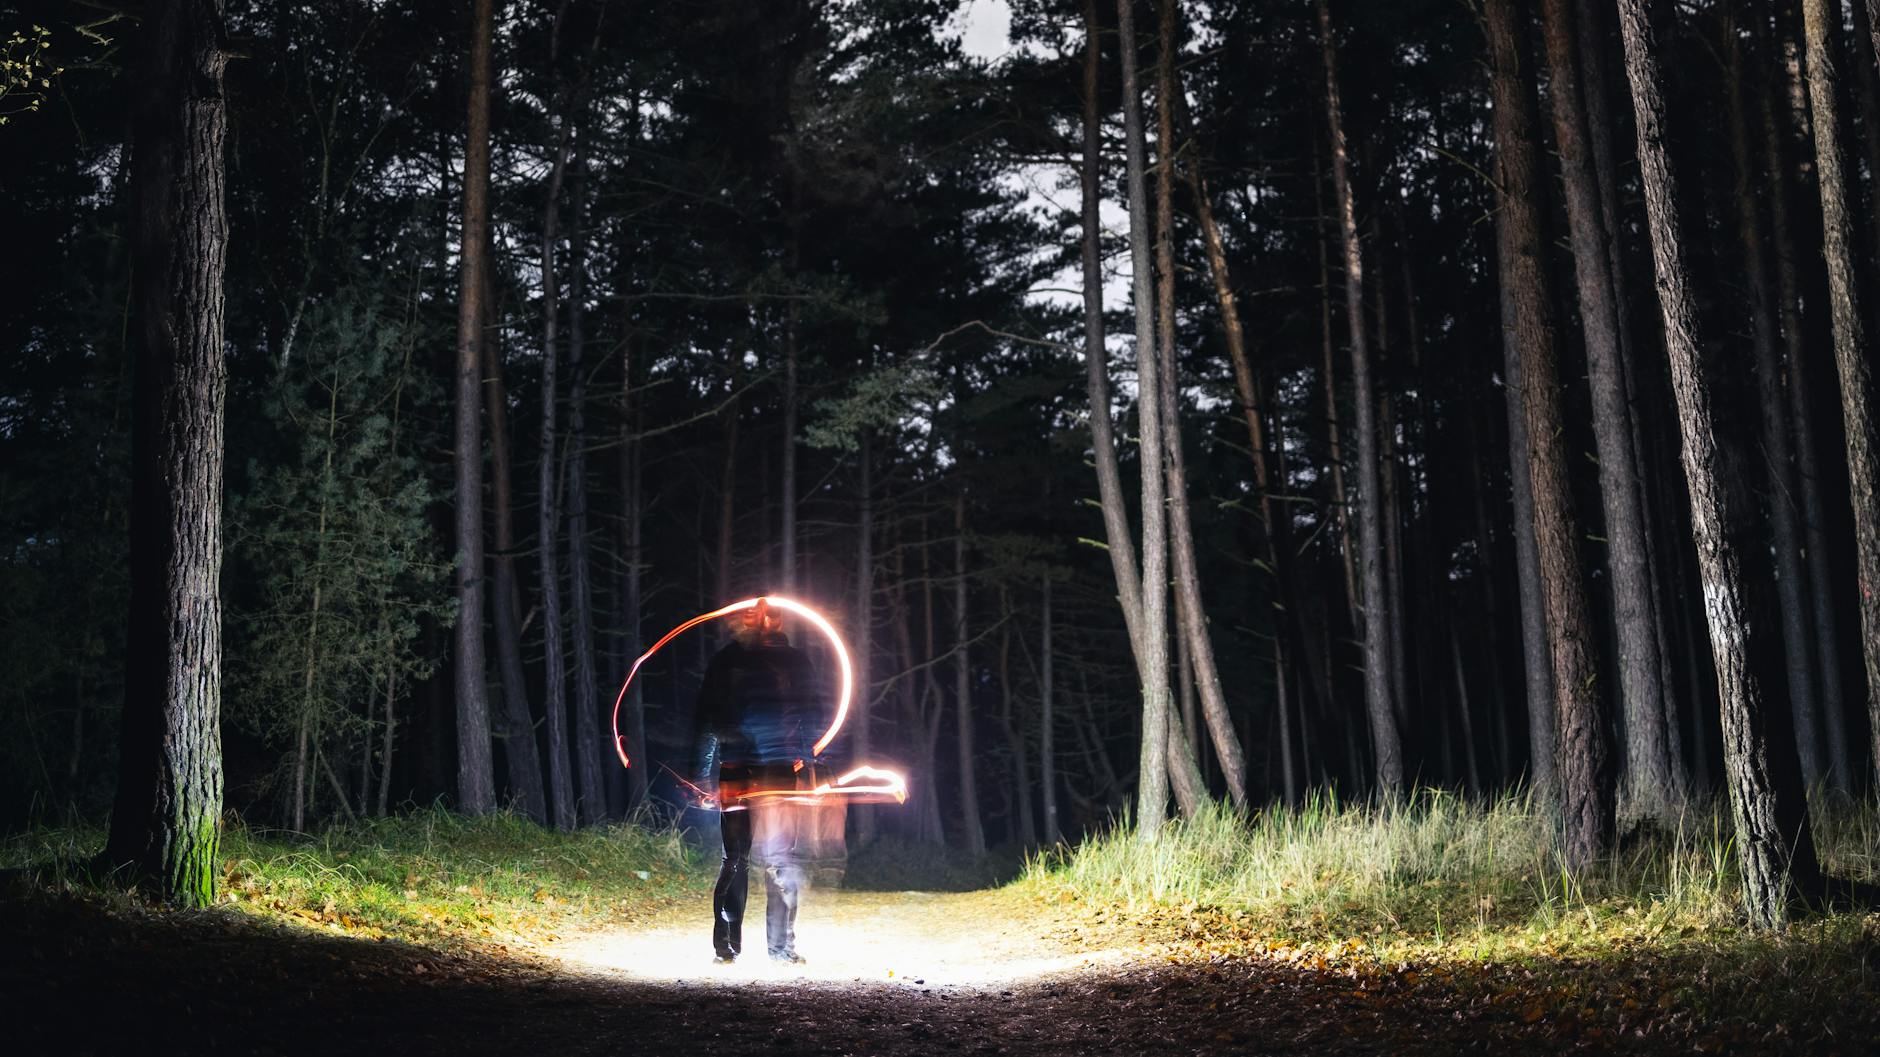
Light painting isn't just a flashy effect — it's about real-time compositional thinking, where creativity in movement determines your shot's impact.
Getting started with light painting photography as a beginner allows you to merge creativity and technical skill in an exciting way. It uses long-exposure techniques to capture the movement of light sources—like a flashlight or LED wand—across a dark scene.
Your camera records sweeping arcs of light rather than a single instant, creating a unique, frozen image.
You're crafting the picture live instead of snapping an existing scene.
In light painting photography, you set up a camera on a tripod in a dark location and configure it for long exposures. While the shutter is open, you move various light sources, like flashlights or sparklers, in front of the lens to create unique trails and shapes. This process involves rehearsing movements, adjusting settings, and iterating based on the results to craft visually striking images …
Light painting photography induces a flow state through the demand for precise, rehearsed performances during long exposures, allowing for real-time creativity and unique outcomes. The iterative nature of experimenting with light, exposure times, and camera settings fosters skill feedback loops, while the excitement of transforming darkness into art provides a strong sense of accomplishment and c…
You think light painting is a camera trick. A gimmick. Something you do once with a flashlight in your bedroom, post it, and forget about.
Light painting is more like directing than shooting. In darkness, you choreograph movement, light intensity, and exposure. The image forms in-camera, not through filters or post-processing tricks.
A photographer named Ronen Dal spent years shooting urban landscapes before picking up light painting. He wasn't chasing aesthetics. He wanted to solve how to make a derelict warehouse feel alive.
One long exposure. A handheld RGB panel. Seventeen minutes of walking the frame. His shot looked like the building was exhaling light. No Photoshop. No studio. Just planning.
That's the actual ceiling of this hobby – and the floor is more accessible than you're expecting.
Dragging a sparkler through the dark to create a dragon seems like magic. Getting it right yourself is tougher than any tutorial suggests.
Your first attempts will be chaos. Expect a folder of overexposed blobs and a single fluke shot.
You start excited but mystified by shutter speed. The dark room dims as you fumble with a phone torch.
By the end, you'll sift through dozens of files with three catches and one shot that clicks. The realization hits when settings start aligning and plans form for the next shoot.
Before you begin, switch to Bulb mode and grab a remote shutter release. Pressing the camera button for long exposures blurs your work and you'll misjudge where the problem lies.
Bad frames, deleted files, and a flickering torch aren't failures. These hiccups mean you're finding how your hands should move in shadows, and precision comes from that rhythm.
When to start: Early morning
Duration: 1–2 hours
Cost to try: $10
Success criteria: If you capture one long-exposure photo with a visible flashlight pattern and a sharp, properly focused subject, do session 2.
In the dark, cranking the ISO seems smart. More sensitivity should mean more light.
But high ISO ruins clean shots with grain. Instead, lower ISO to 100–400. Let your shutter speed handle the exposure (10–30 seconds works best).
In the dark, light painting feels awkward at first. Beginners hurry their movements to escape the discomfort.
Slow down by half. Move your light like drawing a word on foggy glass, not like waving goodbye.
A hardware-store flashlight seems useful but creates fuzzy instead of crisp lines.
Opt for an LED strip, fiber optic wand, or steel wool. These give you cleaner, defined trails rather than bloated streaks.
People often forget they are in the frame too, concentrating only on the light.
Dress in black from head to toe. This keeps your silhouette from ghosting into the final image.
Autofocus struggles in the dark, leading the camera to refuse to shoot, creating confusion.
Use manual focus instead. Pre-focus your camera using a flashlight at the desired spot, then switch off the lights.
Light painting thrives in spots where you can completely control the darkness. Ideal locations include abandoned buildings, open fields, or urban rooftops. You want to avoid ambient light and ensure you're not disturbed during your session.
City parking garages late at night are gold. They offer plenty of space with minimal light pollution for your creative work.
Simply introduce yourself as someone new to collaborative light painting. This straightforward approach often leads to guidance and a warm welcome.
Spin a lit steel wool pad on a cable to create explosive showers of sparks. It looks dramatic — and it's one of the easiest variants to pull off on your first night out. Get a big visual payoff without precision tool-work.
A subject stays completely still during a long exposure while you paint light around or onto them. The challenge isn't the light — it's getting a human to hold perfectly still for 10–30 seconds. Push your portrait skills into something stranger.
Use LED tubes or colored light wands to paint structured shapes instead of drawing freehand. You get higher control and less chaos, which is a different creative mode entirely. Great for those who prefer graphic results over abstract expressionism.
Combine several exposures directly in-camera, letting the camera layer the light passes itself. This method rewards experimentation and punishes perfectionism. Perfect for photographers who want to stay out of Photoshop.
Shoot in near-darkness using UV-reactive paints or neon materials as your light source. Neon pigments that look flat in daylight go electric in a dark room. Achieve surreal results without expensive gear.
A close neighbor worth considering: Hand Building Pottery.
Another variant that pulls from the same roots is Doll Making.
Some of the same instincts show up in Wheel Throwing — worth a look if this clicked.
Beginners often focus on shutter speed and ISO settings, yet the real problem is they lack a plan for where the light goes.
Spatial choreography is the key skill here. It's about knowing where your light source is, where it points, and how it moves within the frame before you press the shutter. Skip this, and you're just guessing.
Without this skill, you paint blind, hoping the 30-second exposure will save you – it won't. You'll waste sessions figuring out why your images look muddled and random. Develop this skill, and you'll stop reacting to errors. Instead, each light pass becomes a deliberate brushstroke.
Mastering the light path opens new creative possibilities.
Set aside 6 sessions over the next 30 days. Plan for one or two each week, ideally during night or late evening.
Light painting requires practice under darkness. You'll need these sessions to go beyond just struggling with camera settings to actually experimenting with light. Six sessions let you explore without dragging it out if it's not your thing.
Imagining shots during the day means you're engaged. Irritation when bad weather interrupts your plans is a sure sign. Dive deeper by building a small kit and focus on mastering one technique like steel wool or light orbs.
If the sessions felt uninspiring but the results impressed you, this might not be your passion. Light painting thrives on obsession, not casual interest. Pushing through won't change that if the thought of late nights doesn't excite you.
Disinterest every time you stepped out? That's a clear signal. The core experience is in the patience, quiet, and darkness. If those don't appeal, it's not the right fit.
Can't resist studying light painting images at odd hours? Asking how they did that instead of just admiring the results is the best sign that this hobby is a long-term match for you.
For ideas that take five minutes instead of five weeks, see things to do when you're bored.
You'll need a camera capable of long exposure (any DSLR, mirrorless, or even some smartphones work), a tripod to keep it stable, and light sources like LED flashlights, glow sticks, or fiber optic tools. Starting with basic gear is possible—many beginners begin with just a camera, tripod, and a simple flashlight.
You can start creating recognizable light paintings within your first session, though mastering the technique takes practice. Most people see meaningful improvement after 5–10 sessions as they learn to control light movement, exposure timing, and composition.
Light painting has a low barrier to entry—the basic concept is simple and mistakes lead to creative results. The learning curve is forgiving because you're experimenting with light in darkness, and each attempt teaches you something useful about timing and movement.
You can begin for under $100 if you already own a camera and have basic household items like flashlights. A complete beginner setup with a used DSLR, tripod, and specialty light tools ranges from $200–$500, though you can start with far less.
Light painting requires complete or near-complete darkness to see your light trails and prevent overexposure. Late evening, night, or indoor dark spaces are ideal—you need darkness for the light sources to be visible and controllable.
Both indoor and outdoor light painting are possible and equally rewarding. Indoor spaces give you controlled environments and protection from weather, while outdoor locations offer larger canvases and interesting backdrops for your light paintings.