BoredomBusted — Find Your Next Favorite Thing To Do
Discover hobbies, activities, places, and ideas that spark joy. Whether you're looking for something creative, active, social, or relaxing, BoredomBusted helps you find your next favorite thing to do.
Browse our hobby guides, things-to-do collections, and place ideas to never be bored again.
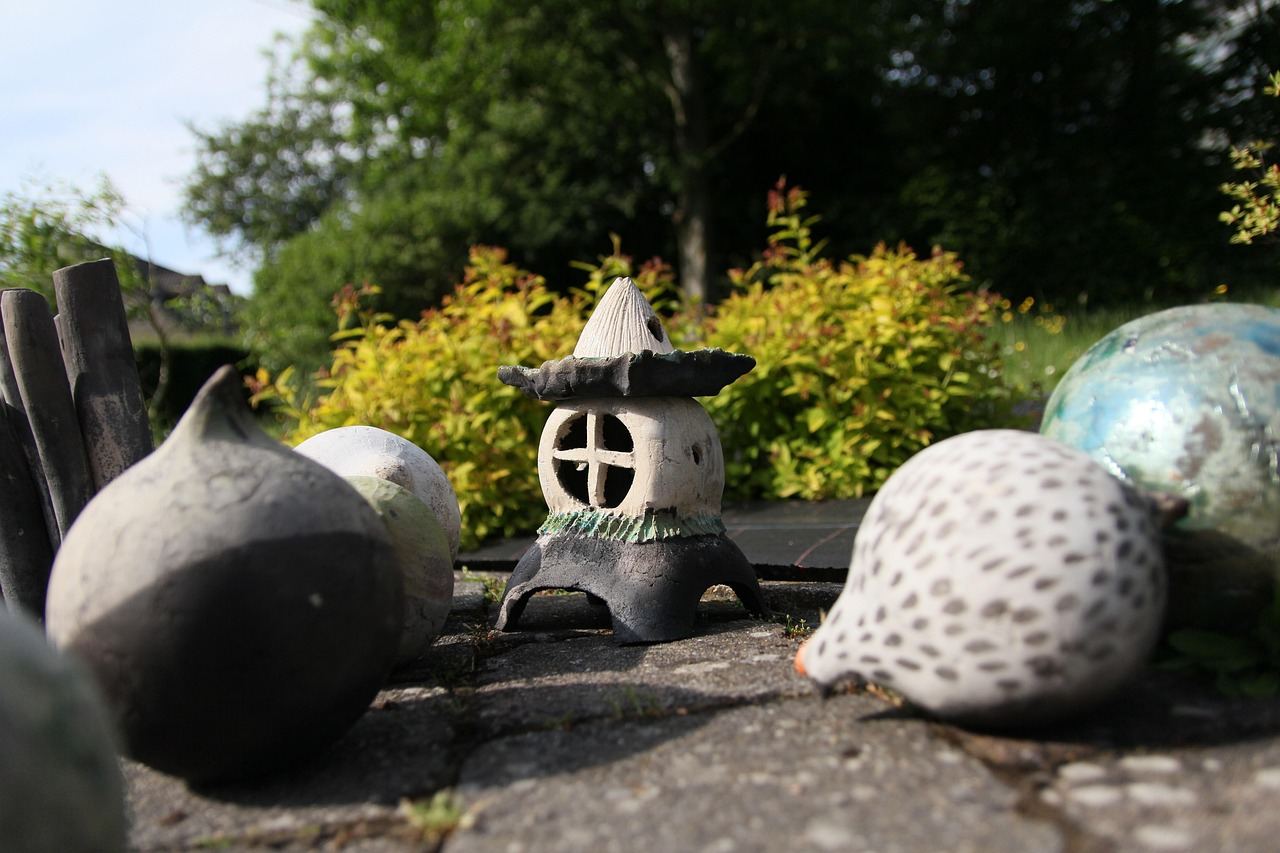
Raku pottery's high-stakes firing process may harbor a flow state—fostering engagement that combats monotony rather than the usual tediousness of crafting.
Learning raku pottery as a beginner involves mastering the unique firing technique where bisque-ware is pulled from a kiln at peak heat – around 1800°F – and placed directly into a combustion chamber with flammable materials.
The resulting oxygen deprivation burns unpredictable patterns into the glaze, producing finishes no two pieces ever share.
Unlike wheel-throwing or hand-building, raku isn't about shaping clay – it's about controlling chaos with fire.
In Raku pottery, you shape clay into forms like bowls or sculptures, apply specialized glazes, and engage in a dramatic firing process using a portable kiln, where you remove glowing pots and place them in a reduction chamber to create unique surface effects through smoke and metal reduction.
Raku pottery fosters a flow state through its high-stakes, hands-on firing process, providing immediate visual outcomes and incremental skill feedback, which keeps your mind fully engaged and counters feelings of monotony.
You think Raku is a beginner craft. Something you do at a weekend retreat, glazed in earth tones, maybe gifted to a parent who's going to use it as a pen holder. That assumption is costing you the actual point of Raku.
Raku isn't about the pot – it's about controlled chaos becoming the aesthetic. The cracks, the smoke, the carbon blooms aren't accidents to fix; they're the whole reason you're creating.
Most ceramics reward precision. Raku rewards your ability to read fire in real time – you're pulling work from a kiln at 1800°F and making split-second decisions that shape the final piece.
Paul Soldner challenged traditional Raku by introducing it to the West in the 1960s. He smoked pots in garbage cans, embracing full surface chaos. He didn't simplify the process. He proved it was deep enough to build a life's work around.
You're wondering about the equipment needed to start. The reality will surprise you.
Get ready to see how even rudimentary setups make true Raku possible.
Being at a raku session is intense. You're right next to a blazing kiln with a piece you've invested weeks in. Your biggest fear? That it'll crack from thermal shock.
Raku isn't as clean as videos show. Your piece might end up with muddy glazes and unexpected cracks, and burns on your forearm could be a part of the experience. But even among the chaos, there's a charm in the imperfection.
In the beginning, the kiln feels like a distant goal as you focus on centering clay. As weeks pass, you learn why each raku piece is unique. Variables like reduction time, glaze thickness, and movement speed all affect the outcome. The real surprise comes when one piece turns out perfectly, and you yearn to replicate it.
Standard raku and naked raku are worlds apart. Naked raku uses a slip that burns away, leaving unique patterns. If that's your studio's method, reset your glaze expectations.
Raku pieces defy what you see online or in typical pottery, resisting control. It embraces uncertainty, making surrender to the process essential. The sooner you do, the more you'll enjoy the unpredictability and character in every raku creation. Up next: avoidable mistakes that could keep you tangled in frustration.
When to start: Morning
Duration: 2 hours
Cost to try: $60
Success criteria: If you fire one glazed piece to red-hot and get a visible crackle or smoke-reduction pattern, do session 2.
The color outside looks done, so you assume inside is ready – it's not, and thermal shock will crack your piece before it ever hits the reduction chamber.
Wait until the glaze has gone from matte to glossy and sits at a consistent 1800°F. Use a pyrometer, not a guess.
Standard earthenware looks similar on the shelf, but it doesn't have the grog content to survive the thermal stress of being yanked from a hot kiln.
Buy a clay body labeled raku or hand-build specifically – anything with at least 20–30% grog content.
More newspaper feels like more smoke, which feels like better results – but starving the fire of oxygen is the point, not feeding it.
Use a small amount of combustible material, seal the lid fast, and let the trapped heat do the work.
First-time Raku potters see it as an optional step and skip straight to glaze firing – the piece then explodes mid-process and takes your glaze tongs with it.
Always bisque fire to cone 06 first; the structural integrity isn't a bonus, it's what keeps you safe.
Raku glazes look thin and unconvincing in the bucket, so beginners pile it on – thick application blisters, crawls, and hides the metallic effects you came for.
Dip for three seconds or brush two light coats, then stop – Raku rewards restraint every single time.
Raku is almost always done outdoors or in a dedicated fire-safe space. The kilns go outside. The smoke goes up. You need a place built for that — pottery studios, community arts centers, and university ceramics departments with open-air setups are your best bets.
NCECA is the closest thing raku has to a governing body in North America. The serious practitioners organize there, and their directory is unusually good at surfacing local educators with active firing programs.
Once you find a session, walk in and say: "I've never done a raku firing before — I'm happy to handle tongs, tend the reduction bin, whatever you need." That one sentence turns you from a spectator into a participant — most raku sessions run on communal labor, and showing up willing to work gets you hands-on fast.
Traditional Japanese Raku offers a calm, reflective approach to pottery. Hand-pinched tea bowls, low-fired kilns, and no post-fire reduction create an aesthetic that's prized for its restraint and imperfection.
Perfect for those who appreciate a meditative craft rather than dramatic visuals.
American or Western Raku is the dynamic choice. This version involves taking pieces from a glowing kiln straight to a bin of combustibles, creating unpredictable metallic glazes and black smoke patterns.
Visually rewarding for beginners. You'll need a propane kiln and metal reduction bins, adding $200–$600 if your studio lacks them.
Horsehair Raku skips glaze entirely. A red-hot piece comes out of the kiln, and horsehair is pressed onto it, searing instantly into carbon-black patterns.
Ideal for potters wanting a striking yet minimal look. The form does the work, not the glaze.
In Naked Raku, a slip-and-glaze coating is applied before firing and peeled away afterward.
Leaves a raw, smoky surface underneath. This method is less forgiving than Western Raku because surface texture matters more.
Best suited for intermediate potters ready to move beyond color effects.
Obvara, also known as Baltic Raku, involves dipping hot pieces into a fermented flour-and-water batter.
Creates a unique matte texture with blisters and burns. It's obscure enough that most studios won't teach it, so expect to rely on online resources and self-discovery.
A great option to try once you're comfortable with standard firing rhythms
If the texture of this appeals to you, Hand Building Pottery is built on similar bones.
Some of the same instincts show up in Wheel Throwing — worth a look if this clicked.
If this resonates, Sketching explores a similar direction.
Raku pottery isn't about perfect throws or even spins. It's all about mastering one crucial moment.
Reading your reduction chamber is the game changer. You need to know how much combustible material to use, how tightly to seal the chamber, and how long to leave the lid on if you want the glaze to do what you intended, not just whatever randomness it decides.
Mastering the reduction chamber transforms every firing from a gamble to intentional artistry. Before you know it, you're not watching results happen—you're making them happen. Nailing this skill means you can aim for specific flash patterns, carbon blacks, and metalite lusters, crafting them on purpose.
Each firing should come with a log. Write down the amount and type of combustible material, note the seal's tightness, and measure the time you keep the lid on. Then, capture the outcome with a photo. Add variety by changing just one of these factors per session while keeping the clay and glaze constant. Nothing accelerates learning like this controlled experimentation.
Controlling the lid seal is also essential. Practice fitting a cold chamber first to ensure a tight seal every time. This small but vital step removes heat loss as a hidden issue that could disrupt your data.
Ready for the next phase? Let's explore how these skills shape different styles of Raku artistry.
Try a pottery session once a week for a month. This will cover throwing a basic form, experiencing at least one firing, and dealing with your first clay crack.
Fire captivates, not just the clay. If you're drawn back, it's the moment the kiln opens that hooks you. Start tracking your projects and consider getting more involved with local pottery groups.
Indifference usually means isolation. Before giving up, try a group workshop. The social dynamics might change your experience completely.
Dislike for the process is a clear signal. Don't force it if the heat, mess, or unpredictability felt unbearable. Exploring other crafts could be a better fit.
The sign of true interest: watching raku videos at night. Not tutorials, just the process, the smoke, the reveal. This fascination is unique to raku pottery.
If raku pottery doesn't feel like the right fit, our hobbies list has plenty of other directions to try.
Looking for something lighter? Our boredom-busters guide is built for exactly that.
Raku pottery is a Japanese-inspired ceramic art form that involves hand-shaping clay and then using rapid, high-heat firing techniques to create unique glazes. Unlike traditional pottery that slowly cools in a kiln, raku pieces are removed while glowing hot and exposed to open flames or water, creating dramatic color shifts and unpredictable surface effects that make each piece truly one-of-a-kind.
The hand-forming process typically takes 1–3 hours depending on the size and complexity of your piece, but the total timeline from start to finish is usually 2–4 weeks when accounting for drying time before firing. The firing itself happens quickly—just 15–30 minutes—but the dramatic transformations happen in seconds when the hot piece is removed from the kiln.
Initial setup can range from $300–$1,500 if you're taking classes (recommended for beginners), which includes instruction and use of studio equipment. If you want to set up at home, expect $800–$3,000+ for a basic kiln and tools, though many beginners start by attending community pottery studios or workshops to avoid this investment.
Raku firing involves open flames and extreme heat, so there are inherent risks if proper safety precautions aren't followed—you'll wear protective gear like heat-resistant gloves and goggles. It's essential to learn from an experienced instructor in a controlled studio environment rather than attempting it without guidance, as improper technique can lead to burns or cracked pieces flying apart.
Absolutely—you don't need prior pottery experience to start raku, though learning basic hand-building techniques first makes the process easier. Most beginners start with a beginner-focused class at a pottery studio where instructors teach safe firing procedures and help you understand how to shape clay effectively.
Your first firing will be unpredictable and exciting—the heat and open flames create dramatic color transformations you can't fully control, which is part of raku's appeal. Don't expect your first piece to be gallery-perfect; the experience is about learning how the fire interacts with glazes and clay, and most potters create progressively more refined pieces as they repeat the process.