BoredomBusted — Find Your Next Favorite Thing To Do
Discover hobbies, activities, places, and ideas that spark joy. Whether you're looking for something creative, active, social, or relaxing, BoredomBusted helps you find your next favorite thing to do.
Browse our hobby guides, things-to-do collections, and place ideas to never be bored again.
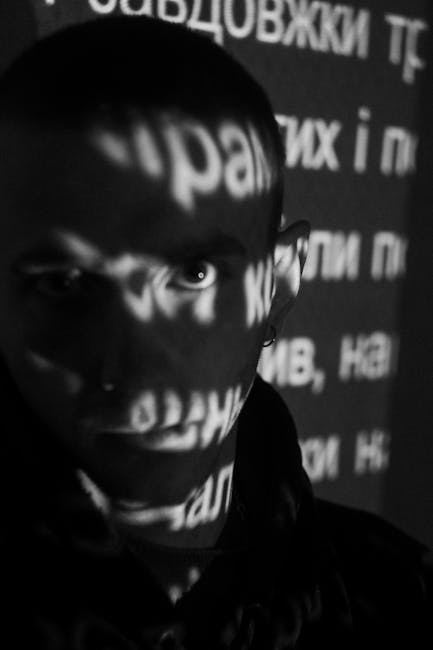
Projection mapping isn't just about visuals — it's a creative arena where calibration turns into a satisfying flow state that battles boredom head-on.
Learning projection mapping as a beginner can be an exciting journey of transforming ordinary surfaces into stunning visual experiences using just a projector and some creative software.
The software warps each image to precisely fit the surface, making objects look animated or three-dimensional.
In projection mapping, hobbyists set up a video projector and use software to measure the 3D contours of objects, creating custom video content that aligns with those shapes, projecting animations onto surfaces after adjusting settings for precise alignment.
This hobby induces a flow state through the focused task of calibrating projections, offering immediate feedback as hobbyists refine their work, fostering a sense of accomplishment and creative expression while preventing boredom through endless visual possibilities.
Projection mapping seems like it's only for grand events—stadium concerts or corporate launches. Big budgets. Big crews. Nothing DIY about it.
That assumption is doing a lot of work – and it's wrong.
Look at Joanie Lemercier. He's a top projection artist, and he began his journey in a living room. Not a fancy studio. Not a high-tech lab. Just a living room, a secondhand projector, and software he'd taught himself over weekends.
Do you have the resources? No, that's not the real question. The real question is whether you understand what's actually required—that's precisely what's covered next.
Opening the projection mapping software feels like staring at a wall of confusing terms and settings. You don't know what a mesh is or why the projector behaves strangely. Nothing lines up the way you imagined, and that's normal.
Expect the first hour to feel frustrating. It's not the frictionless magic from showreels—yet. Instead, it's one projector, a cardboard box, and mismatched corners. But it's the start of something real.
The first weeks are like taming a wild animal. Initially, the software interface is the main battle. By the second week, you achieve a decent projection but might overcomplicate things. In week three, breaking and fixing your setup deepens your understanding. By week four, you'll produce a short, raw creation that feels surprisingly rewarding.
This is where persistence pays off. The initial chaos softens into familiarity as your brain gradually builds the necessary spatial vocabulary. Each session moves you closer to what seemed impossible at first.
Before you dive into nodes, check your gear. Your projector's throw ratio is crucial. Setting this up means you won't waste early sessions on preventable setup errors. Spec sheets and proper measurement come before creative play.
When to start: Early morning
Duration: 1-2 hours
Cost to try: $10
Success criteria: If you can align a projected image so it fits a wall or canvas cleanly with no major cutoff, do session 2.
You eyeball the wall and hope the math will sort itself out. Hours later, you're stuck nudging a distorted grid that just won't align.
Map your surface dimensions before opening software—input exact width and height right from the start.
Ambient light ruins your projection, and beginners often need more brightness than they realize.
For indoor areas under 10 feet, aim for at least 3,000 lumens to avoid washed-out edges and colors.
A bookshelf or building facade might look exciting but they hide many alignment problems.
Begin with a single flat rectangle or a simple box. Perfect your masking and warping there before moving to multi-plane objects.
The gap between projector and surface determines clarity. Content sharp at 6 feet can turn blurry at 12.
Use your projector's throw ratio calculator to set content resolution before designing any assets.
Two projectors side by side with a visible seam screams beginner.
Learn edge blending early. MadMapper and Resolume offer tools that take under 20 minutes to grasp.
Projection mapping thrives where there's a surface to use. Maker spaces, art galleries, community theaters, and university campuses are the usual hangouts.
You'll start small. Expect your first 50 hours of practice to be in someone's garage or on a borrowed studio wall.
Check ILEA (International Live Events Association) chapter listings. Regional chapters host workshops where projection mappers gather.
Projection mapping isn't under a single national body. Communities form around software, making forums your entry point.
When you introduce yourself, say: "I've been practicing at home with a short-throw projector and want to see how alignment works on irregular surfaces."
That one sentence shows you're past just being curious. It often earns you a hands-on demo instead of newbie info.
Projection mapping takes many forms. Different setups and challenges fit various interests and skill levels.
Instead of large surfaces, this involves projecting onto small 3D objects like a skull or a product prototype. The smaller the surface, the more affordable the projector – and results come quicker for beginners.
Architectural projection covers entire building facades. Huge scale means you need multiple powerful projectors and outdoor-rated gear. This challenge appeals to seasoned mappers
Here, projections respond to actions like movement or sound through sensors or cameras. It's complex, bridging projection and AV design. Ideal for those with coding or electronics know-how.
This technique uses projection and a reflective surface to create a 3D floating illusion. Gear costs can add up because the necessary screen material isn't cheap. Great for creating visual magic on a budget.
360° dome mapping projects onto a curved dome, surrounding the viewer completely. Standard mapping tools won't work; you need specialized software. Suited for creating highly immersive experiences.
Readers who enjoy this often gravitate toward Installation Art next.
Logo Design is a sibling pursuit and often surfaces the same kind of curiosity.
Beginners often focus on perfecting software settings and edge blending. But the true key is the ability to see surfaces as geometry.
Develop spatial decomposition: break objects into flat planes, angles, and depth zones before software use. Experienced mappers know which surface will hold which content layer before the gear starts.
Seeing a surface as geometry eliminates guesswork. Your mask shapes are precise, drawn once and perfectly aligned. Without this skill, you're constantly adjusting vertices, re-rendering loops, and facing that "painted on" look.
The depth illusion hinges on matching content to perceived planes. It's the secret to making audiences truly gasp.
Six sessions over 30 days is your test. One or two per week, giving you room to grasp the software and map to a physical object.
Finding yourself drawn to the software between sessions is a clear sign. You're not merely doing projection mapping; you're becoming immersed in it. Dive deeper by exploring 3D scanning or live audio-reactive visuals.
Completing six sessions with lukewarm feelings means the reality didn't match your expectations. Before giving up, switch projects for a month. Try mapping a sculpture instead of walls to see if it rekindles your interest.
If setting up feels like a chore, and there's no excitement for the final projection, take that as data. The process itself isn't satisfying for you. No gear upgrade will change that.
Walking past buildings at night, imagining your projections on them, shows you're in. Spotting potential in crumpled boxes or staircases does too. If those thoughts aren't cropping up, this hobby might not be your match.
Projection mapping demands a dark environment; ambient light ruins the effect. If controlling light is impossible, you're constantly fighting a losing battle. A steep software learning curve awaits, needing you to enjoy the technical puzzles. If tech interfaces frustrate you, the hobby turns into drudgery. It's also a slow-feedback hobby, with long setup times. For those who crave instant results, it's a frustrating loop.
Still looking for something to do? Browse things to do when bored for more ideas.
You'll need a projector, a computer or media player to run mapping software, and content creation tools like video editing or projection mapping software (many free options exist). For beginners, a standard projector and basic design software are enough to experiment with simple surfaces like walls or cardboard boxes.
Entry-level projection mapping can start with equipment under $300–500, using a budget projector and free software. As you advance, costs can reach $1,000–3,000+ for better projectors and more sophisticated software, but you can begin learning with minimal investment.
A simple project mapping basic shapes and colors onto a flat surface can take 2–4 hours from setup to execution. More complex designs with multi-layer animations and synchronized content can take days or weeks depending on your skill level and project scope.
The basics are accessible to beginners—you can start with straightforward mapping on simple surfaces using intuitive software. The learning curve steepens when creating complex 3D mappings, advanced animations, and synchronized multi-projector setups, but most hobbyists can create impressive results within weeks.
Matte or slightly textured white surfaces (walls, screens, sculpted foam) work best because they diffuse light evenly without glare. Avoid highly reflective or dark surfaces, though experienced mappers can work around these limitations with proper projector placement and content adjustment.
You can create art installations, decorate events, produce visual performances, enhance home displays, or build interactive experiences. Many hobbyists start with decorative projects like transforming rooms or objects, then expand into storytelling or live performances.