BoredomBusted — Find Your Next Favorite Thing To Do
Discover hobbies, activities, places, and ideas that spark joy. Whether you're looking for something creative, active, social, or relaxing, BoredomBusted helps you find your next favorite thing to do.
Browse our hobby guides, things-to-do collections, and place ideas to never be bored again.
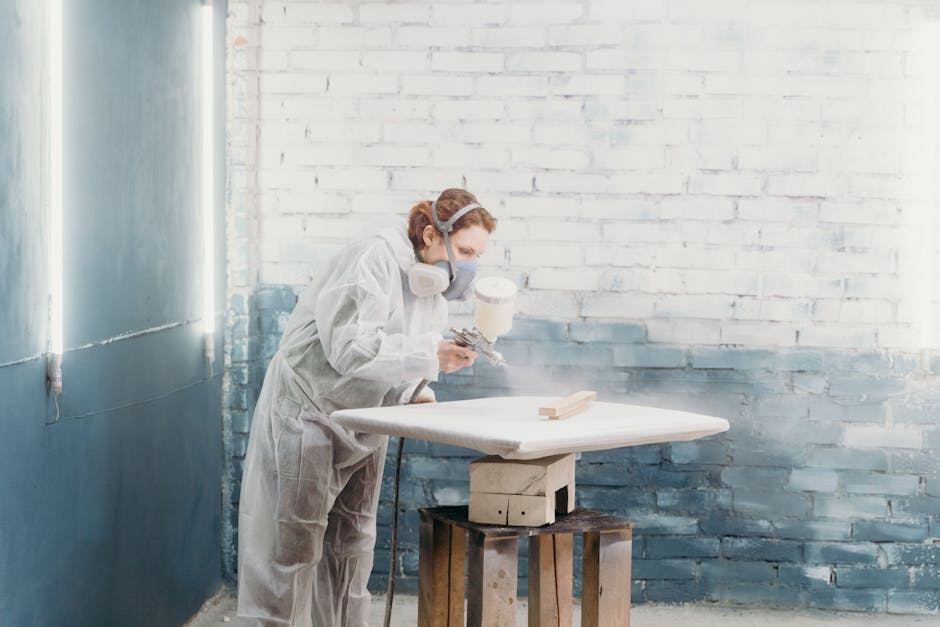
Unlock your creativity with our beginner's guide to spray paint art! Learn essential techniques, safety precautions, and maintenance tips to master this versatile art form. With the right supplies and skills, you can create stunning artwork and express yourself like never before.
Most people think spray paint art means shaking a rattle can and going wild on a wall. What it actually means is learning to control a tool that punishes hesitation, rewards deliberate movement, and dries in seconds — giving you almost no room to fix mistakes.
That's the real challenge. Not the paint, not the surface, not even the fumes. It's learning to move with confidence before you've earned confidence. This guide gives you the honest version of how that happens.
There are three things working against you every time you spray: pressure, distance, and dwell time. Air pressure determines how atomized your paint is. Distance from the surface determines how wet it lands. Dwell time — how long you linger over a spot — determines whether you get coverage or a drip.
Dial any one of those three wrong and the other two can't save you. A beginner who understands this triangle makes progress fast. One who just points and sprays stays frustrated for months.
With a spray gun and compressor setup, you also have to think about paint viscosity — how much you've thinned the paint — and fan pattern width. That's five variables before you've made a single mark. Street artists using rattle cans are working with preset pressure and viscosity, which simplifies things, but gives up a lot of control.
Your first session will probably be outdoors, on cardboard or scrap wood, with paint going everywhere you didn't intend. That's normal. The spray cone is wider than it looks in videos, and your arm speed will be too slow, leaving wet blobs instead of smooth gradients.
The thing most beginners get wrong immediately is stopping their arm movement at the end of a stroke. You need to start moving before you trigger the spray and keep moving after you release it. If you start and stop the spray while your arm is stationary, you get heavy buildup at both ends of every line.
What surprises most beginners is how physical it is. You're managing arm speed, gun distance, and trigger pressure simultaneously while a clock is running on drying time. Plan on your first few sessions being purely about learning the tool — don't expect to make anything worth keeping.
Here's the insight working spray artists actually use: there is a narrow wet-into-wet window — usually 10 to 30 seconds depending on the paint and conditions — where a fresh layer can be blended into the previous one. Once that window closes, you're painting over a hard edge, not blending into a soft one.
Every technique in spray paint art — the galaxy effects, the landscape gradients, the smoke and fog — depends on hitting that window intentionally. Skilled artists sequence their colors specifically to extend or exploit it. They spray lighter colors first because dark paint drying over wet light paint gives different results than the reverse.
When your blends look muddy or choppy, it's almost always a timing problem, not a technique problem. Work faster, or thin your paint slightly to extend the window — but understand that thinning also reduces coverage and increases drip risk. That's the trade-off you're always managing.
At this level you're using artist-grade rattle cans (Montana or Rust-Oleum 2X) and painting on cardboard or cheap canvas boards. A 6-pack of cans runs $25–$40. Add basic PPE — a decent respirator, nitrile gloves, safety glasses — and you're near the top of this range. Don't skip the respirator.
This is where you add a gravity-feed HVLP spray gun ($40–$80) and a small pancake compressor ($80–$150). You now have control over pressure, viscosity, and fan pattern — the rattle can ceiling disappears. Budget another $30–$50 for acrylic paint, thinner, and proper surfaces like MDF or stretched canvas.
A quality mid-range HVLP gun ($150–$300), a compressor with a tank for consistent pressure, artist-grade paints in a full palette, and a proper ventilated workspace or spray booth. If you're working large — 3-foot canvases and up — you'll want the tank compressor badly. Small compressors can't keep up with sustained high-volume spraying.
Half-face respirator with organic vapor cartridges — not a dust mask, not a disposable N95. Spray paint fumes are a genuine hazard and a $30 respirator is not optional.
4–6 rattle cans in primary colors plus black and white — Montana Gold or Rust-Oleum 2X. Cheap cans have inconsistent pressure and clog constantly.
Scrap cardboard or cheap hardboard panels — you will ruin your first 10 surfaces. Don't make them expensive ones.
Nitrile gloves and safety glasses — spray paint gets into places brushwork doesn't.
Drop cloth or plastic sheeting — overspray travels farther than you expect and stains everything.
HVLP spray gun and compressor — genuinely worth it once you've outgrown rattle cans, but not for session one.
Stencil sets and masking tools — learn freehand control first. Stencils become a crutch if you reach for them before you understand the medium.
Large canvases — scale amplifies every mistake. Work small until the fundamentals are solid.
A spray booth — if you're working indoors seriously, yes. But not until you're doing this regularly.
Beginners often jump straight to a spray gun and compressor because it looks more professional. That's backwards. Rattle cans teach you everything you need to know about spray mechanics before you add the complexity of pressure adjustment, viscosity mixing, and gun cleaning.
The real trade-off: rattle cans are immediately accessible, relatively cheap, and require almost no setup or cleanup. Spray guns give you full control over every variable and work better with acrylic and custom-mixed colors — but a clogged gun from improperly thinned paint will end a session fast.
The practical answer: start with rattle cans for your first 10–15 sessions. Switch to a spray gun when you notice the pressure and viscosity limits of the can actually holding back what you're trying to do. That moment of frustration is the right signal to upgrade — not before.
Most spray paint workshops are performance demos, not teaching sessions. Before you sign up, run this checklist:
The instructor teaches technique, not just steps. If the class is "follow along and make this exact painting," you're learning mimicry, not the medium.
Safety gear is provided or explicitly required. Any instructor who doesn't mention ventilation and respiratory protection in the course description is not taking this seriously.
Class size is small enough for individual feedback. Spray paint technique is highly individual. Groups larger than 8 make it hard to get real correction on your specific problems.
The instructor has a visible body of work. Check Instagram or their website. The technical understanding shows in how they handle gradients, layering, and edge control.
There's a breakdown of materials and why you're using them. Good instruction explains the reasoning. You should leave understanding why certain paints, surfaces, and techniques were chosen — not just what was used.
If local options are thin, look at the BB creative hobbies list for adjacent disciplines — sometimes a general mixed-media or street art workshop opens the door to the right instructor.
Online, the spray paint art community lives primarily on YouTube and Instagram. YouTube channels like Spray Paint Art Secrets and the work of artists like Skech or Dreph show serious technique in real time — watch for how they sequence colors and manage timing, not just the finished result.
Reddit's r/graffiti and r/streetart communities include spray work and will give you direct feedback if you post your progress. For gun-based fine art work, r/airbrush is worth checking — the technique overlap is significant even if the aesthetics differ.
In person, look for open studio nights at local art centers, community mural projects, and urban art festivals — these are where working spray artists actually congregate. Street art workshops run by local muralists are often more technically useful than formal classes.
Give it 30 sessions before you decide. Here's what the milestones actually look like:
Sessions 1–10: You're fighting the tool. Drips, uneven coverage, muddy blends. You're figuring out arm speed and distance. Nothing looks like what you intended. This is correct and expected.
Sessions 11–20: You start hitting the blending window intentionally. You make one or two pieces that look close to what you planned. You understand why the mistakes happened instead of just noticing them.
Sessions 21–30: You have a feel for your materials. You're making intentional choices about color sequencing and timing. You start developing a visual style — even if you can't name it yet.
Stop if the physical and logistical demands — outdoor work, PPE, cleanup, overspray containment — feel like obstacles rather than acceptable parts of the process. This medium has real friction built in. If that friction drains you rather than focuses you, it won't get better with more practice.
Keep going if you find yourself mentally replanning a piece mid-week — adjusting the color sequence in your head, thinking about the timing differently, or noticing spray effects on walls and signs outside and thinking about how they were made. When the work follows you away from the canvas, it's in you.
Acrylic Painting for Beginners — overlapping color, layering, and paint consistency principles that transfer directly to spray work.
Oil Painting for Beginners — wet-into-wet blending in oil is slow and forgiving where spray is fast and unforgiving; understanding both sharpens your sense of timing.
Digital Drawing for Beginners — if you want to prototype compositions and color palettes before committing paint to surface, digital tools are worth understanding.
Creative Hobbies List — the full BB roundup if you're still figuring out which visual art medium fits you best.
You can begin spray painting for $50–$150, which covers basic spray cans, stencils, and safety equipment like gloves and a mask. As you advance, you may invest in premium paints, specialized nozzles, and protective gear, but quality beginner setups are affordable and widely available.
Spray paint art has a gentle learning curve—basic techniques like layering and blending can be mastered in a few practice sessions. While developing a personal style takes time, beginners typically see noticeable improvement within their first few hours of practice.
Always wear a respirator mask, gloves, and eye protection to avoid inhaling fumes and chemical contact. Work in a well-ventilated area, outdoors, or in a space with proper airflow, and keep flammable materials away from your workspace.
A simple stencil-based design takes 15–30 minutes, while more complex pieces with multiple layers and details can take 1–3 hours. Drying time between layers adds another 10–15 minutes per coat, depending on environmental conditions.
Essential supplies include spray paint cans, a canvas or surface (cardboard, wood, or canvas), stencils, a respirator mask, gloves, and eye protection. Optionally, you can add spray caps in different sizes, tape, and a drop cloth to protect your work area.
Indoor spray painting is possible but not ideal due to fume exposure and ventilation challenges. If painting indoors, use a well-ventilated room or space with windows, wear a proper respirator mask, and consider a spray booth setup to contain overspray and protect your surroundings.